I want to ride my bicycle
I want to ride my bike
I want to ride my bicycle
I want to ride it where I like
Freddy Mercury
This is a gallery of all the bicycles I have refurbished since I retired. If you click on the pictures, they will enlarge. A second click makes them even bigger if you like.
This is the bike that got me started refurbishing old Schwinn bicycles. I assembled this Sierra Brown Continental bicycle (in 1971) when I was a kid working in the Schwinn store in Bloomfield, NJ called Brookdale Cycle.
It went to college with two brothers, and returned to me in 2014. Since it was mostly “all there,” I decided to see if I could bring it back to its former glory.
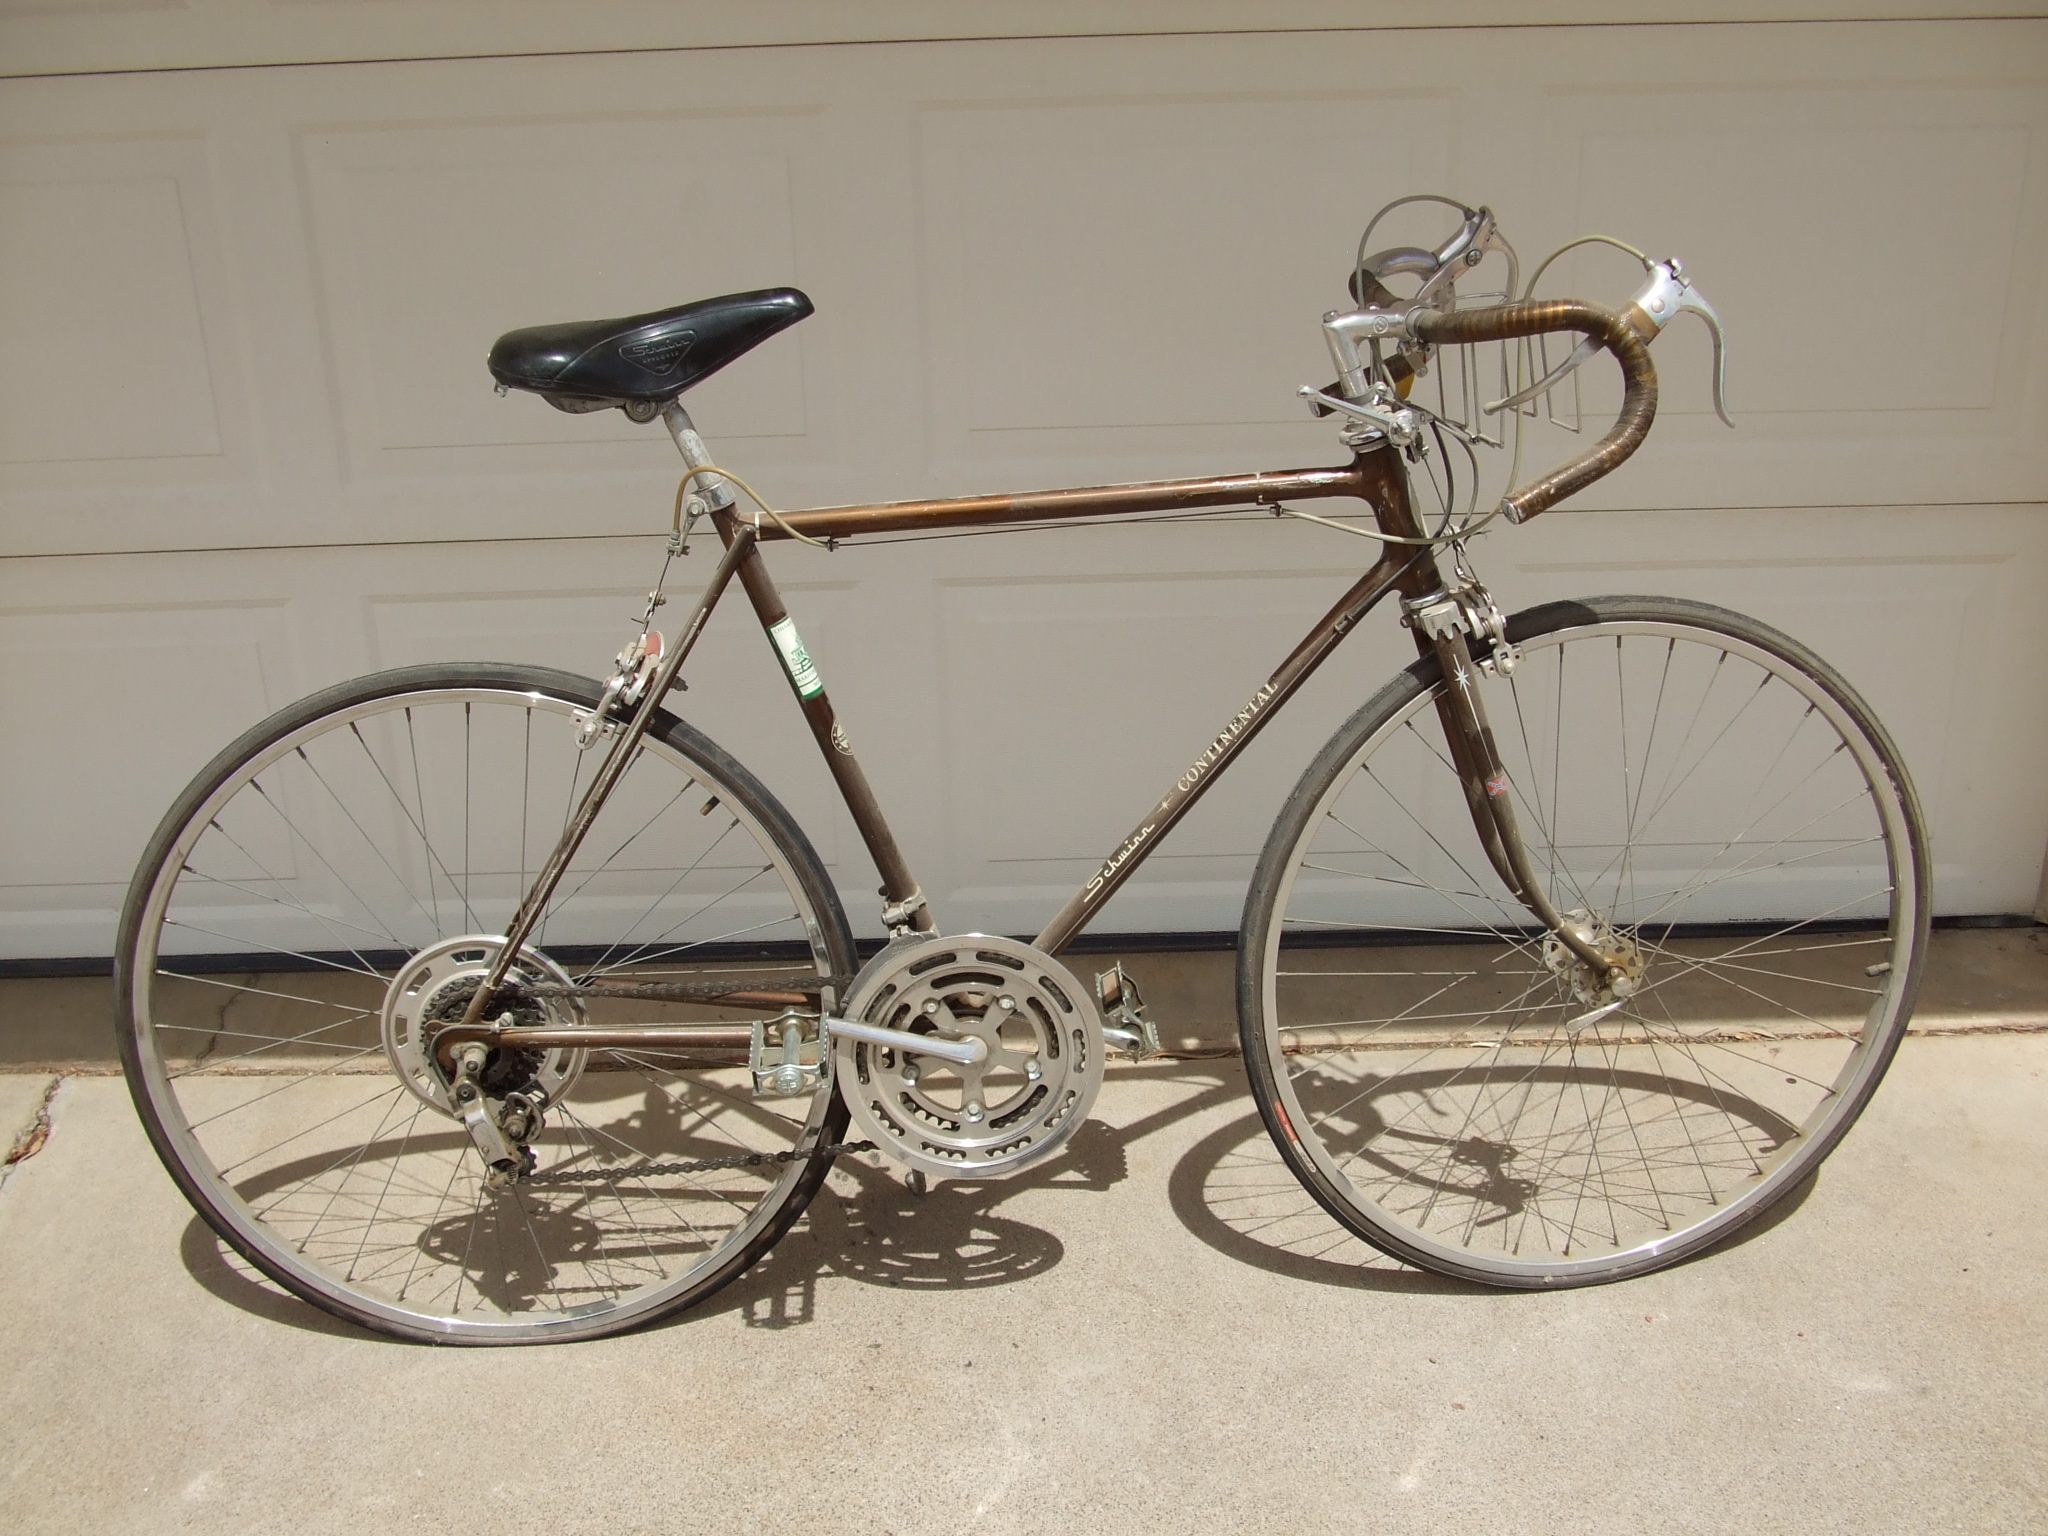
After riding it a few times, I finally realized that the frame was bent, and that there was what looked to be a tiny crack starting where the downtube meets the head. Also, the bike was originally purchased for my brother, and was one size smaller than the frame I would buy for myself. So I mined Craigslist for a donor bike with a bigger frame.
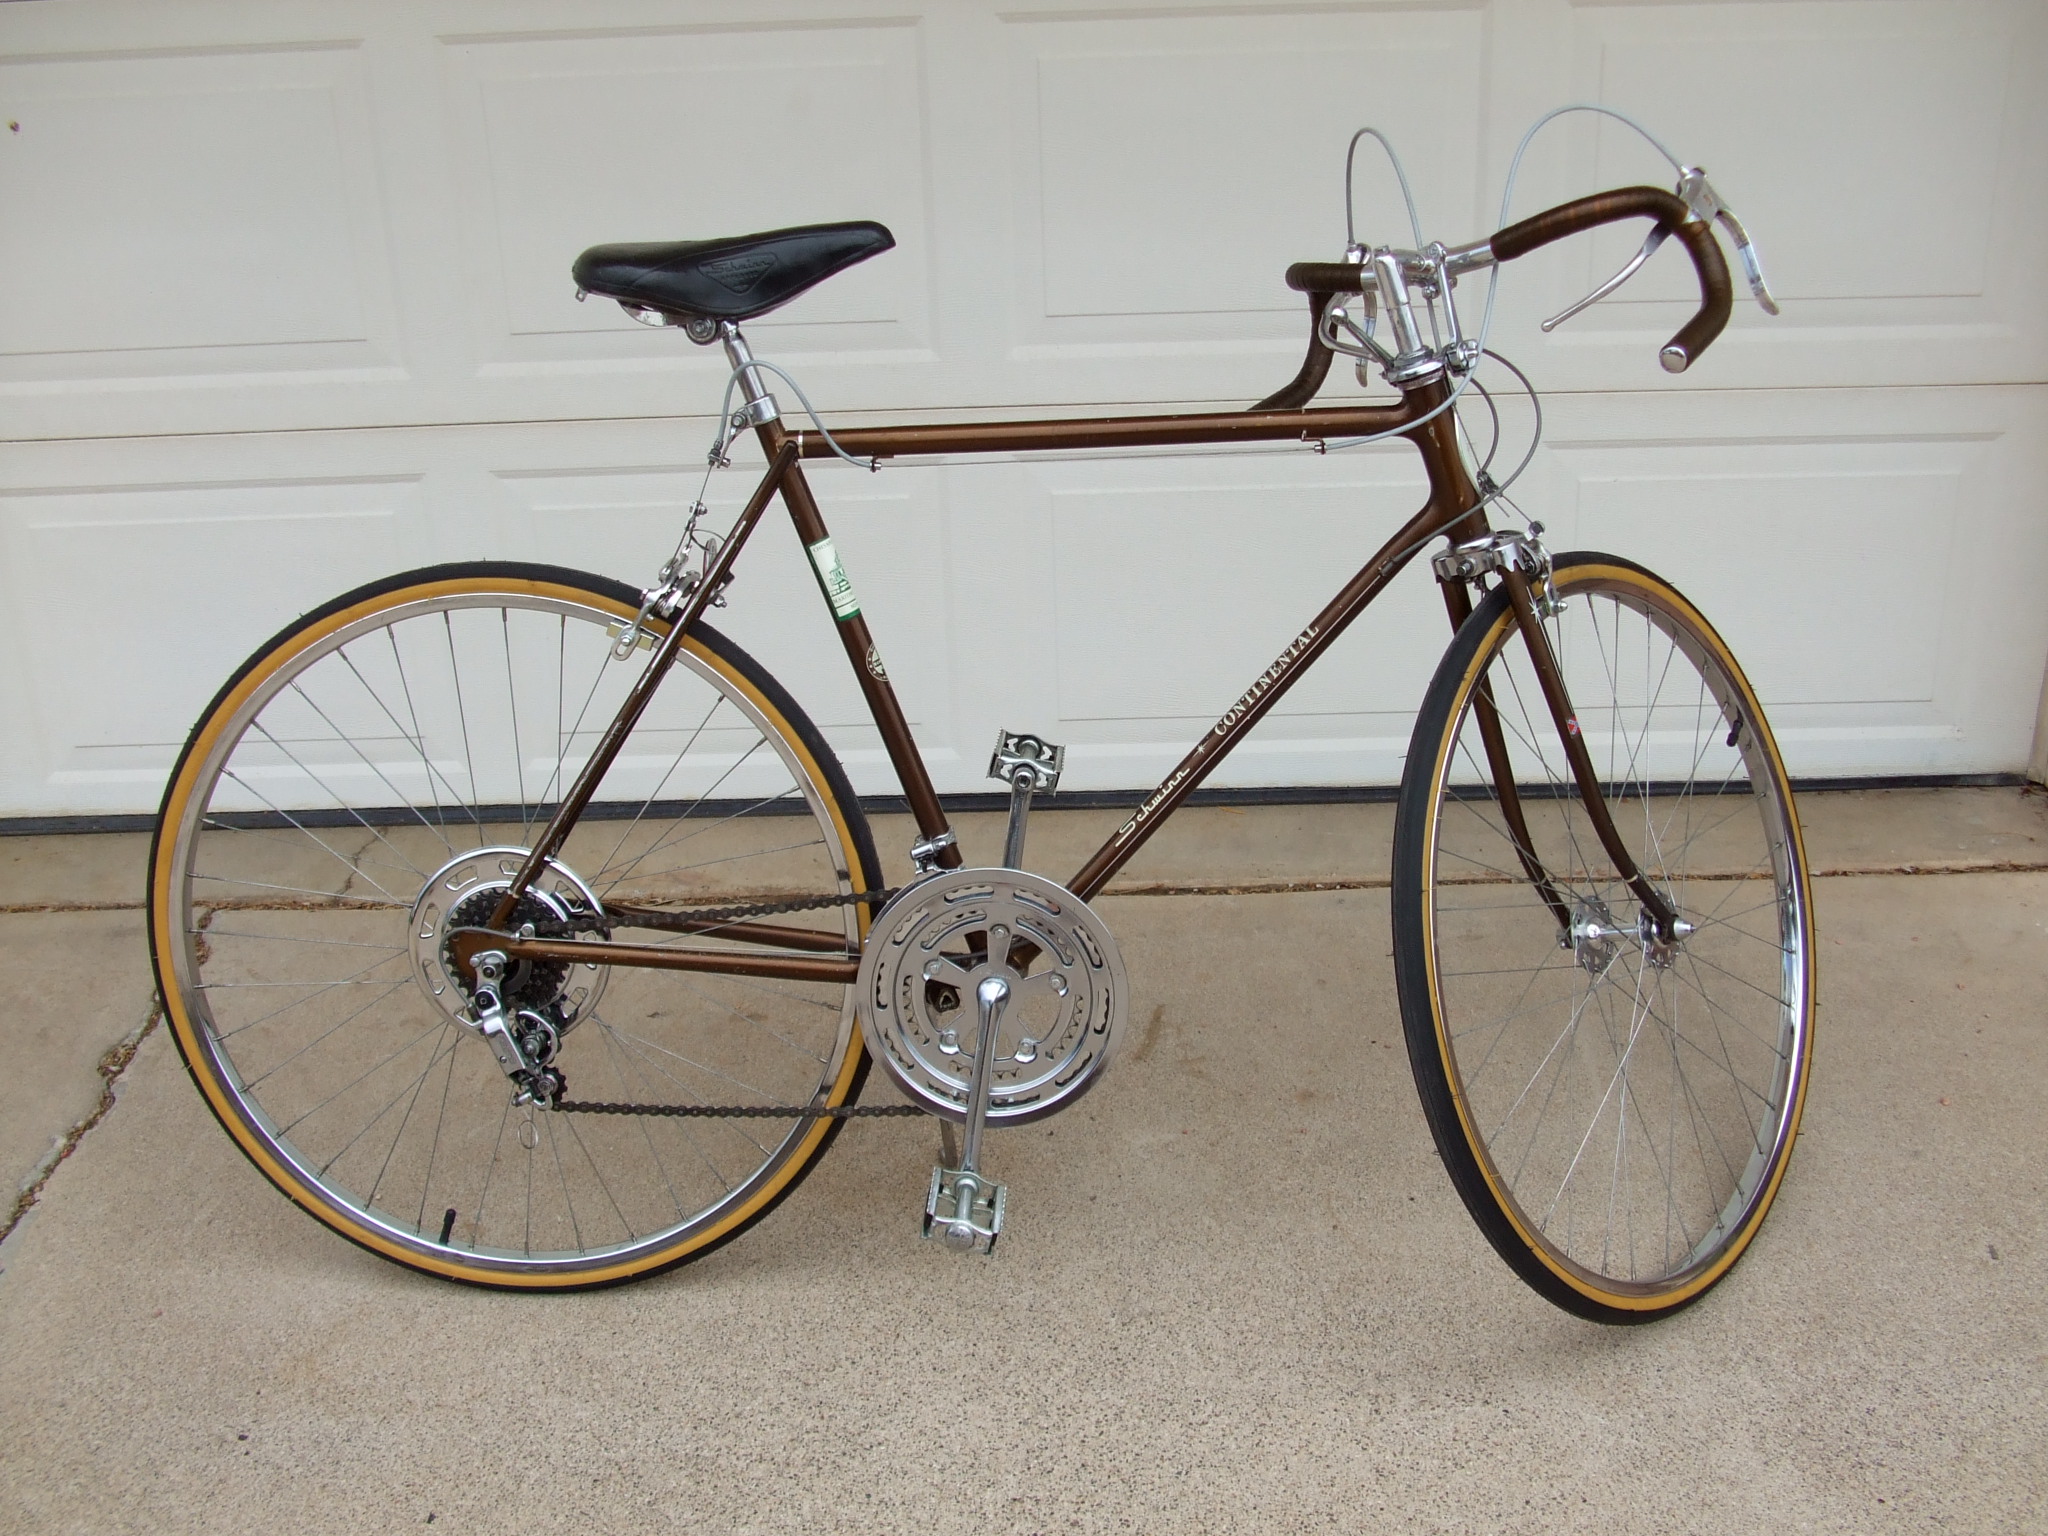
This is what I found; a 24″ Sierra Brown Continental.
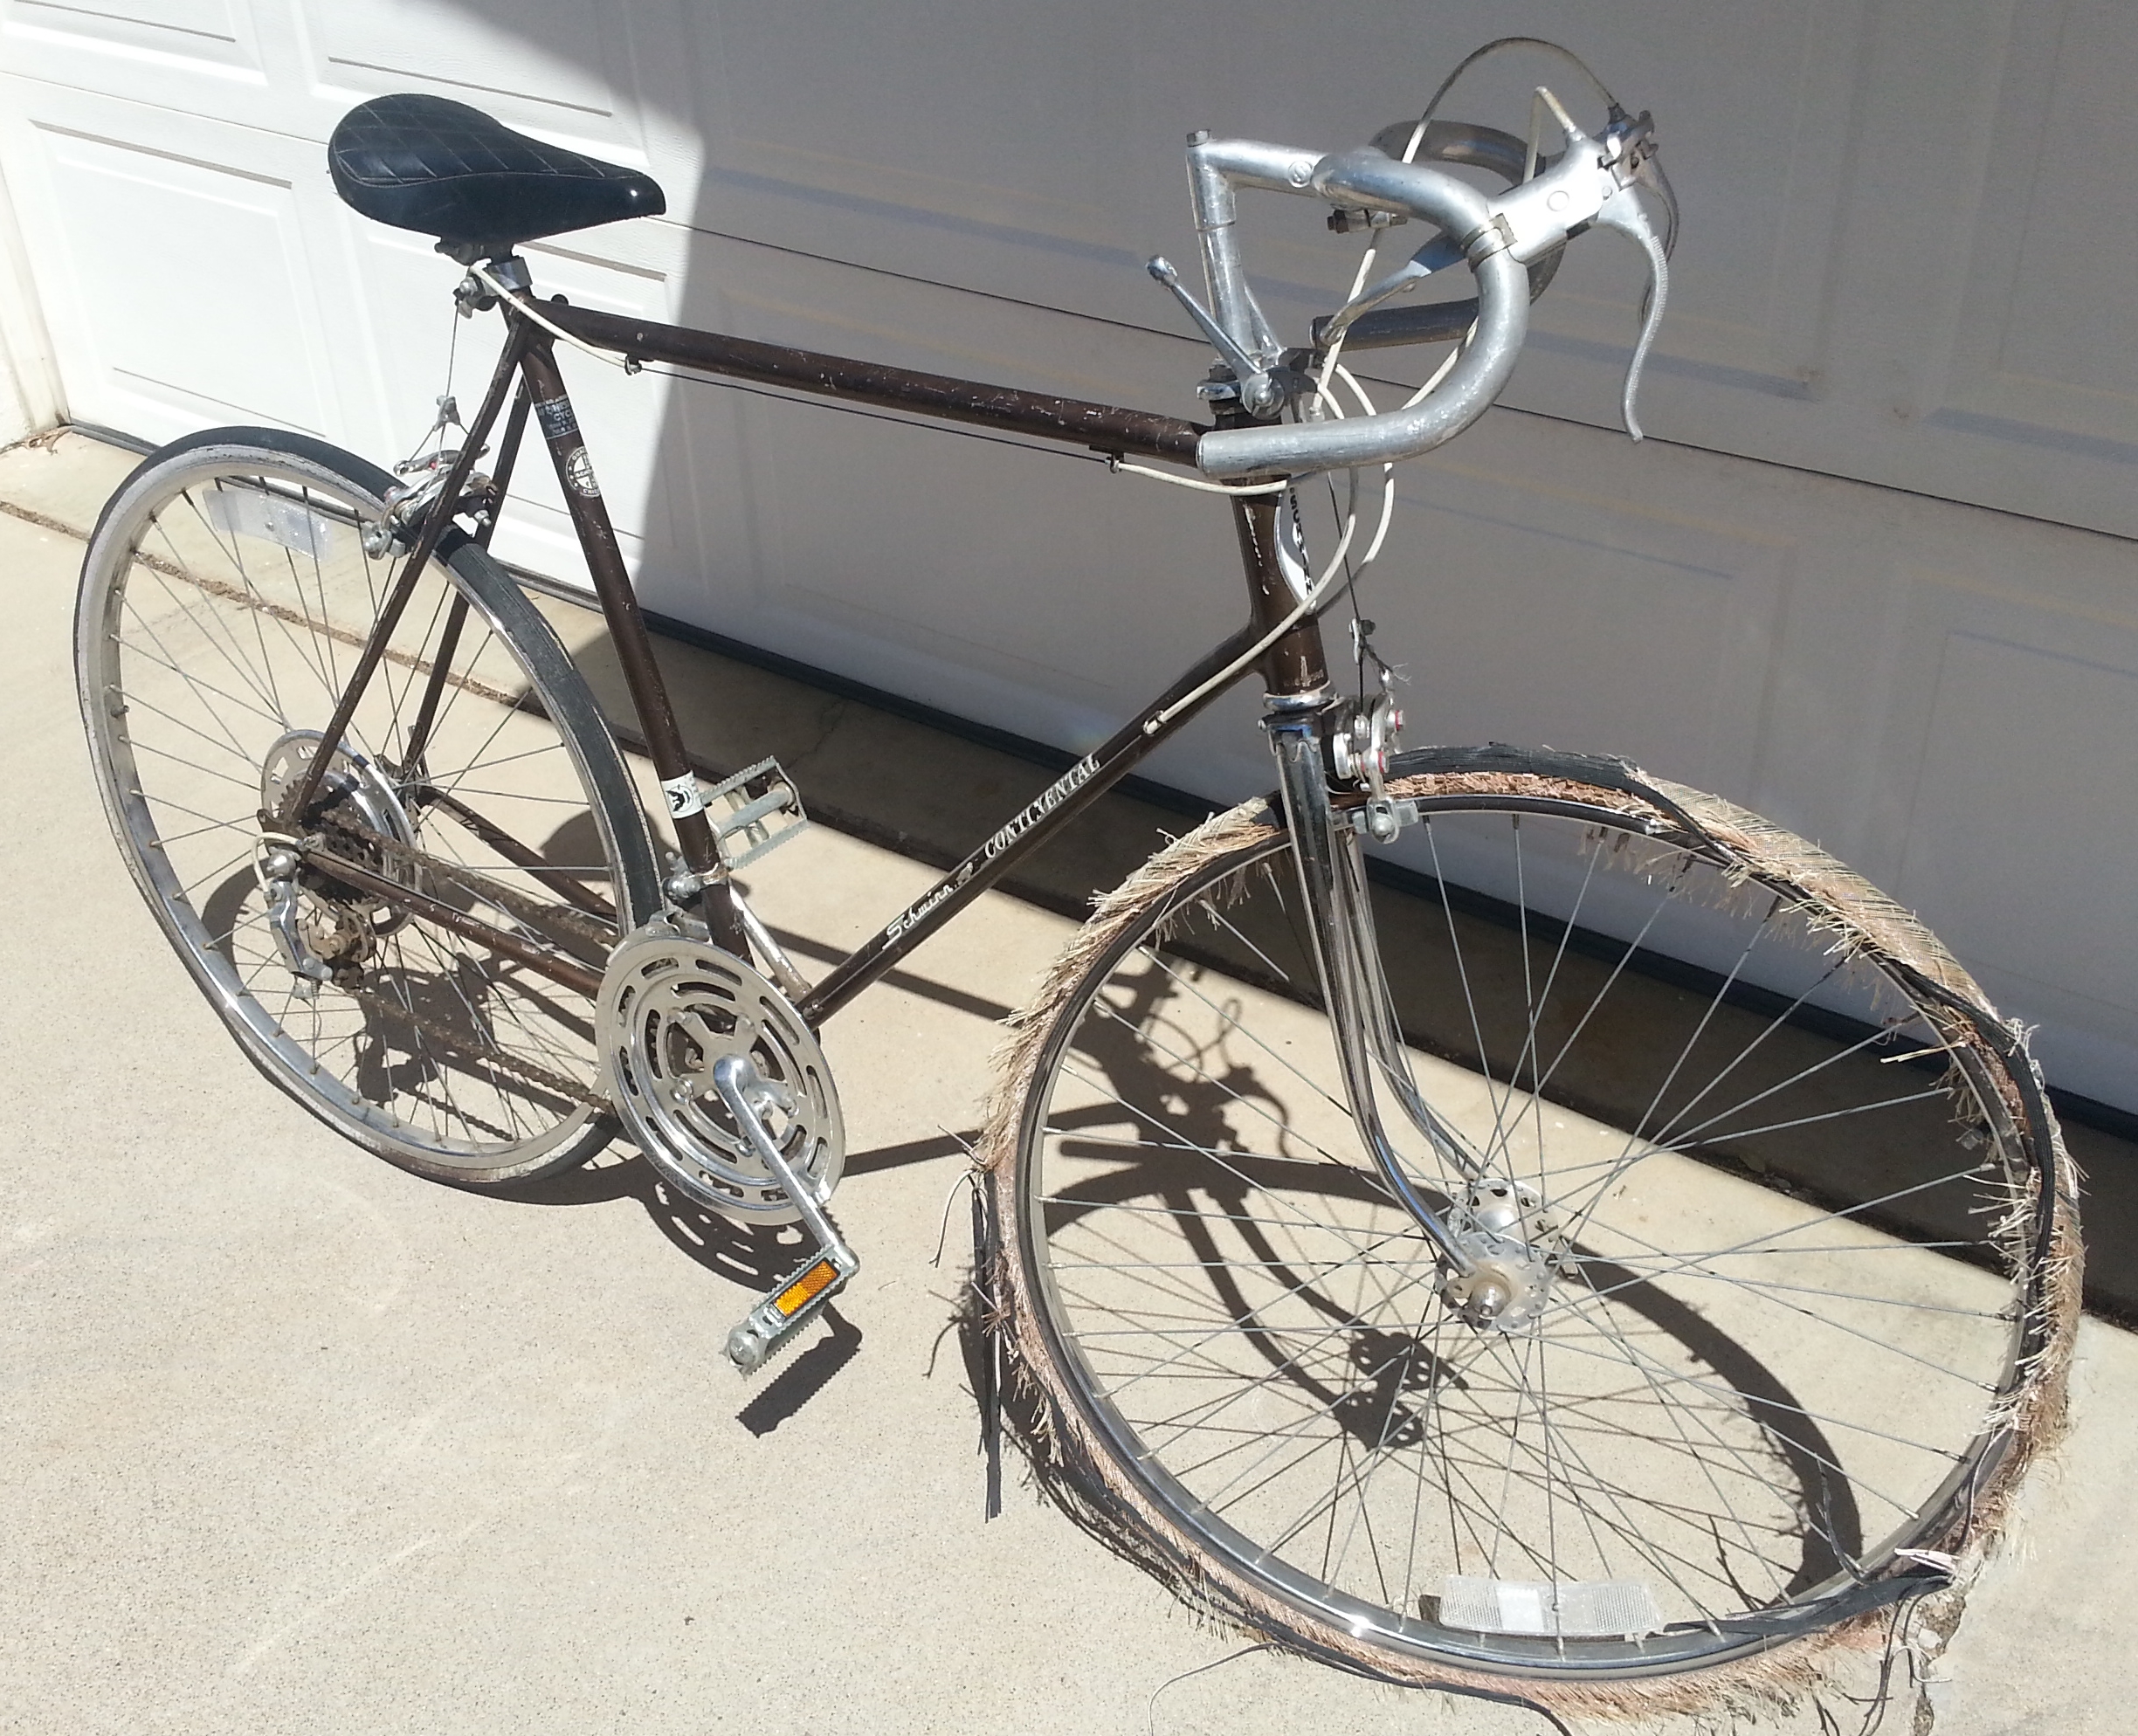
Of course, being eager and new to the refurbishing game, I hastily bought it and soon discovered that this bike also had a bent frame. I guess I didn’t see it because I was dazzled by the spiffy chrome fork, (which was obviously a replacement because the original must have been pretzeled.)
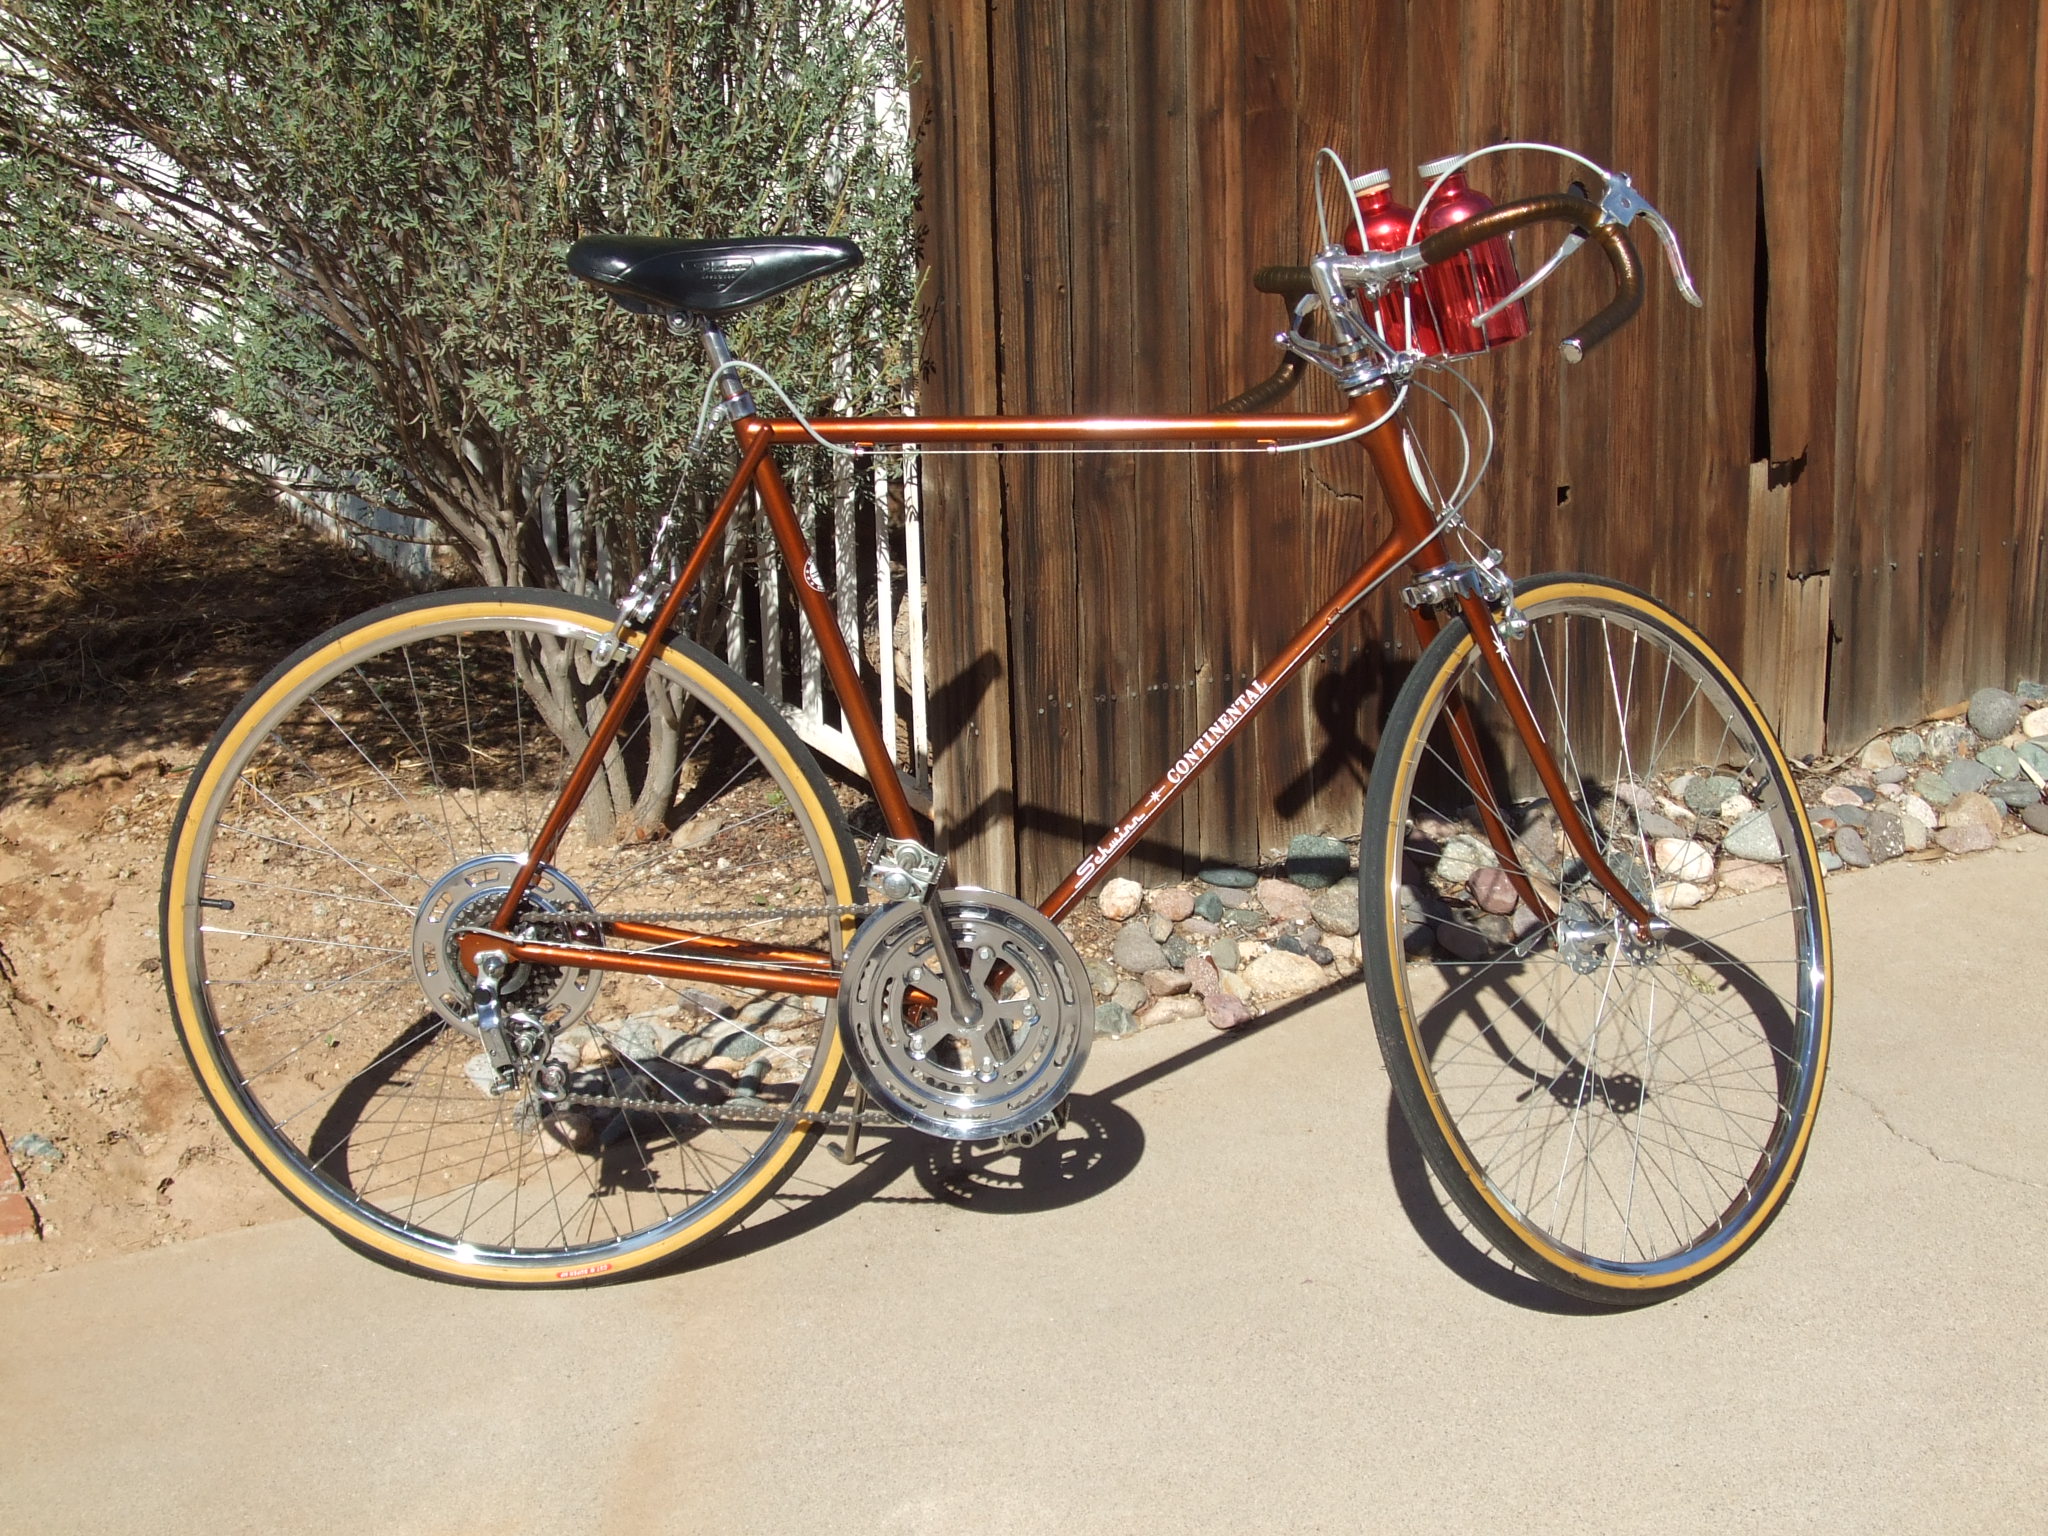
So, with a wonderful seller on eBay selling a nice straight frame powder coated in “Root Beer”, I combined parts from both bikes, added new decals and ended up with this bike which I love to ride.
Next, also in storage with the original 22″ bent Continental was this 22″ Burgundy Suburban, which I also assembled when it was new and gave to my dad. This is a picture of it after I washed it in the driveway to see what I had to start with. I knew he had ridden it very little since he took ill not long after I gave it to him.
Requiring Mostly just a thorough disassembly, cleaning, lubricating, and tuning, I ended up with a very clean, factory original bike. I used NOS parts and kept it as original as possible;

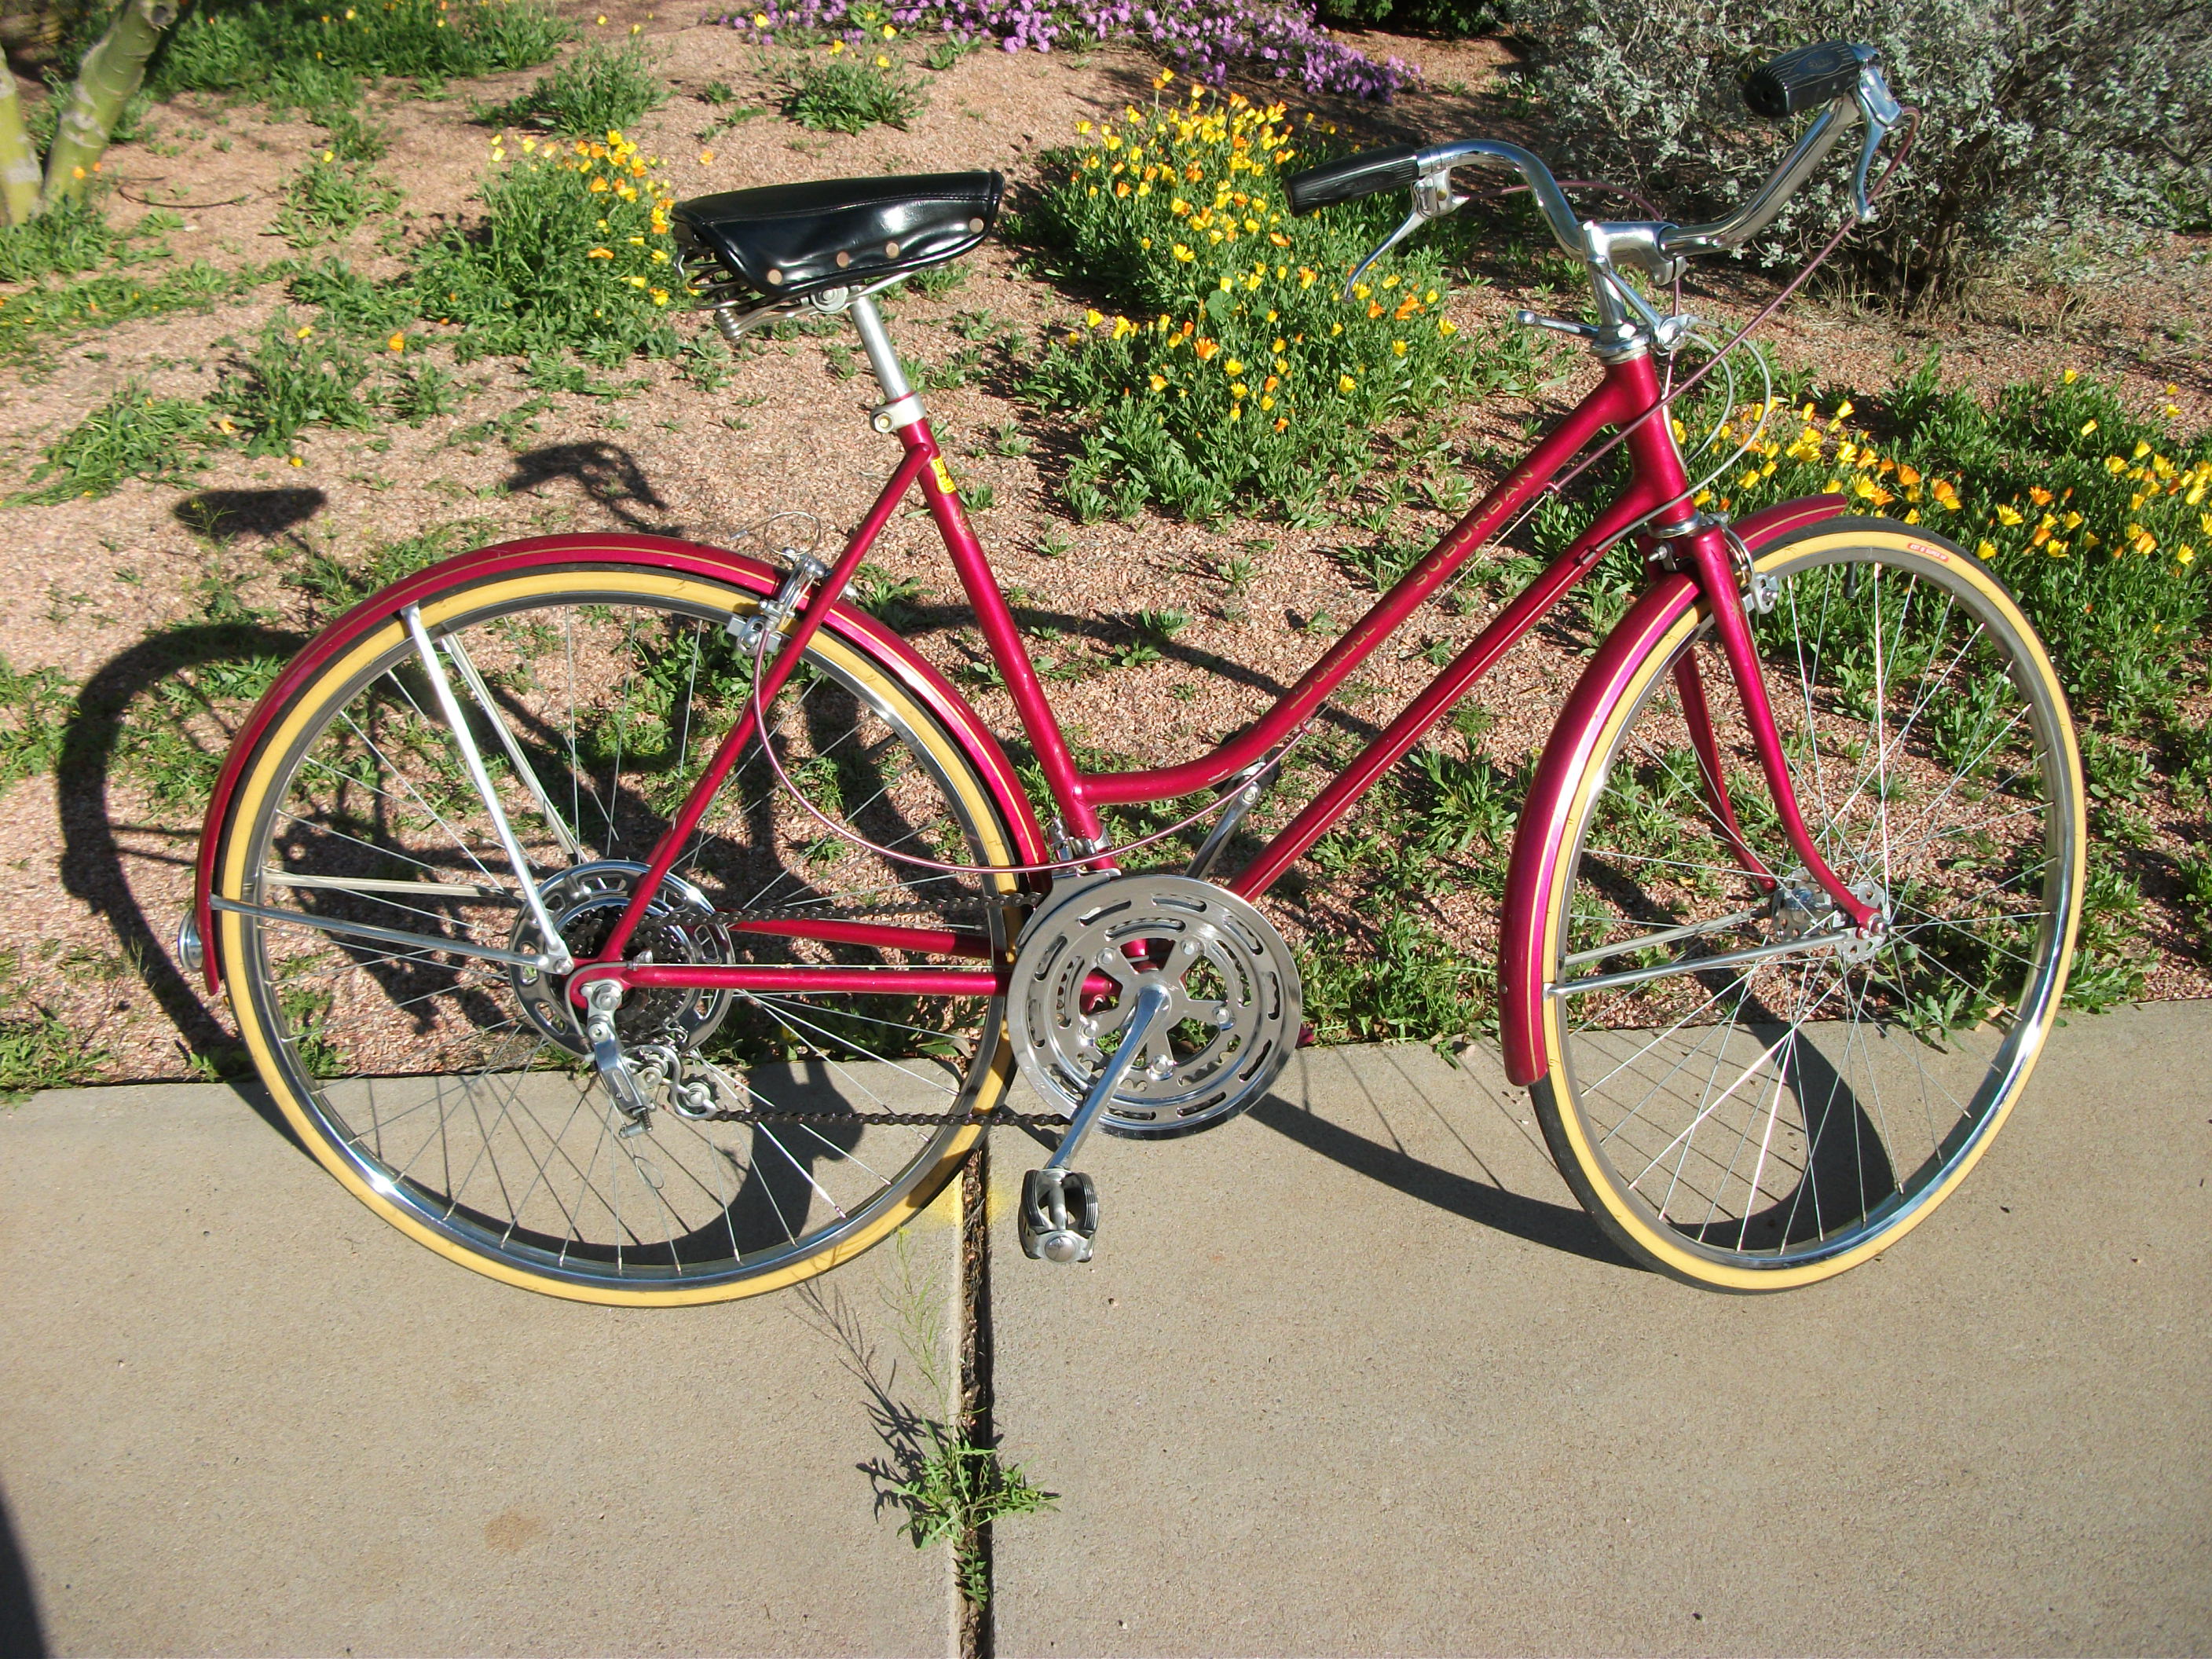
Coincidentally, I was browsing Craigslist when I chanced upon a matching Burgundy Ladies’ in a 19″ frame, that was in very nice original shape and needed the same treatment as the Men’s.
It too cleaned up rather nicely with all NOS parts too;
My wife and I rode them a few times, and although they rode just like we remembered them, neither bike was exactly the right frame size. That Christmas, a friend of mine, seeing the completed bikes in the garage, made me an offer I couldn’t refuse and bought them for himself and his wife.
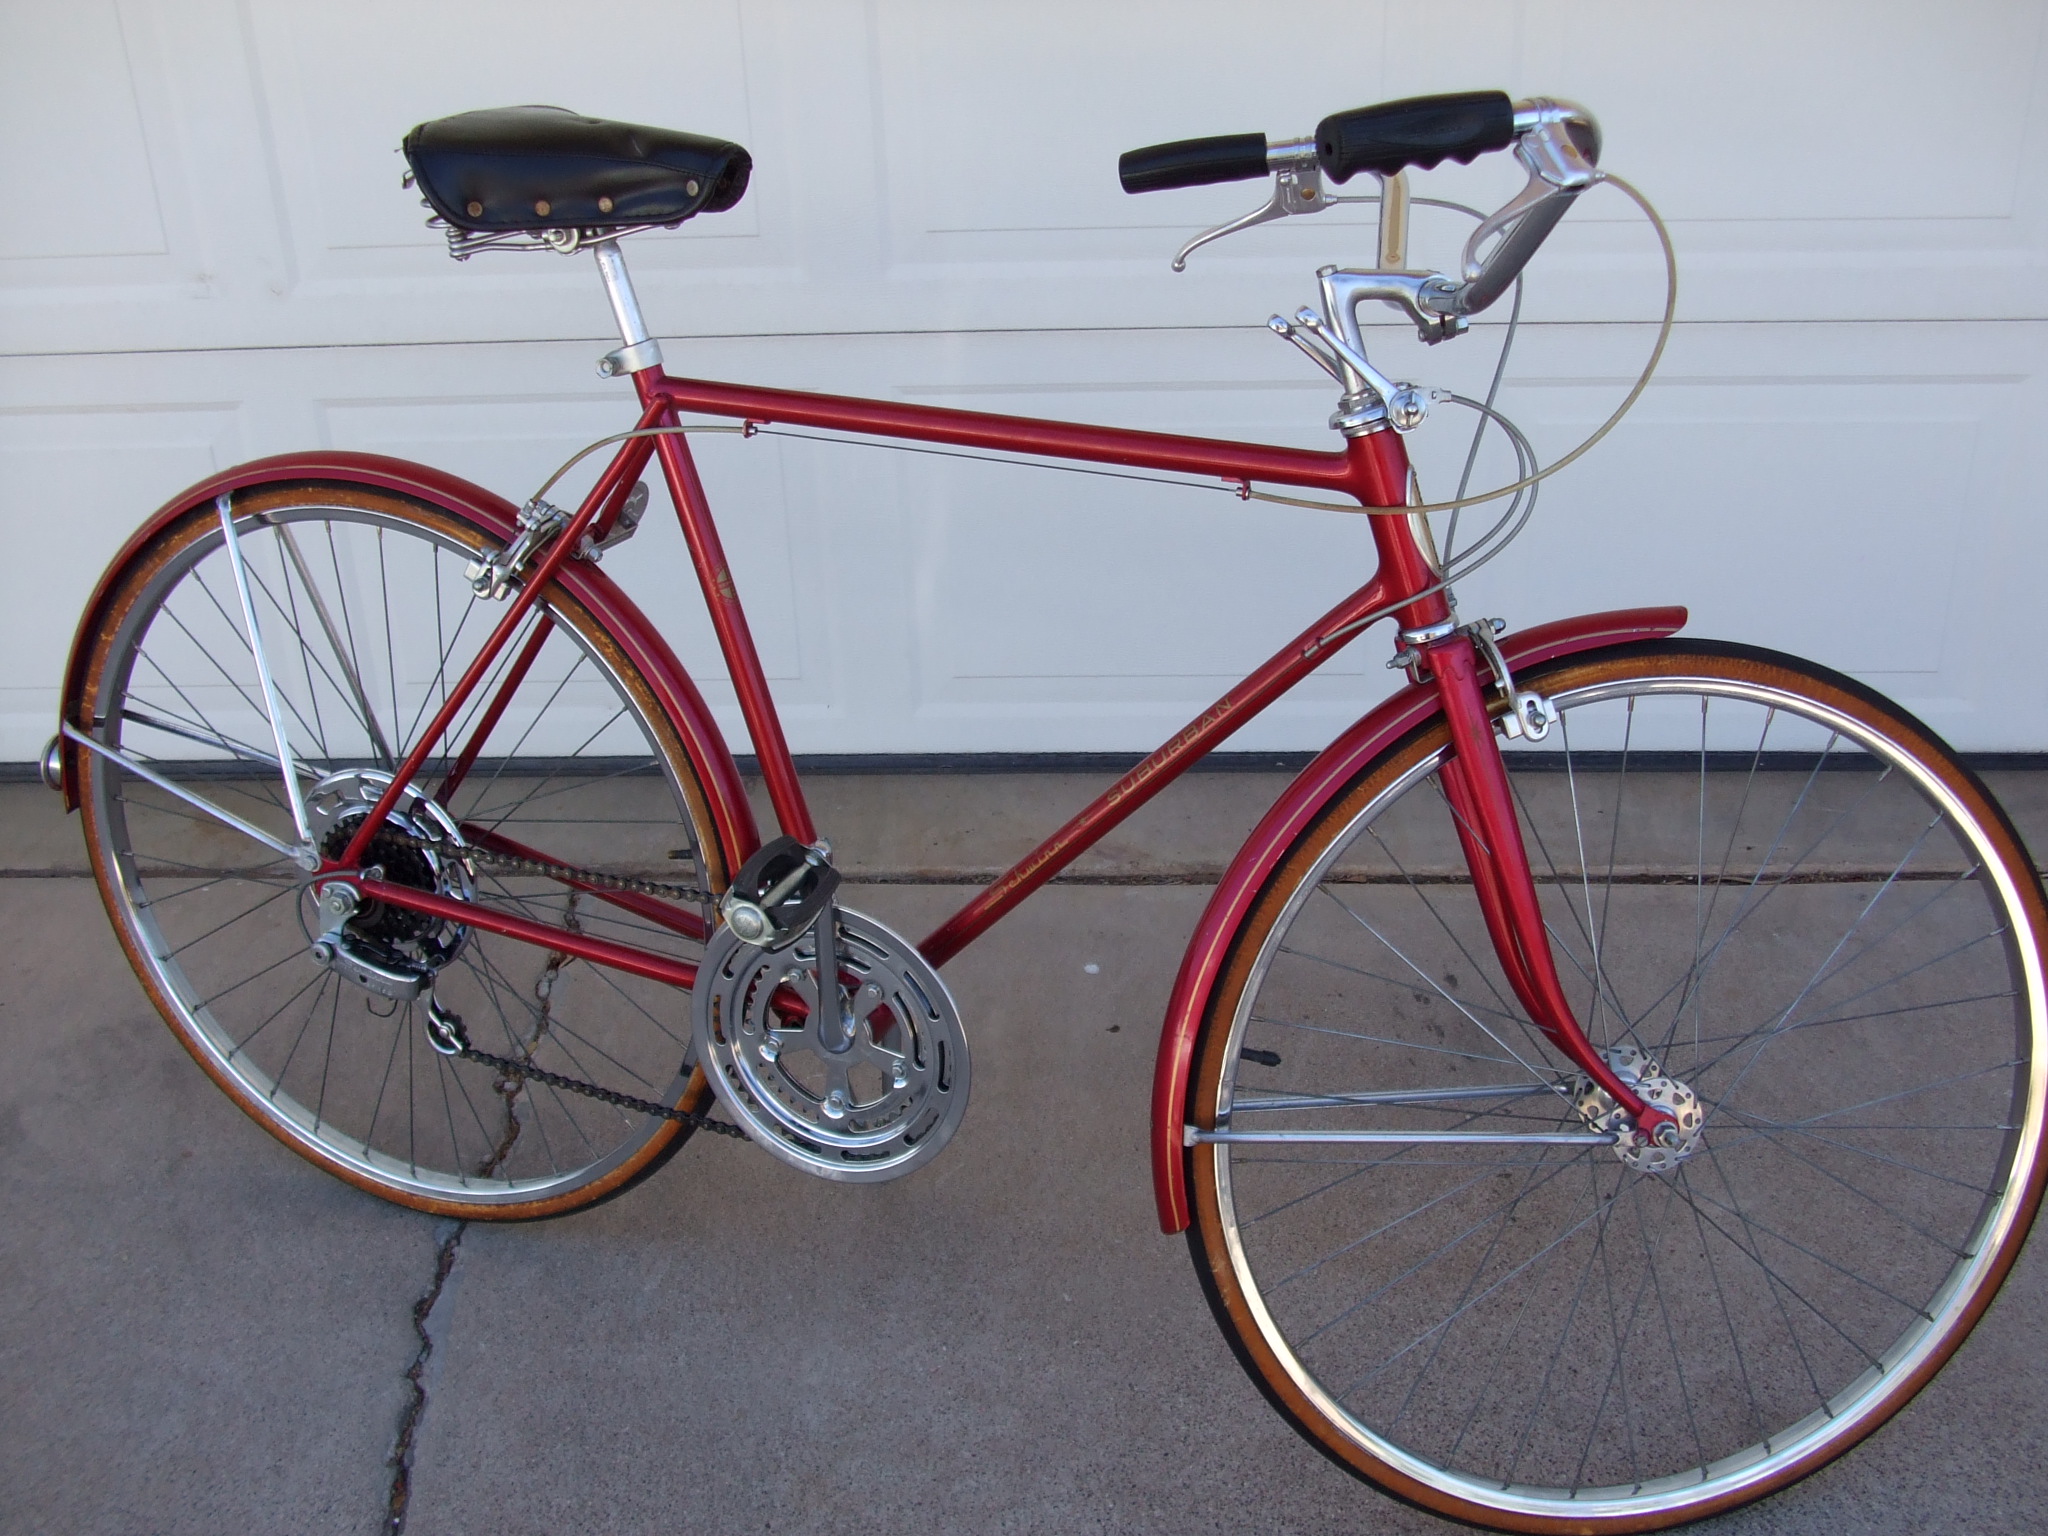
So, having enjoyed them so much myself, I started to look out for some proper sized Suburbans. Soon, a pair materialized on Craigslist in my neighborhood. This is the men’s Burgundy 24″ suburban 10 speed as I bought it.
It was in rougher shape than the 22″ had been, but I made it into a “rider”. The rims weren’t saveable, so I built a pair of alloy rims onto the original hubs using DT-Swiss Double Butted stainless steel spokes and 16mm brass nipples. It has some non-Schwinn cables and brake pads too.
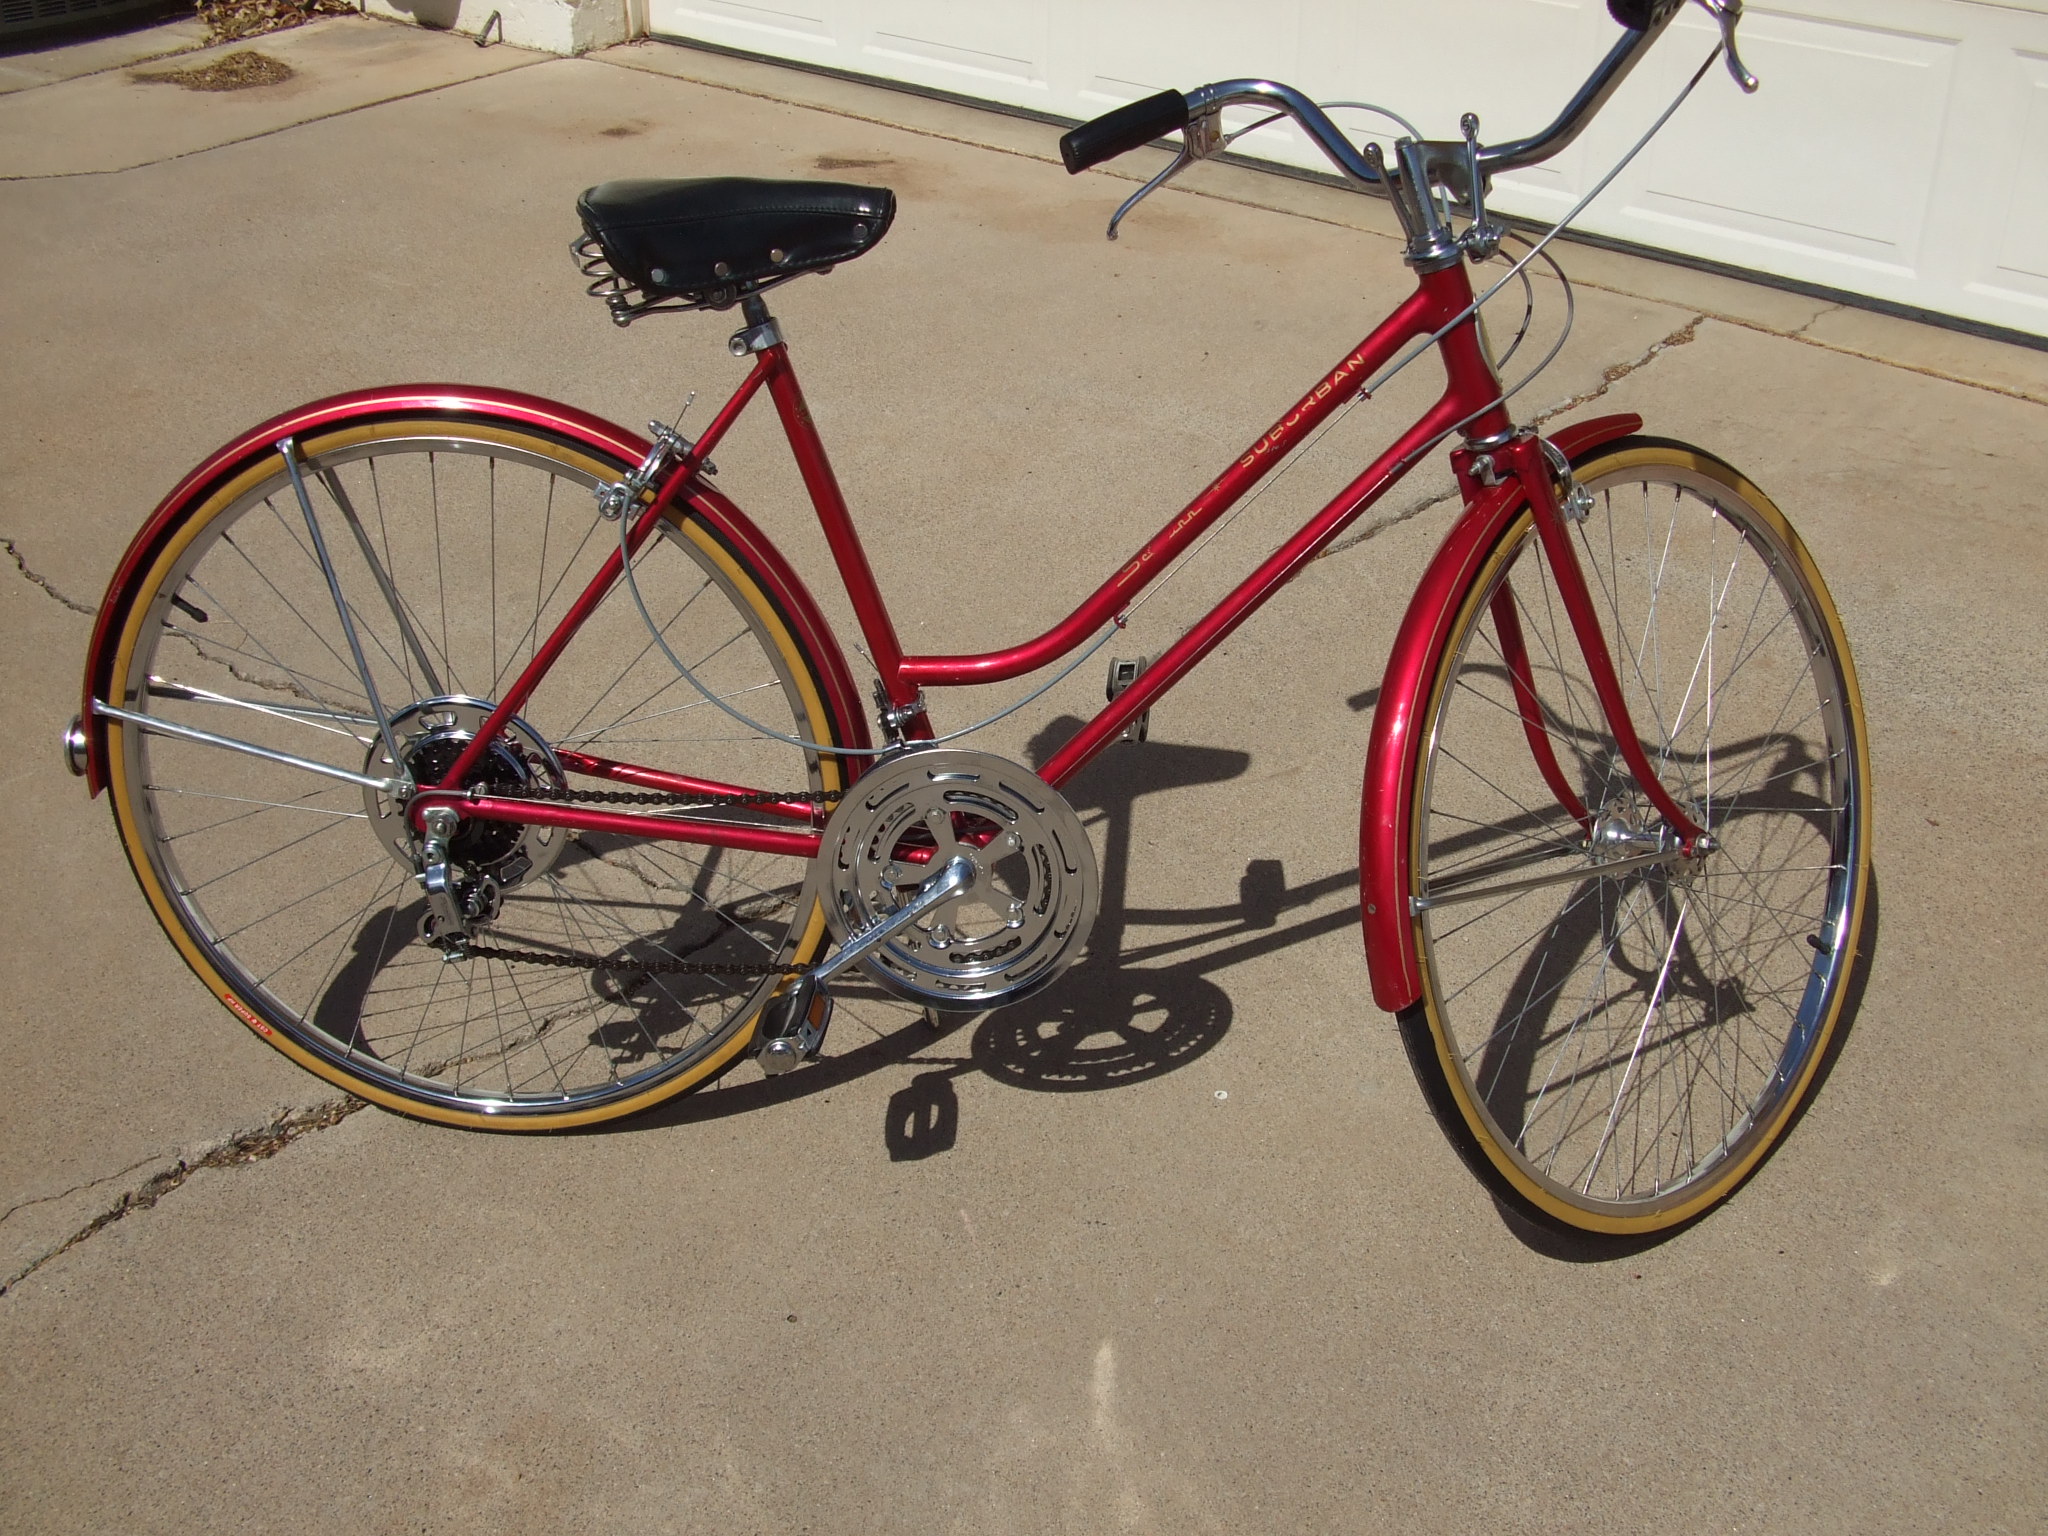
This is the 21″ Ladies’ Burgundy 10 speed Suburban when I purchased it.

And this is the finished bike, also a “rider.” We both love the ride they give us.
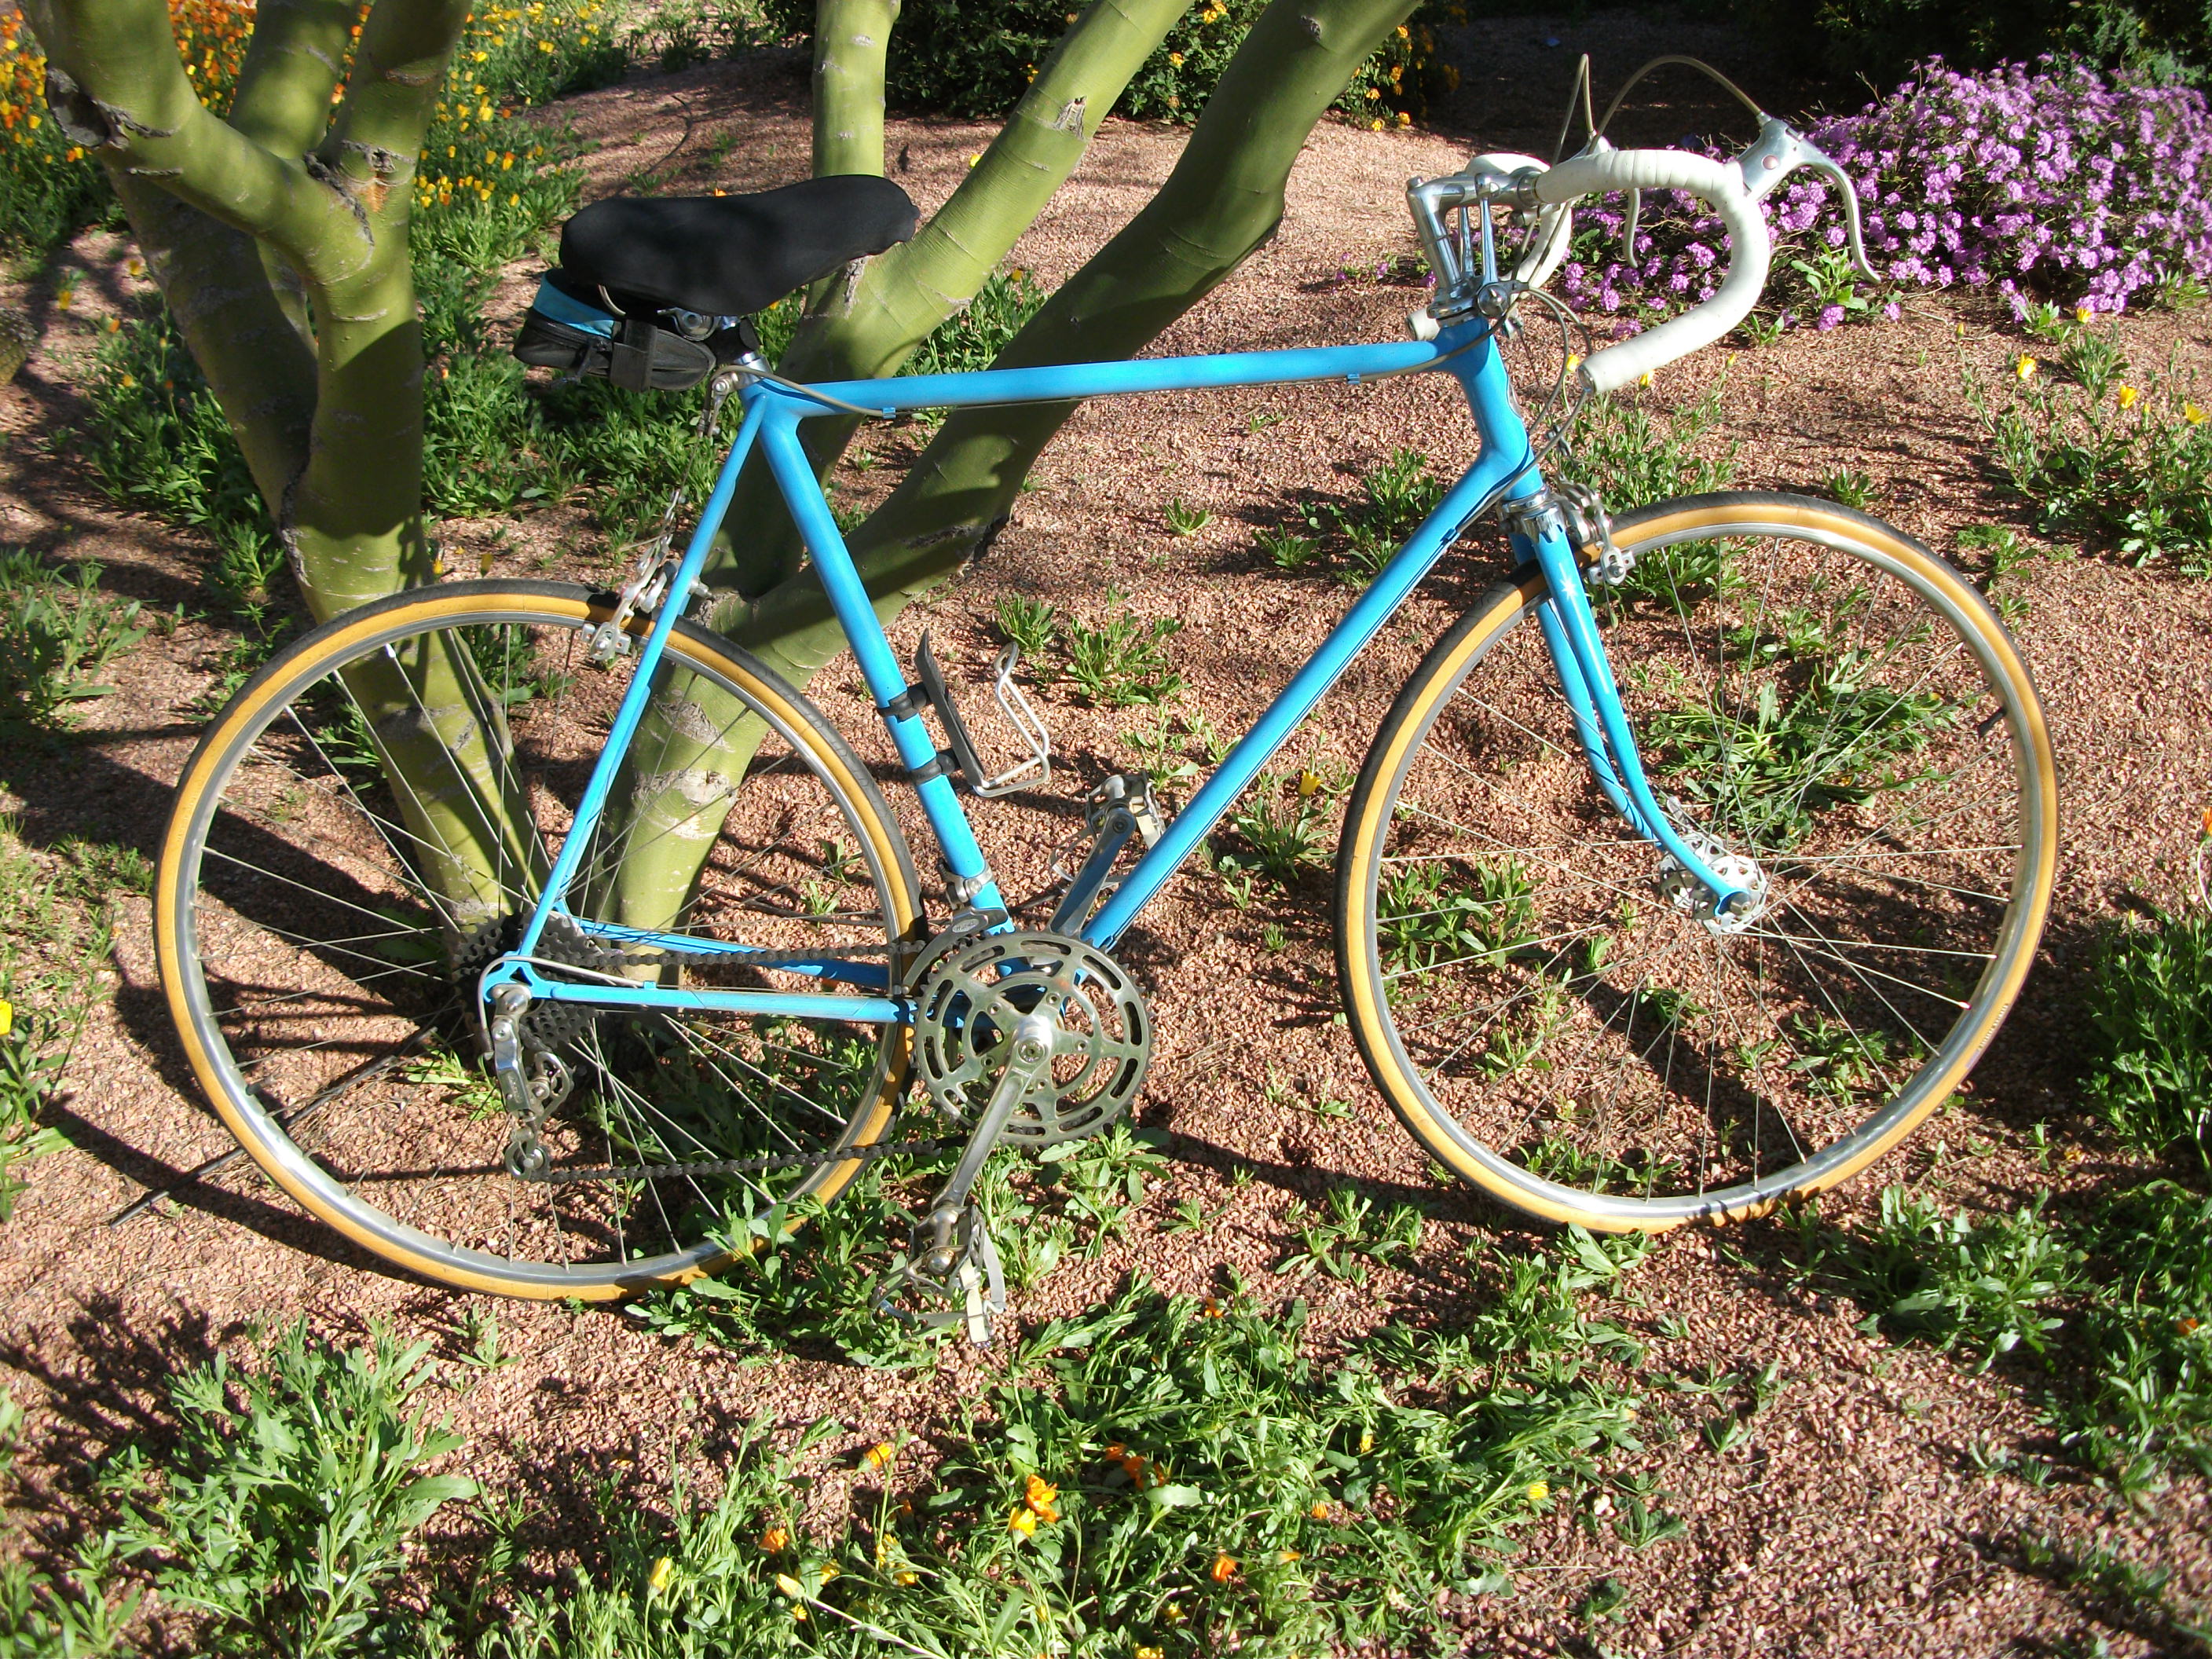
The last bike from my bike shop days was this 22″ Opaque Blue Super Sport that my wife bought for herself so she could keep up with me on my French “race” bike (pictures further down, because it’s not a Schwinn.) When she bought it, I installed the alloy crank conversion kit, hot-rod pedals, and cushioned handlebar tape, and we buffed off the decals to keep people guessing as to what it was. It needs a loving and thorough cleaning and afterwards, I will reinstall (new) decals. The original Brooks saddle is under that cushy cover.
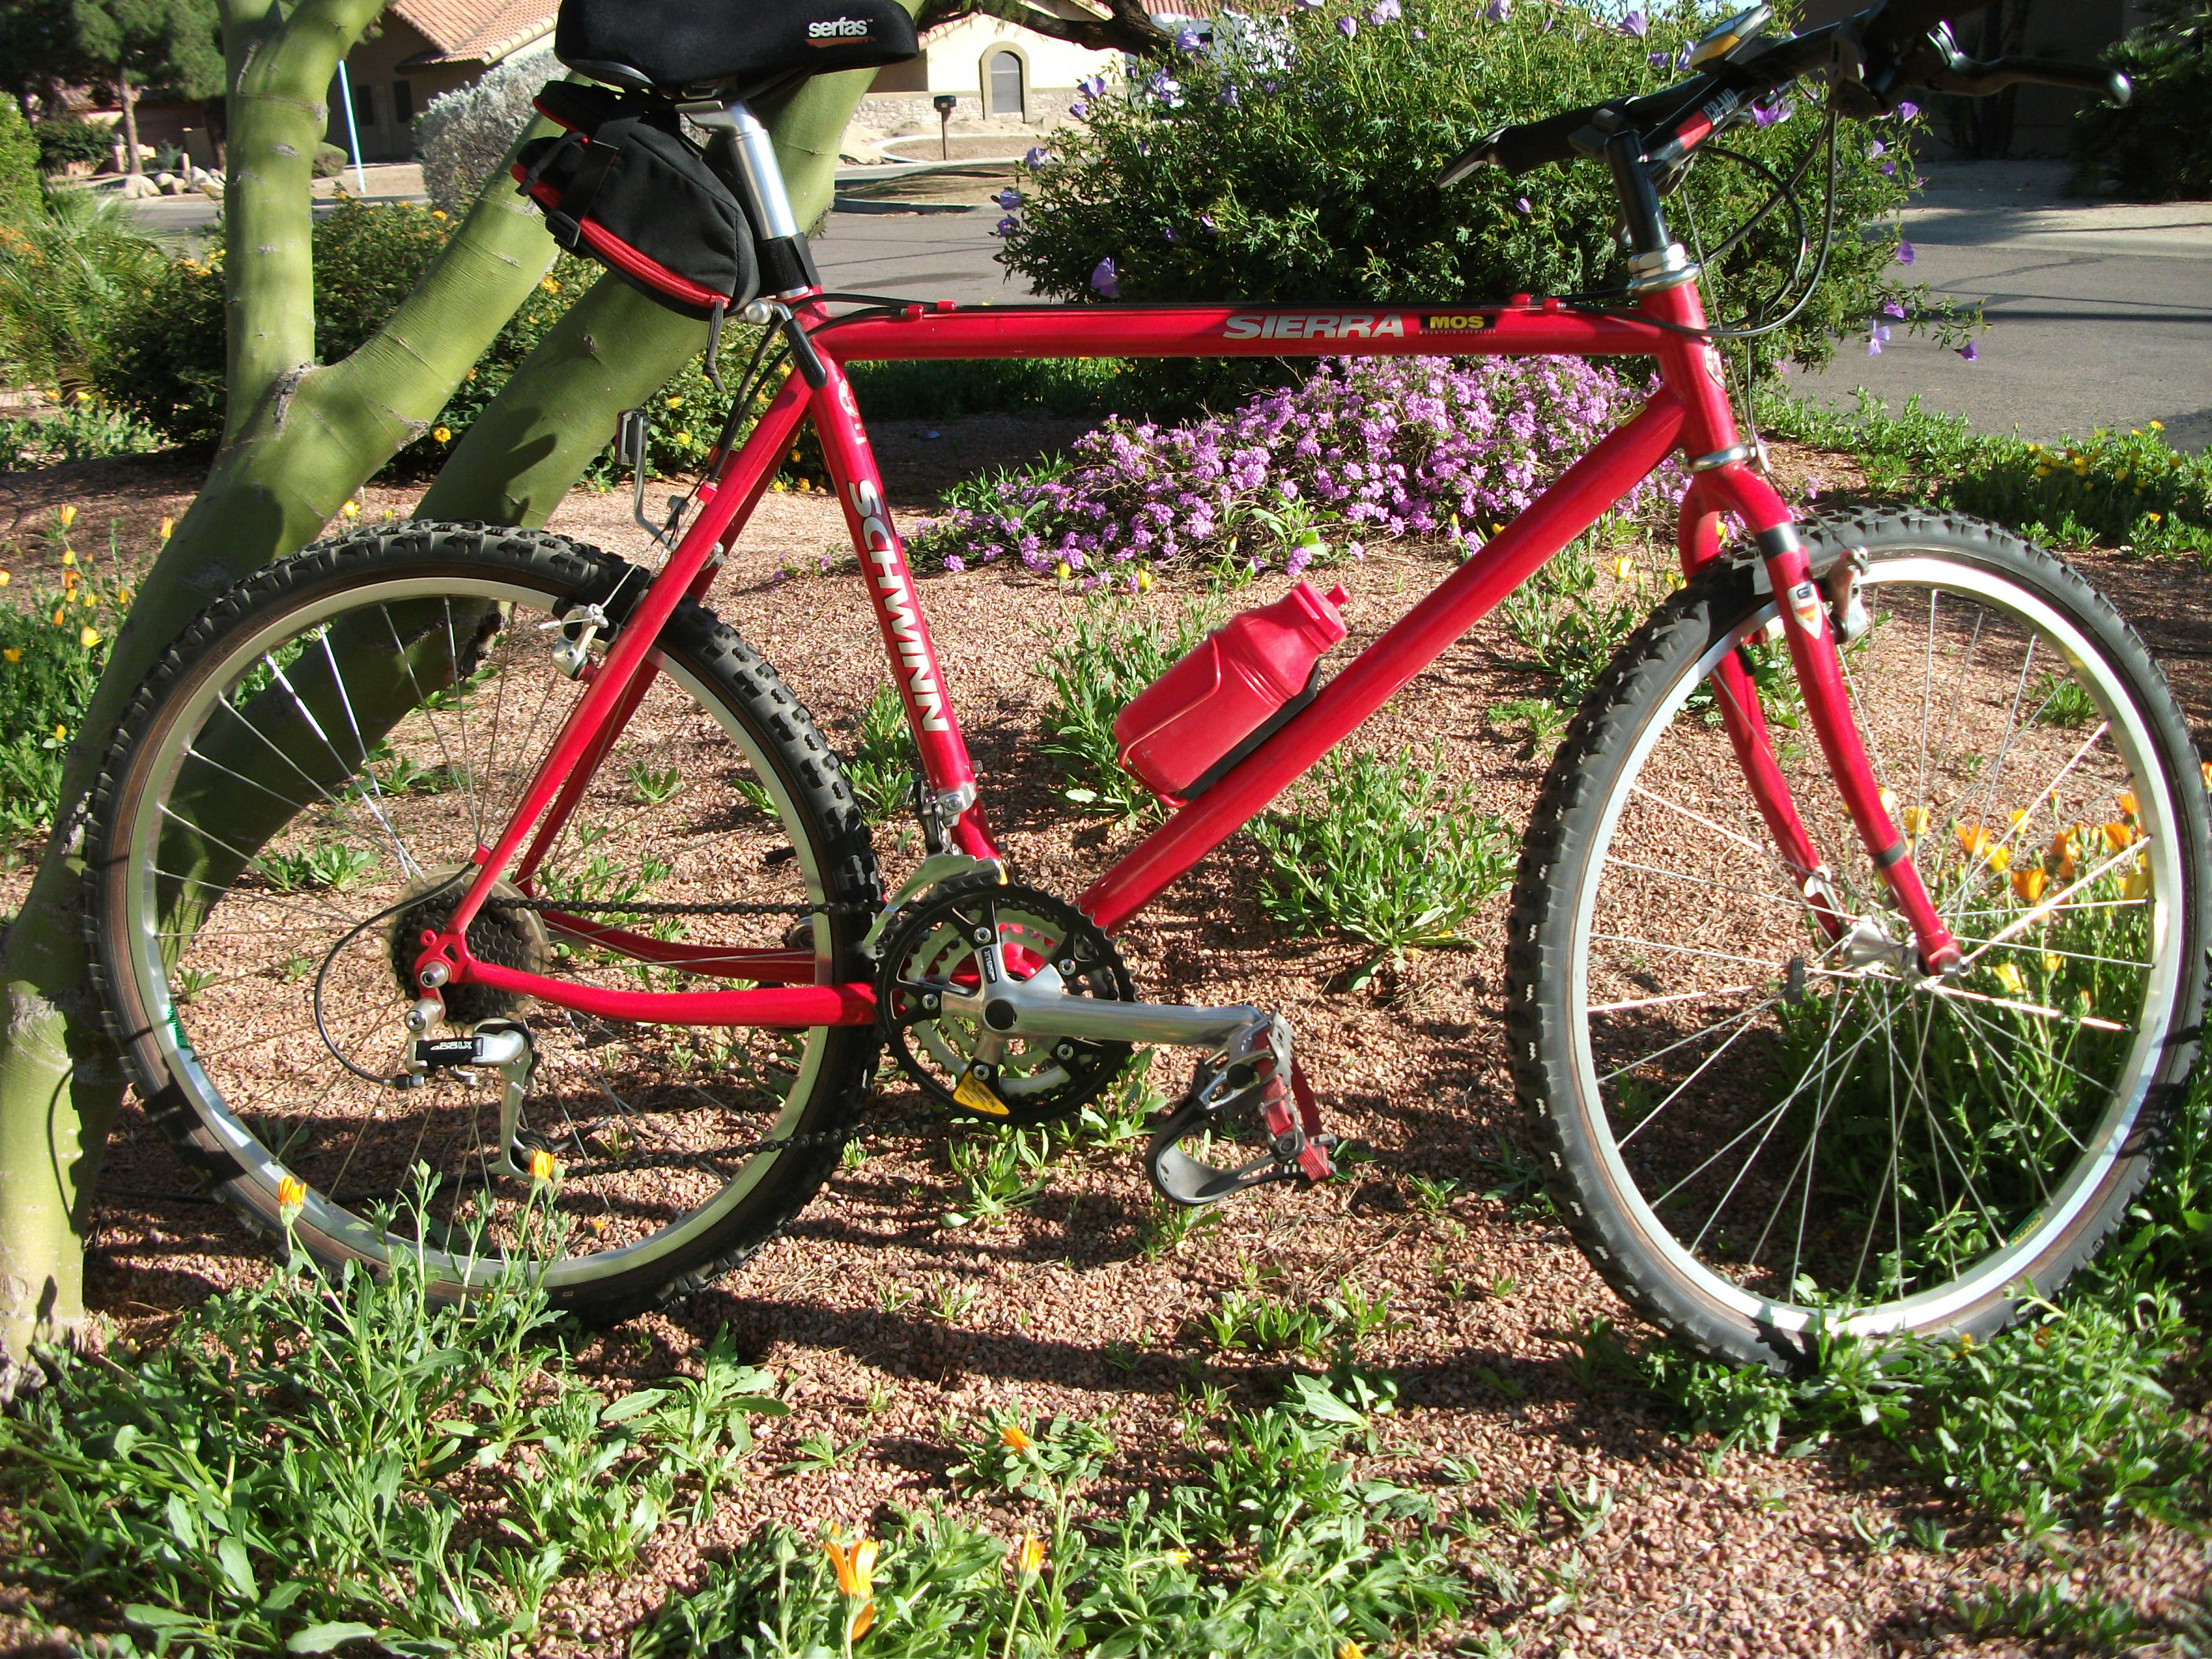
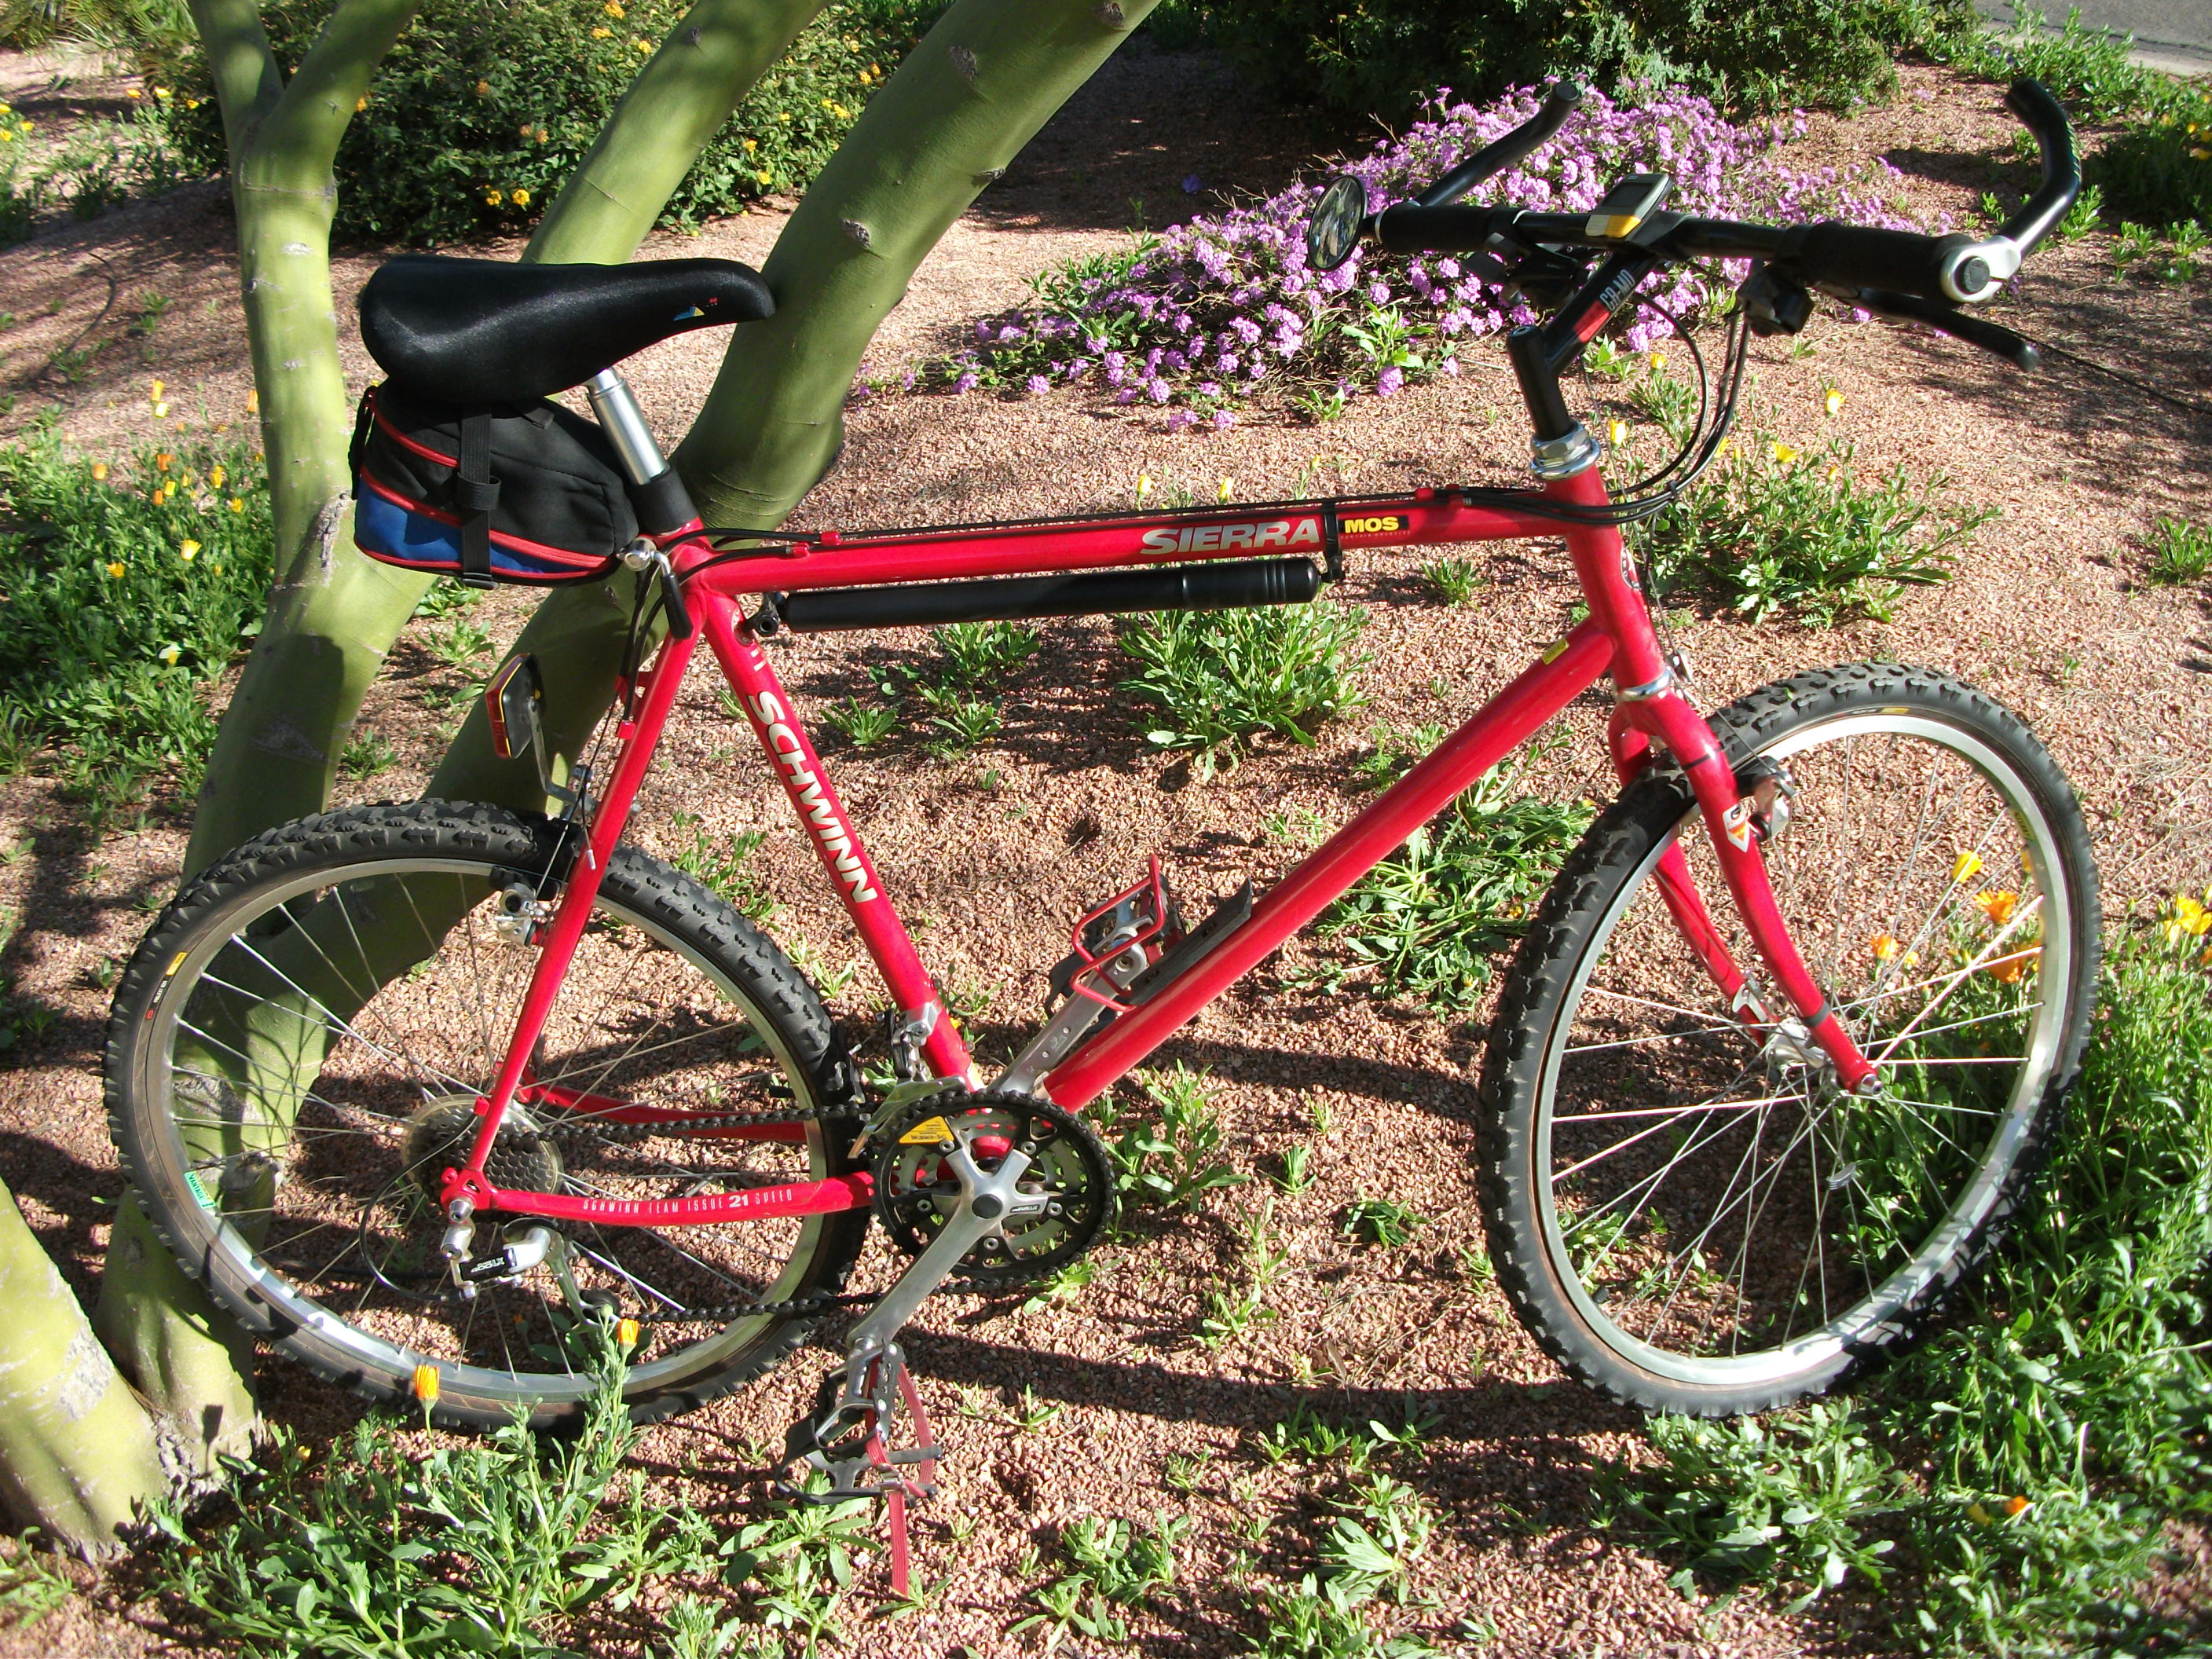
Meanwhile, I long while back, I had purchased a pair of Sierra MOS Mountain Bikes, that we rode a lot years ago, but that had sort of become “art” hanging from the ceiling.
I went through the larger frame one already, and the smaller one is on my list of winter projects.
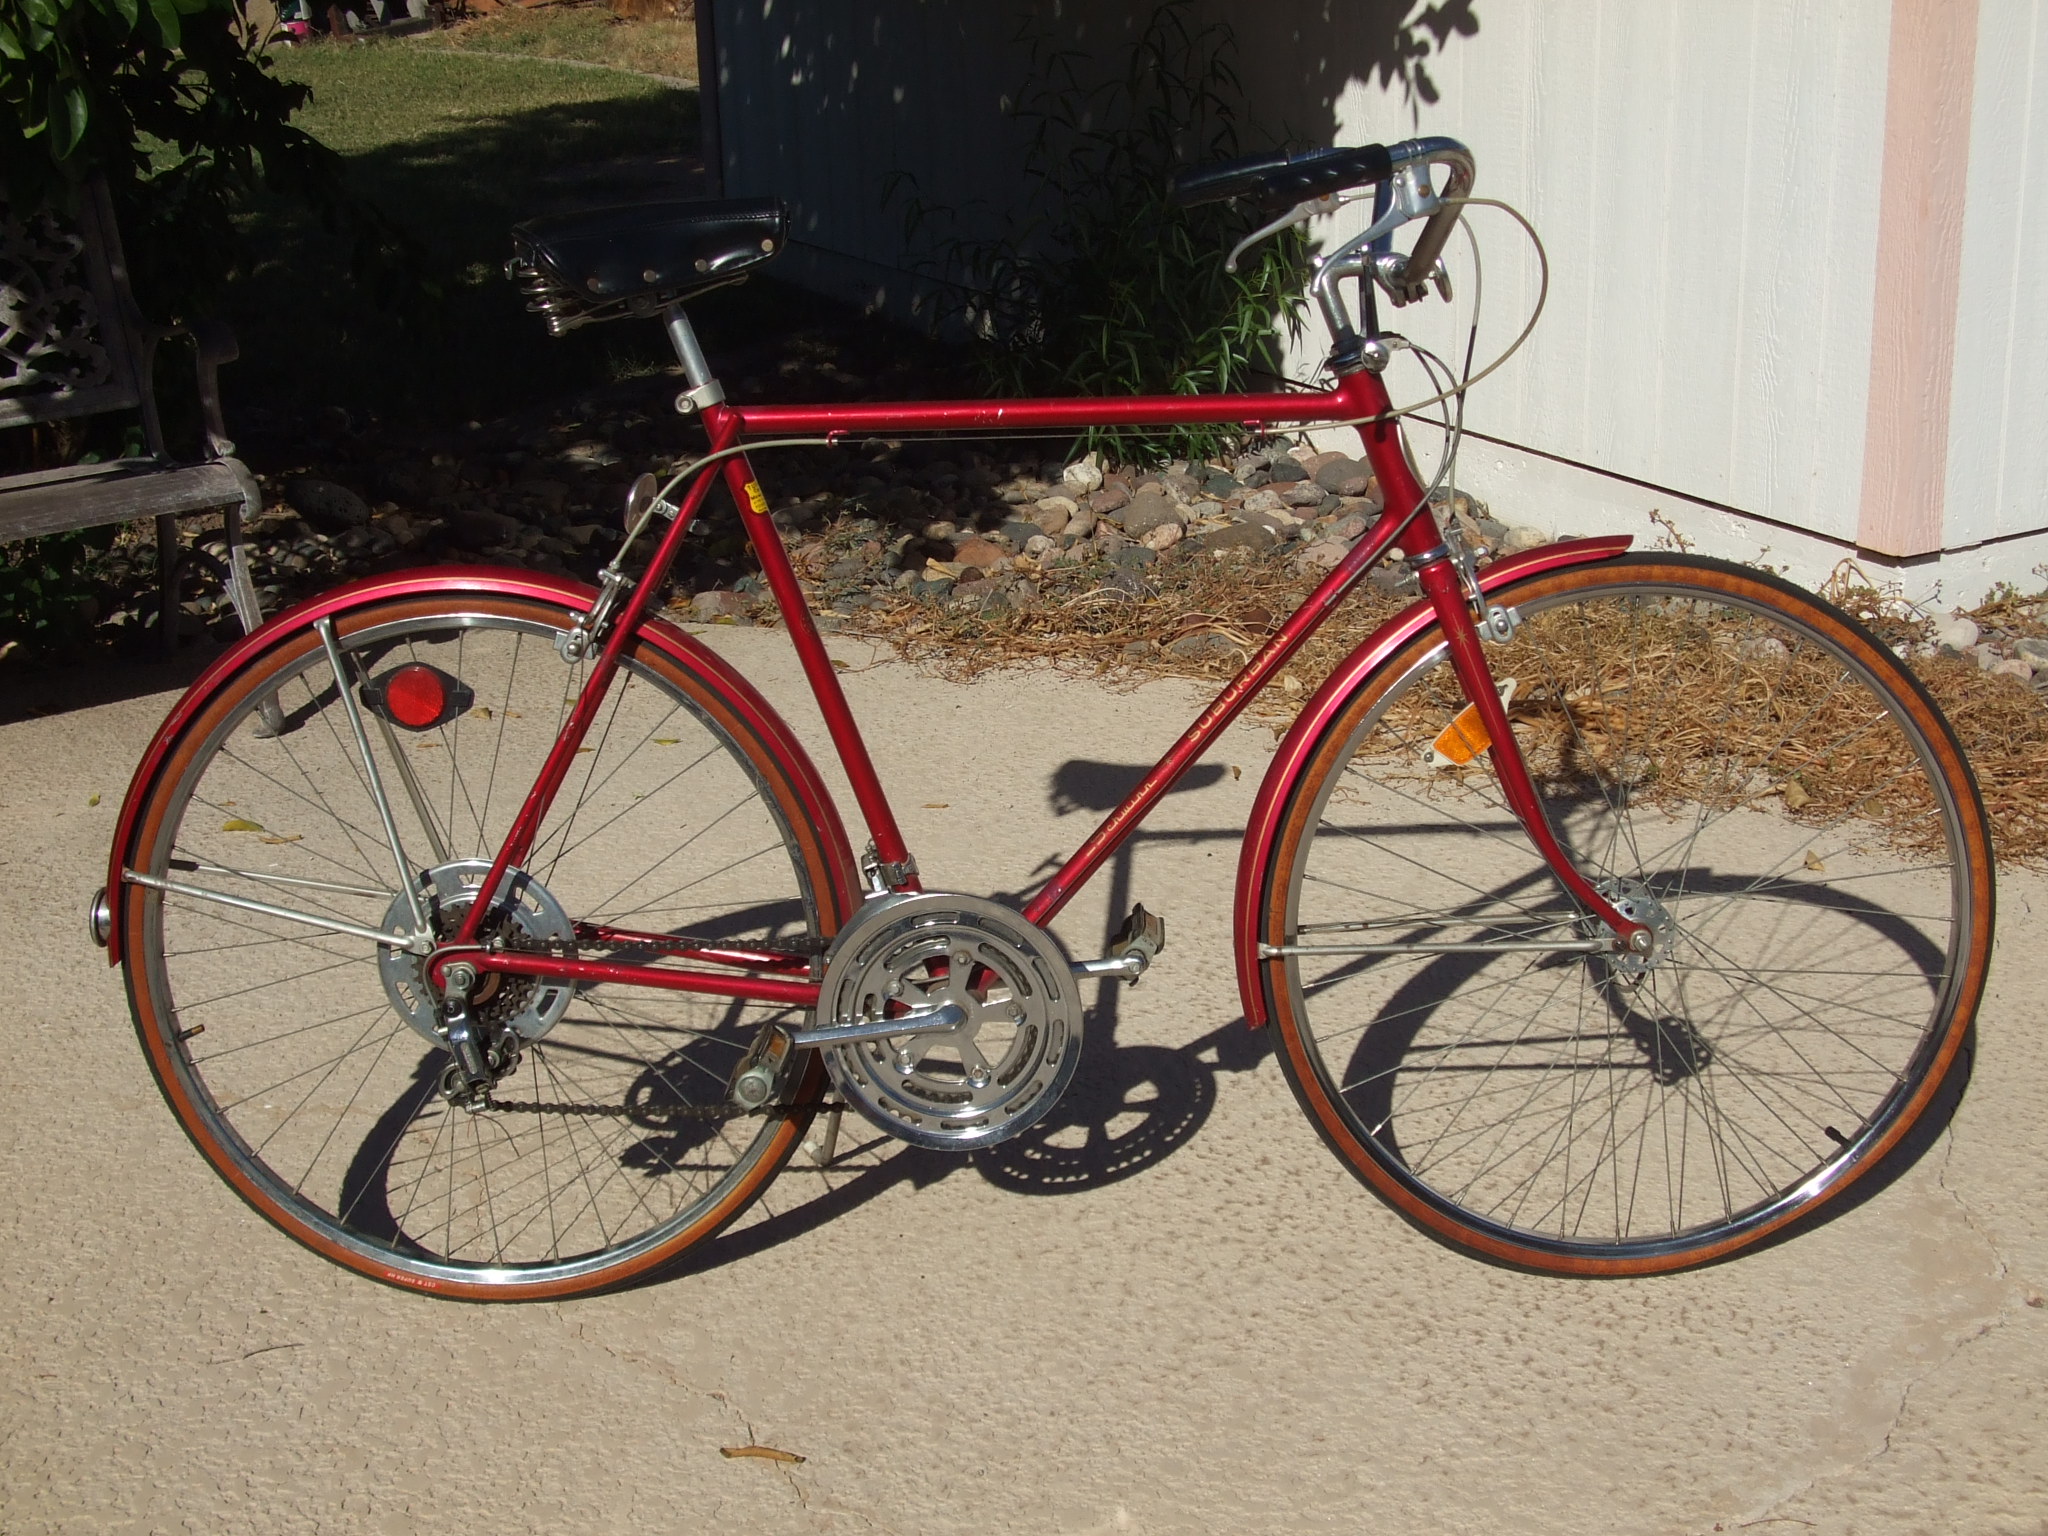
Recently, I found this 24″ 5 speed Suburban at an estate sale. It is in the garage in pieces as I type, and I am finding that it has hardly been ridden. It will be a very near perfectly original refurb. The spokes are un-saveable, so another set of DT-Swiss stainless spokes are on the way. I will use the original hubs and rims to keep it as original as possible and all NOS parts except repro brake pads and new Schwinn Kevlar gumwall tires. It will be very clean and original, but it has some top tube paint damage from being hung on un-cushioned hooks.
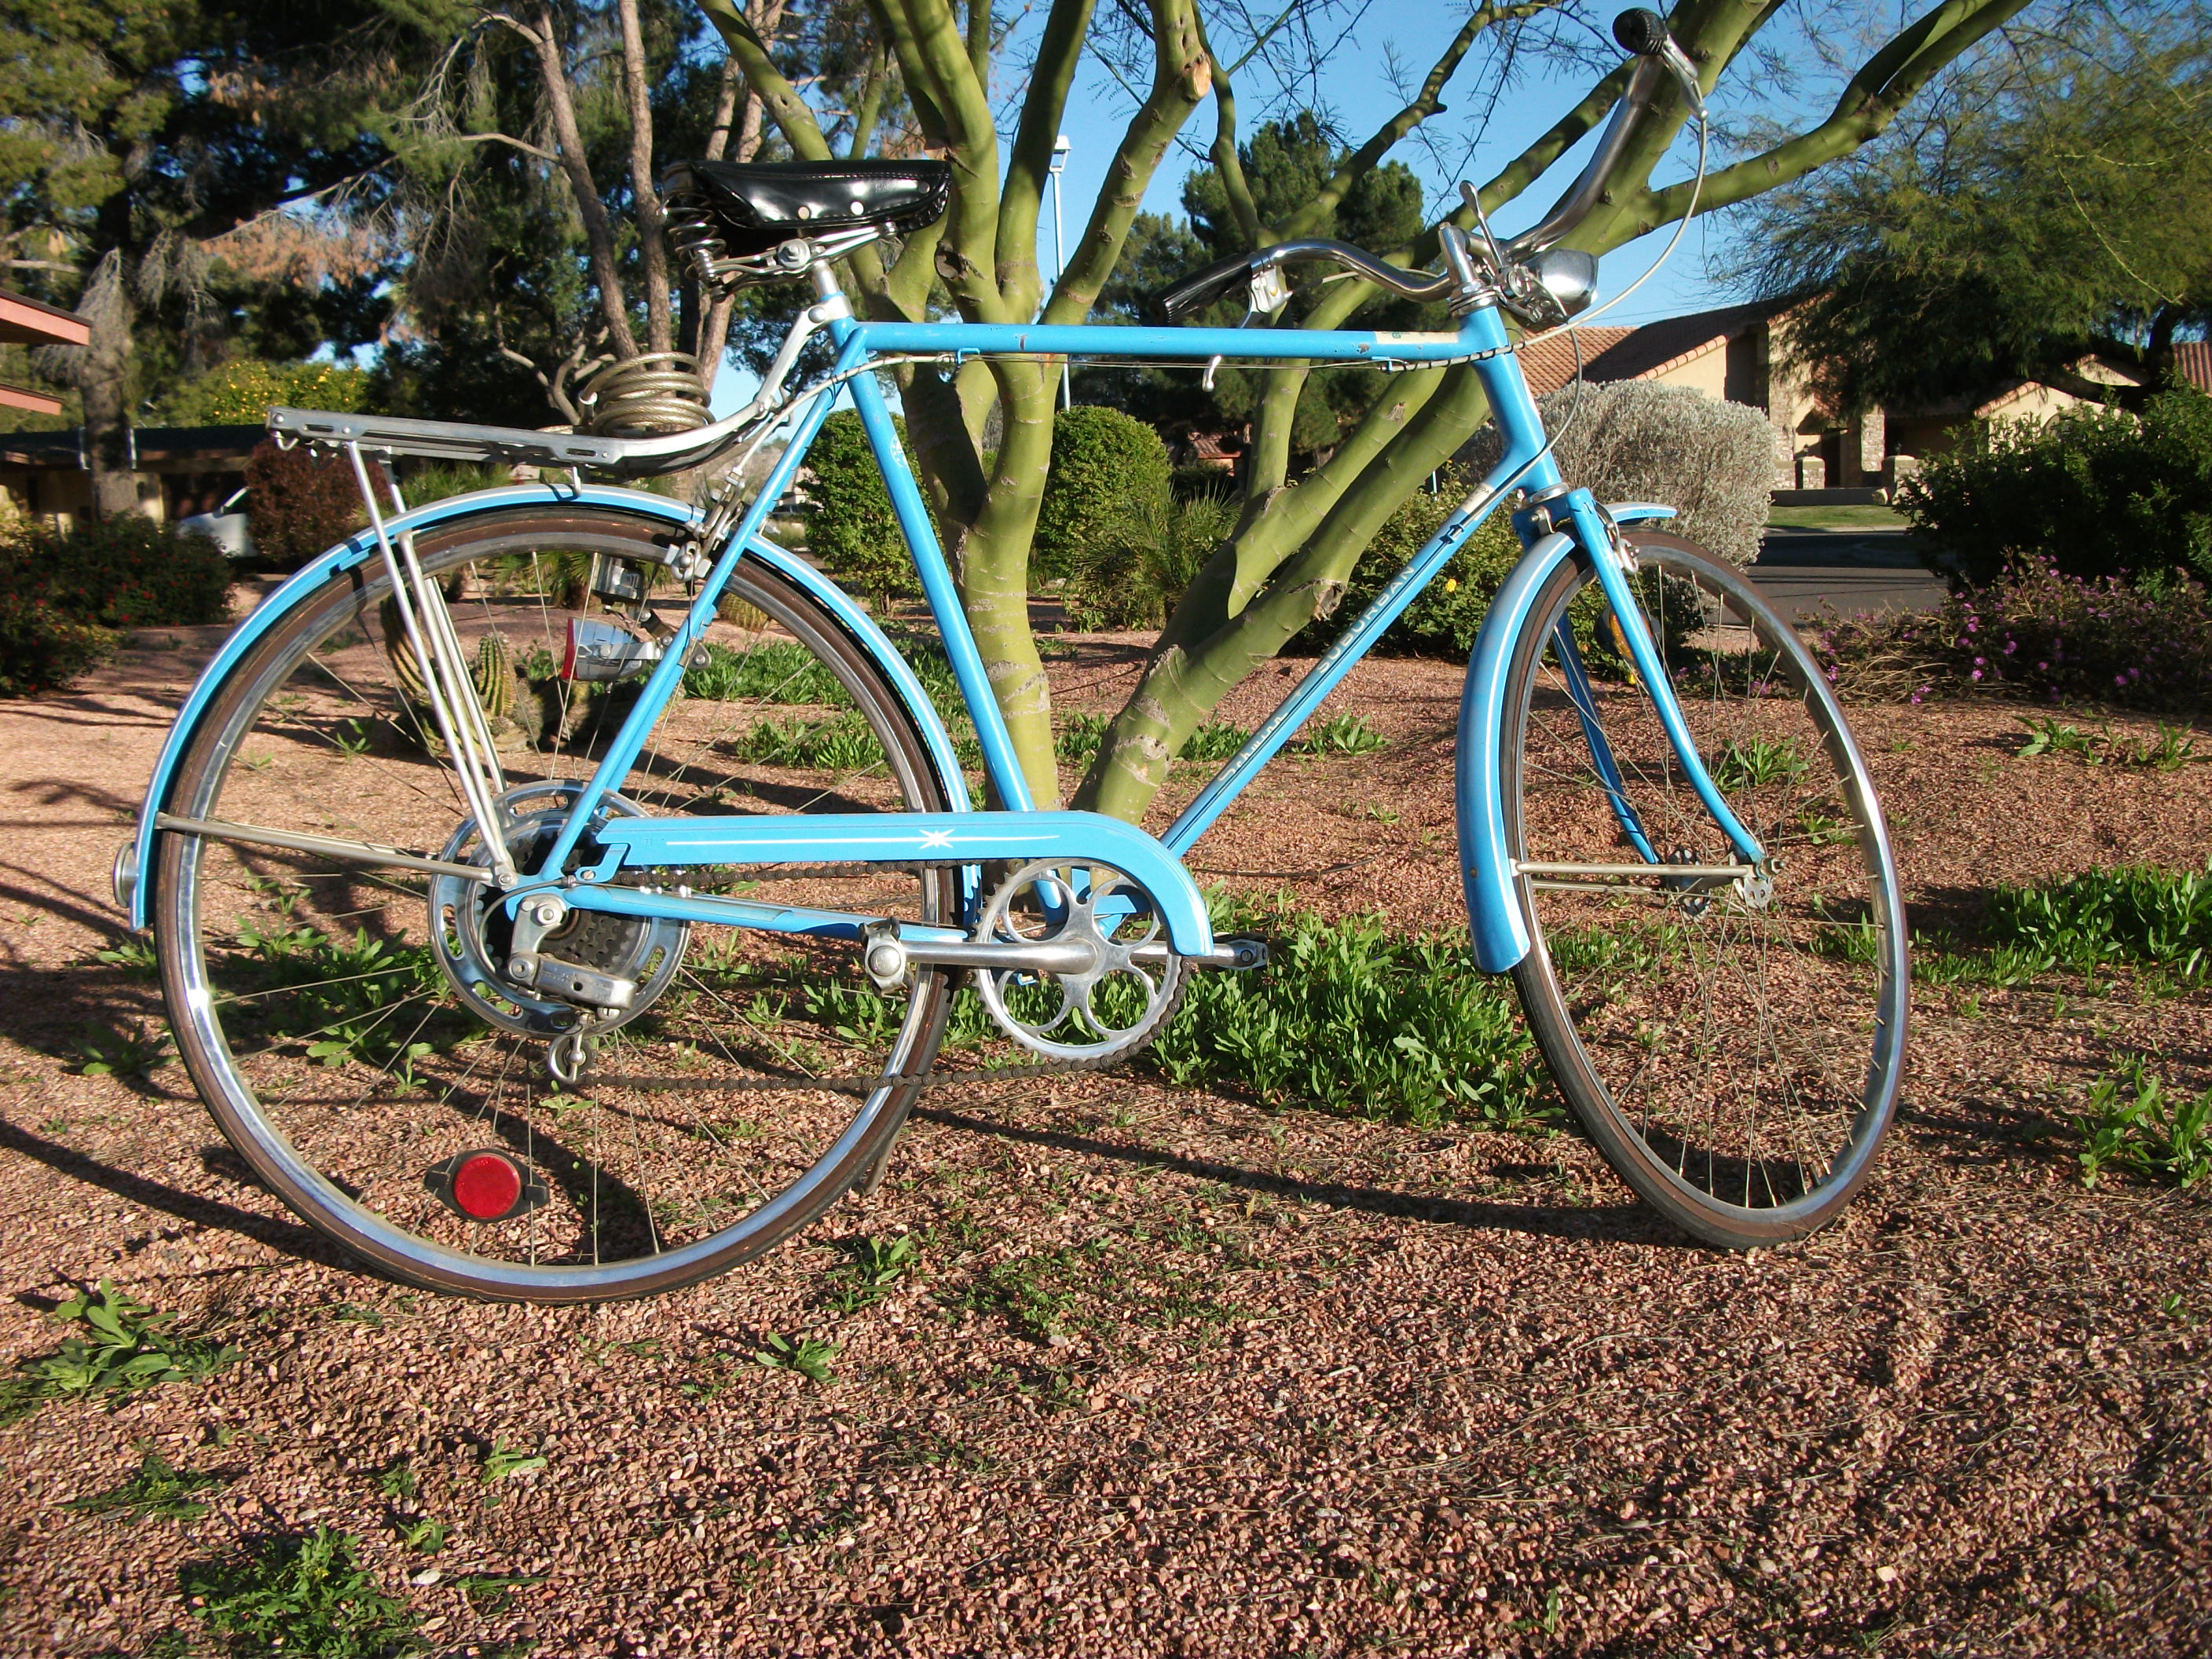
Well, after more than 100 hours of painstaking refurbishing, the 5 speed Suburban went on it’s shakedown cruise today, the last day of February. Oh, the nostalgic feeling that it gives me as it instantly took me back 46 years to the Schwinn shop, and the feeling of pulling a new bike out of the box, assembling and adjusting it, and taking it around the block to be sure it was ready for a proud new owner. This bike has that new feeling. I have taken hundreds of pictures along the way, and none of them are as stunning as seeing this old beauty in person. I wish you were here! The new stainless steel spokes were the finishing touch, and I’m so glad that I rebuilt both wheels with them.
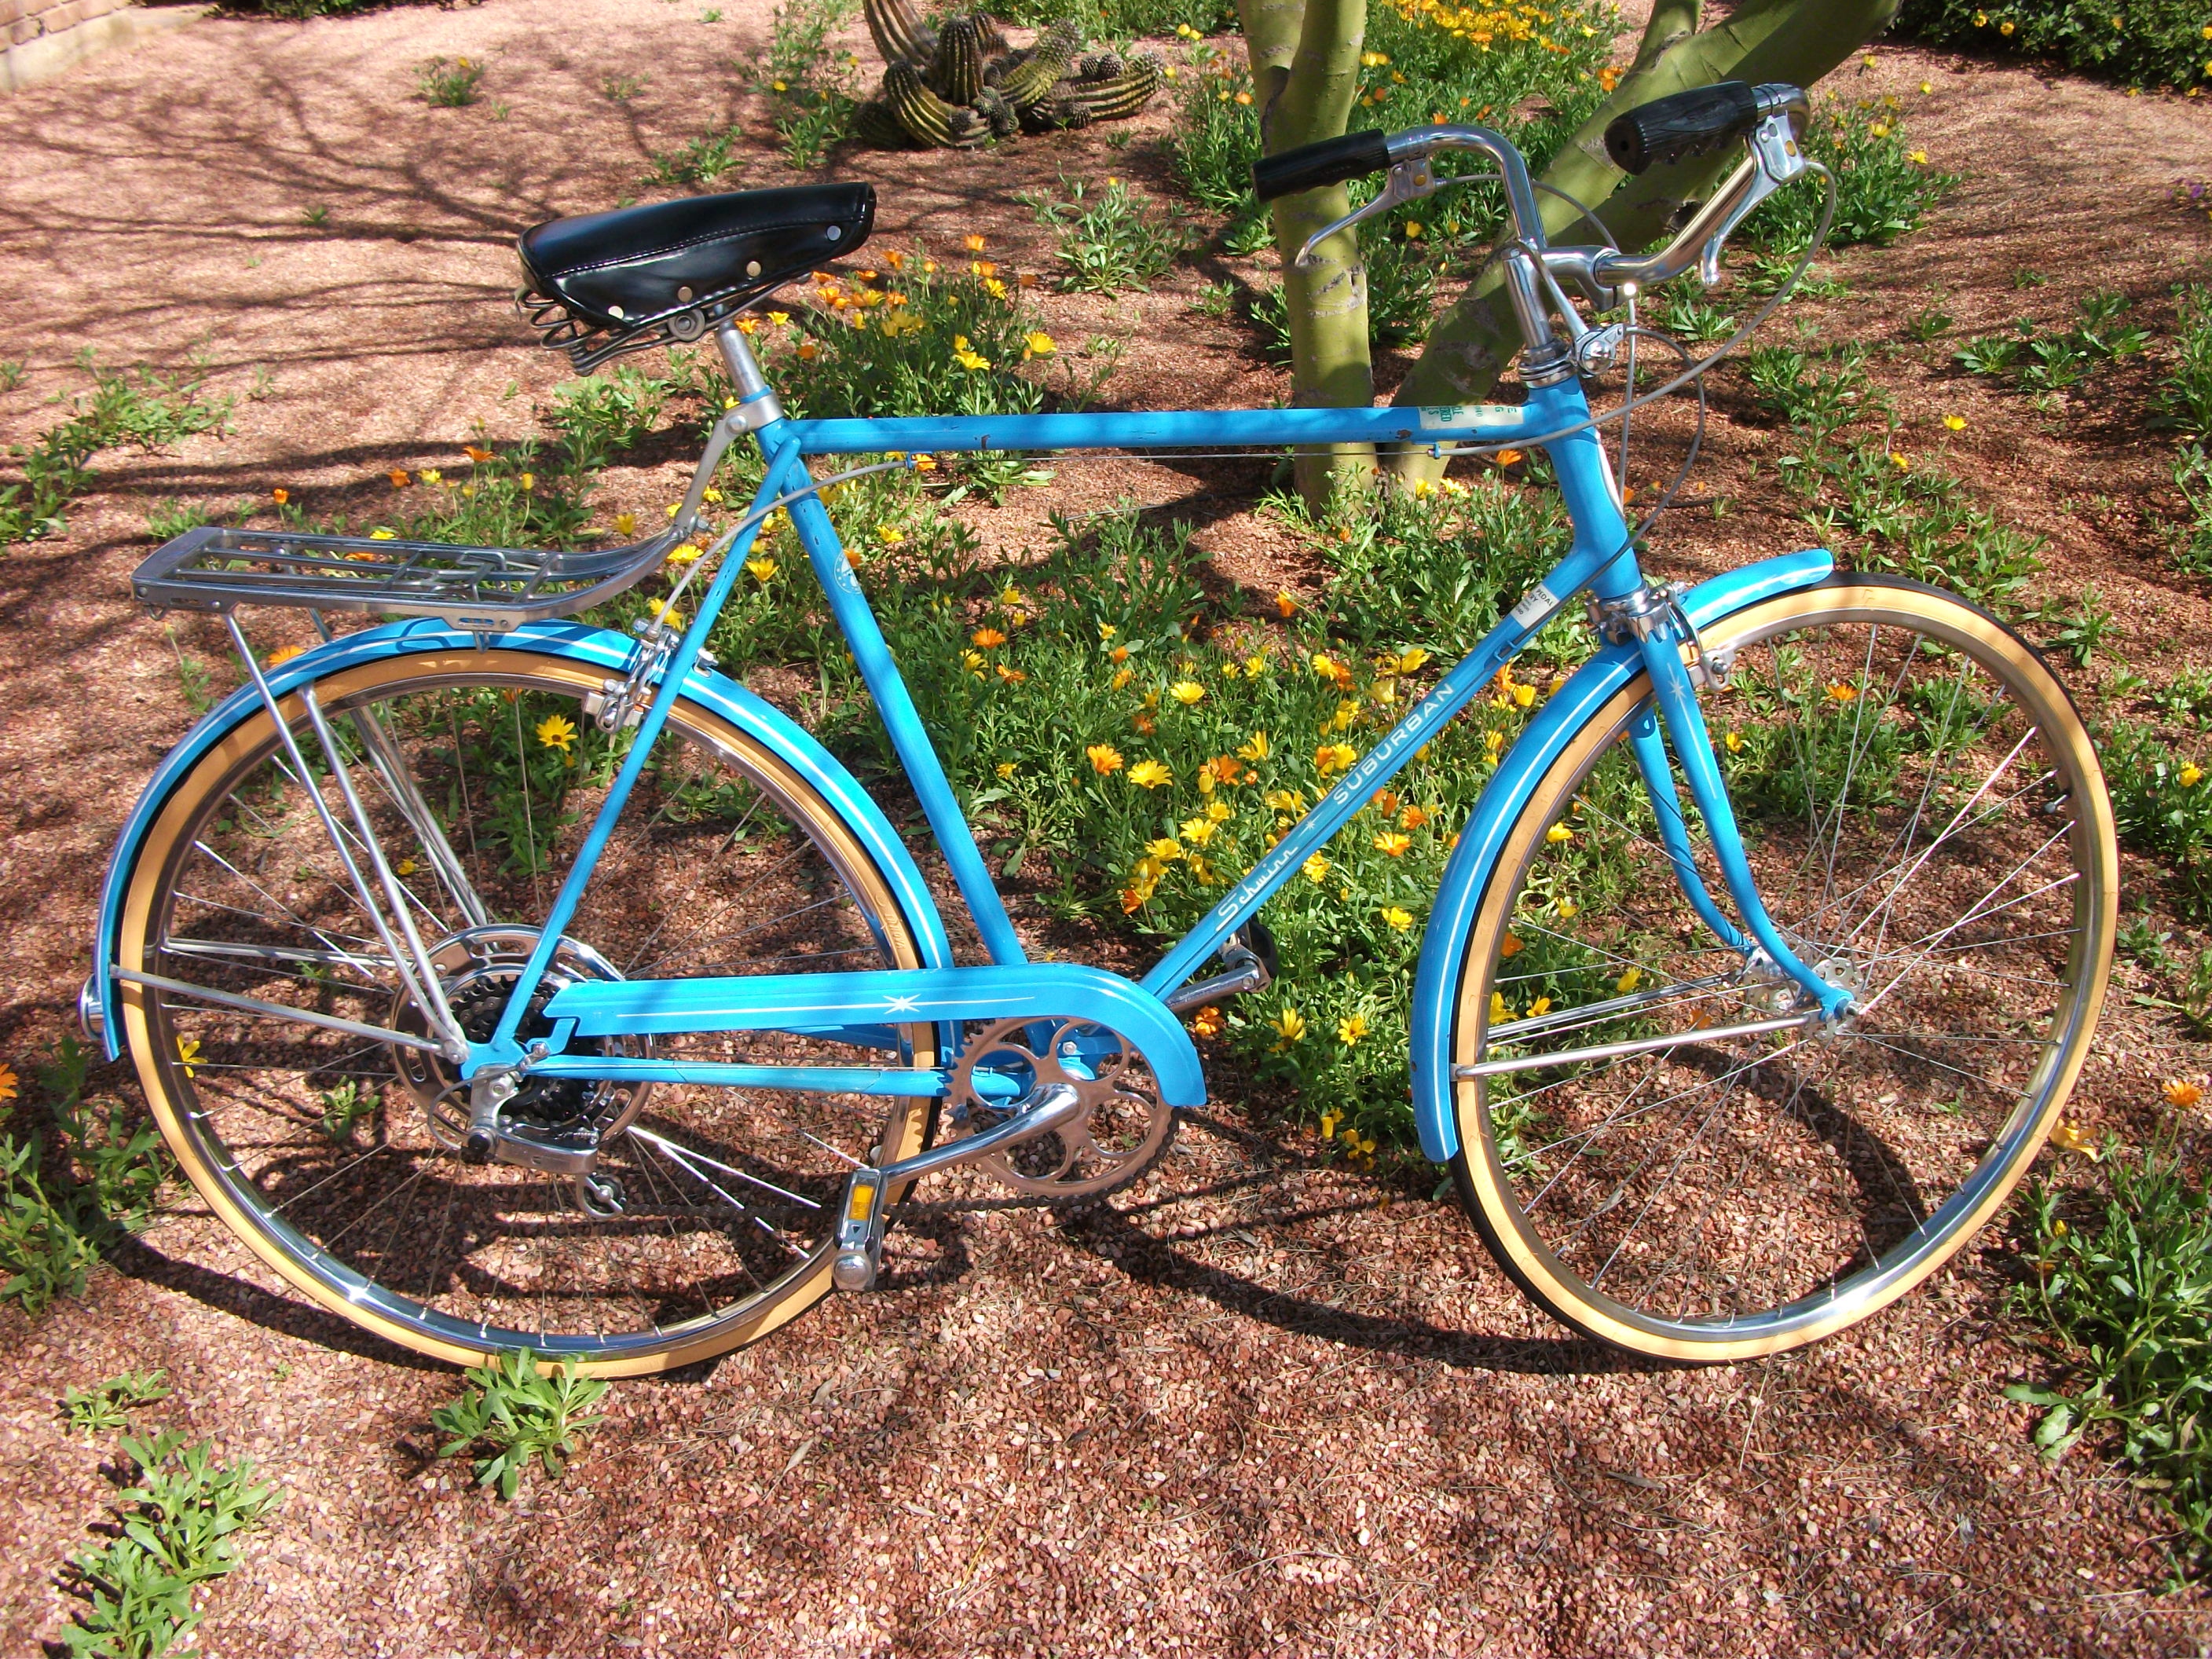
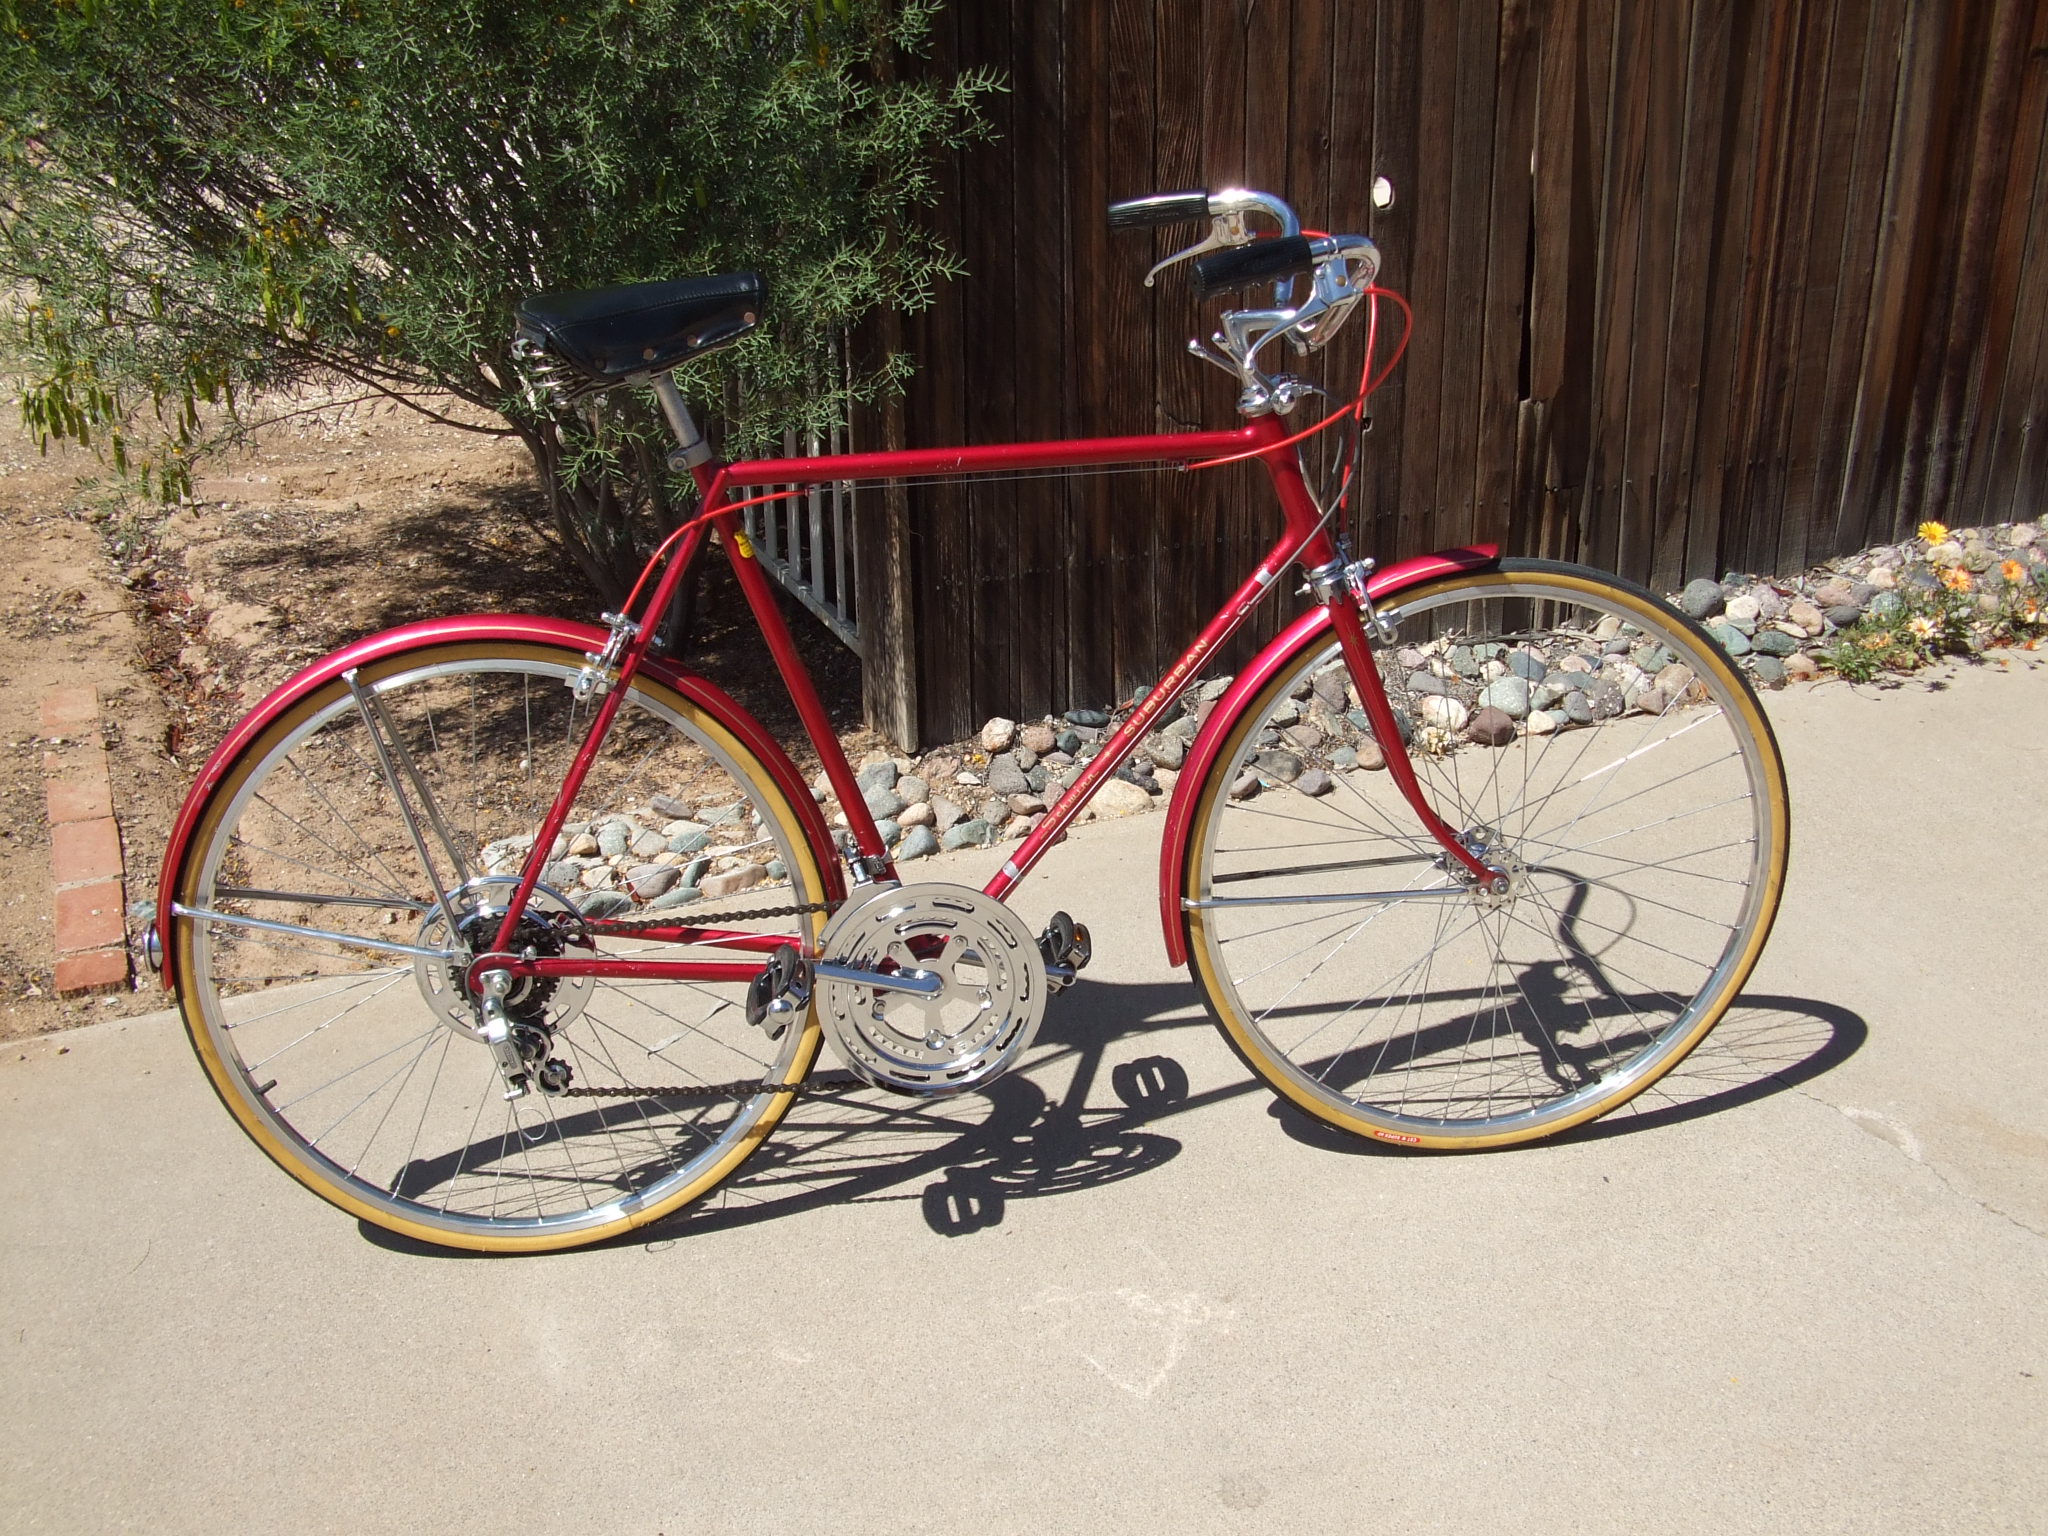
This Opaque Blue suburban has become my favorite “cruiser.” Whenever I want to take a spin around the block, it’s the bike I pull off the rack and air up. It is uncommonly smooth and solid, and the range of gearing is equivalent to the 10 speed bikes because of the wide-range cluster and derailleur, just with fewer incremental steps.
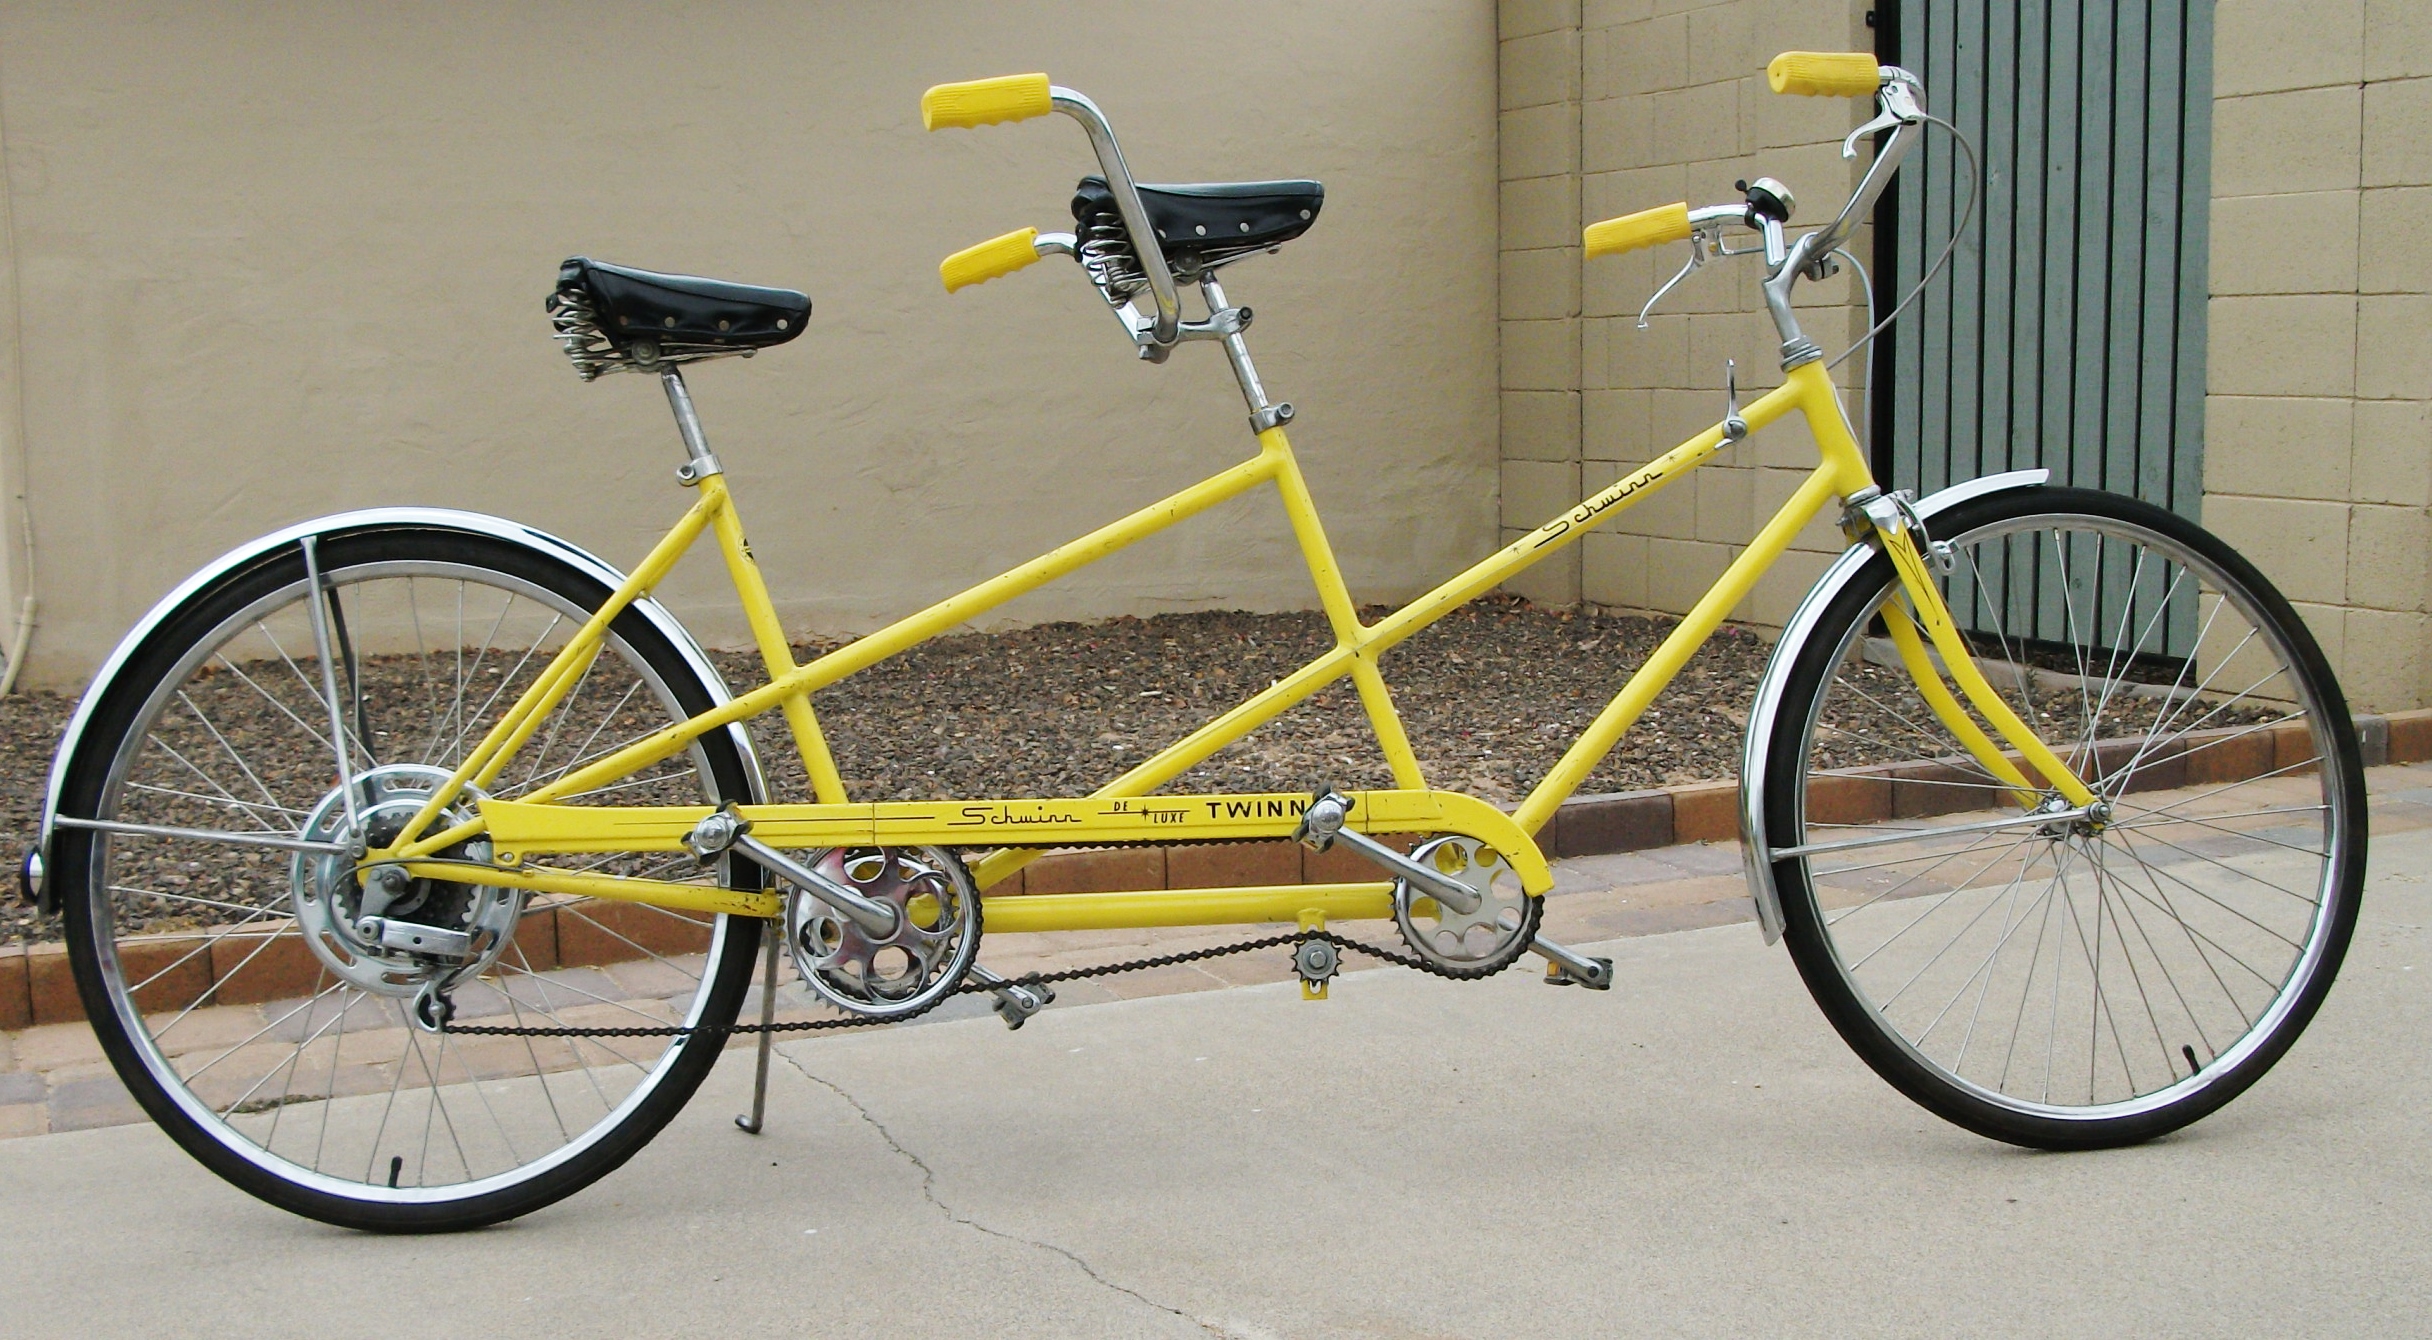
Recently, I stumbled onto this very restorable Lemon Yellow Twinn, and it’s next on my list of winter projects. I am accumulating parts for it daily.
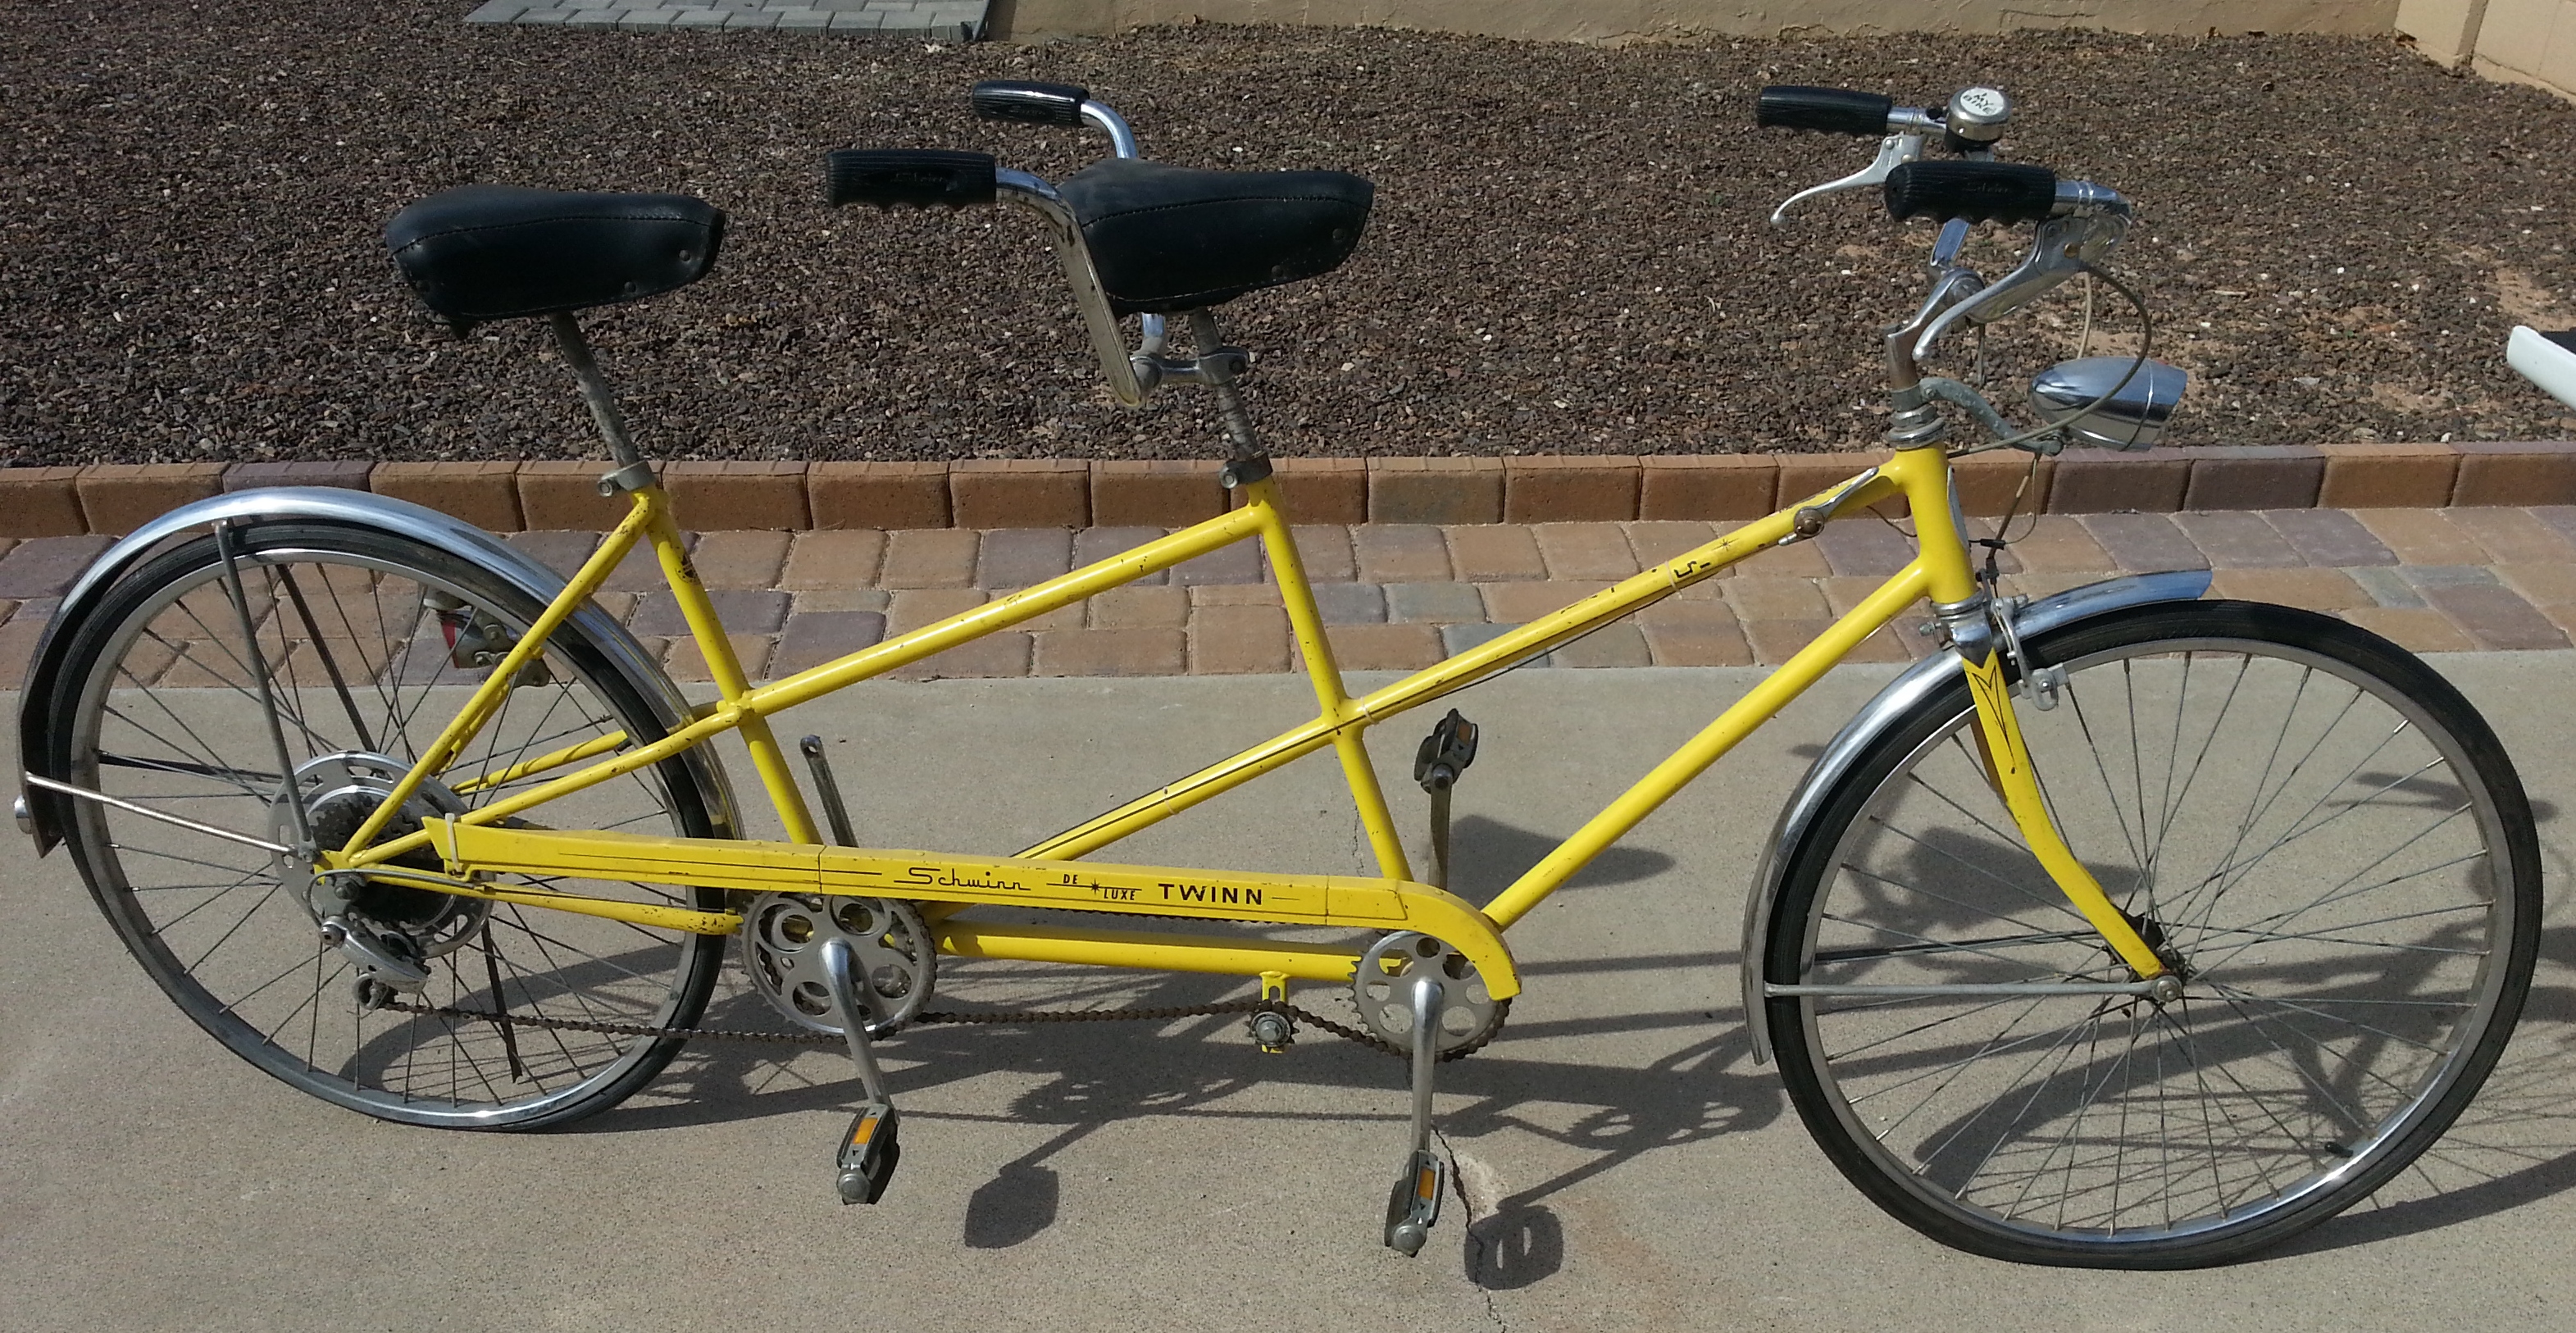
The 1973 Schwinn Twinn Tandem in Cool Lemon has been brought back from its neglected and failing state to ride again after years in storage at its previous owner’s residence. I suspected that it may have been stored outside, albeit under cover, as on a back porch or the like for many years. The accumulation of baked-on grime, oxidized paint, and “flug rost” indicated less than optimal storage, and the badly dried out bearings everywhere confirmed long term neglect.
This was one of the more involved refurbishments I have done, because in addition to many parts stiffened with old dried grease and grime, the derailleur apparently took a hit when the bike must have fallen over at one time. A significant gouge on the chrome, and a bent derailleur body signaled the need to affect a complete disassembly and repair, after which, on-frame alignment took repeated careful bending back to the original shape.
The original frame decals were beyond saving, and although they are a bit of a compromise, vinyl replacements were installed after the remnants of the originals were gently buffed off. Water transfer decals would have been more original, but with the bike destined to be more of a “rider” than a museum restoration, I decided that vinyl decals were adequate. If nothing else, they are certainly more durable. Fortunately, the chain guard decals were in very nice original condition, and required nothing more than a careful buffing and wax.
One of the biggest challenges was the restoration of the wide-range 5 speed gear cluster. Despite soaking in solvent for nearly two weeks and repeated flushing and many cubic feet of compressed air, the bearings on the freewheel hub were still “grouchy.” Fearing the worst, I undertook a procedure that, even for me, is rare; that is, the complete disassembly of the cluster and freewheel sprag. Of course, the upper retainer plate / bearing race was extremely tight, and resisted every effort of the pin spanner. I finally had to round the head of a drift punch and apply hammer force to loosen it. And yes, I was turning it the right way, which in this case is backwards as it has a left-hand thread. With ninety-odd 1/8″ loose ball bearings, and ratchet pawls and springs threatening to fly apart, I was extremely careful as I separated the hub from the body, but the procedure went smoothly, and the concretions on the bearing balls and races accounted for the roughness. Some stronger solvent, a brass wire brush, and a slew of new bearing balls set everything back to normal once the parts were re-assembled with a generous coating of Lubriplate 130-AA.
I was thrilled to see that many of the “detail” pieces were on the bike when I got it, as they constitute the final touches that make a restoration complete, but are often not done because they are so hard to find. For example, the little cable ferrule where the cable leaves the shift handle housing, is often overlooked. Unfortunately, the rear reflector was shattered, and I used a knock-off to replace it, but it is the correct diameter and pattern, and the original curved chrome fender mount bezel was still on the bike when I got it. I also used “correct” hardware to attach the chain guard and the drum brake reaction arm, instead of the hardware-store generic pieces that it came to me with.
So, this morning after inflating the tires to 65 psi, we played at “Captain and Stoker” and rode it around the block a few times, making minor fit adjustments between trips. As is true of all electro-forged Schwinn bikes of this era, it rides as smoothly and solidly as when it was new. With its silent drivetrain, super strong frame, and newly built wheels upgraded with new stainless-steel spokes, it is a true classic, reborn. What a laugh we had!
Here is a “finished” picture;
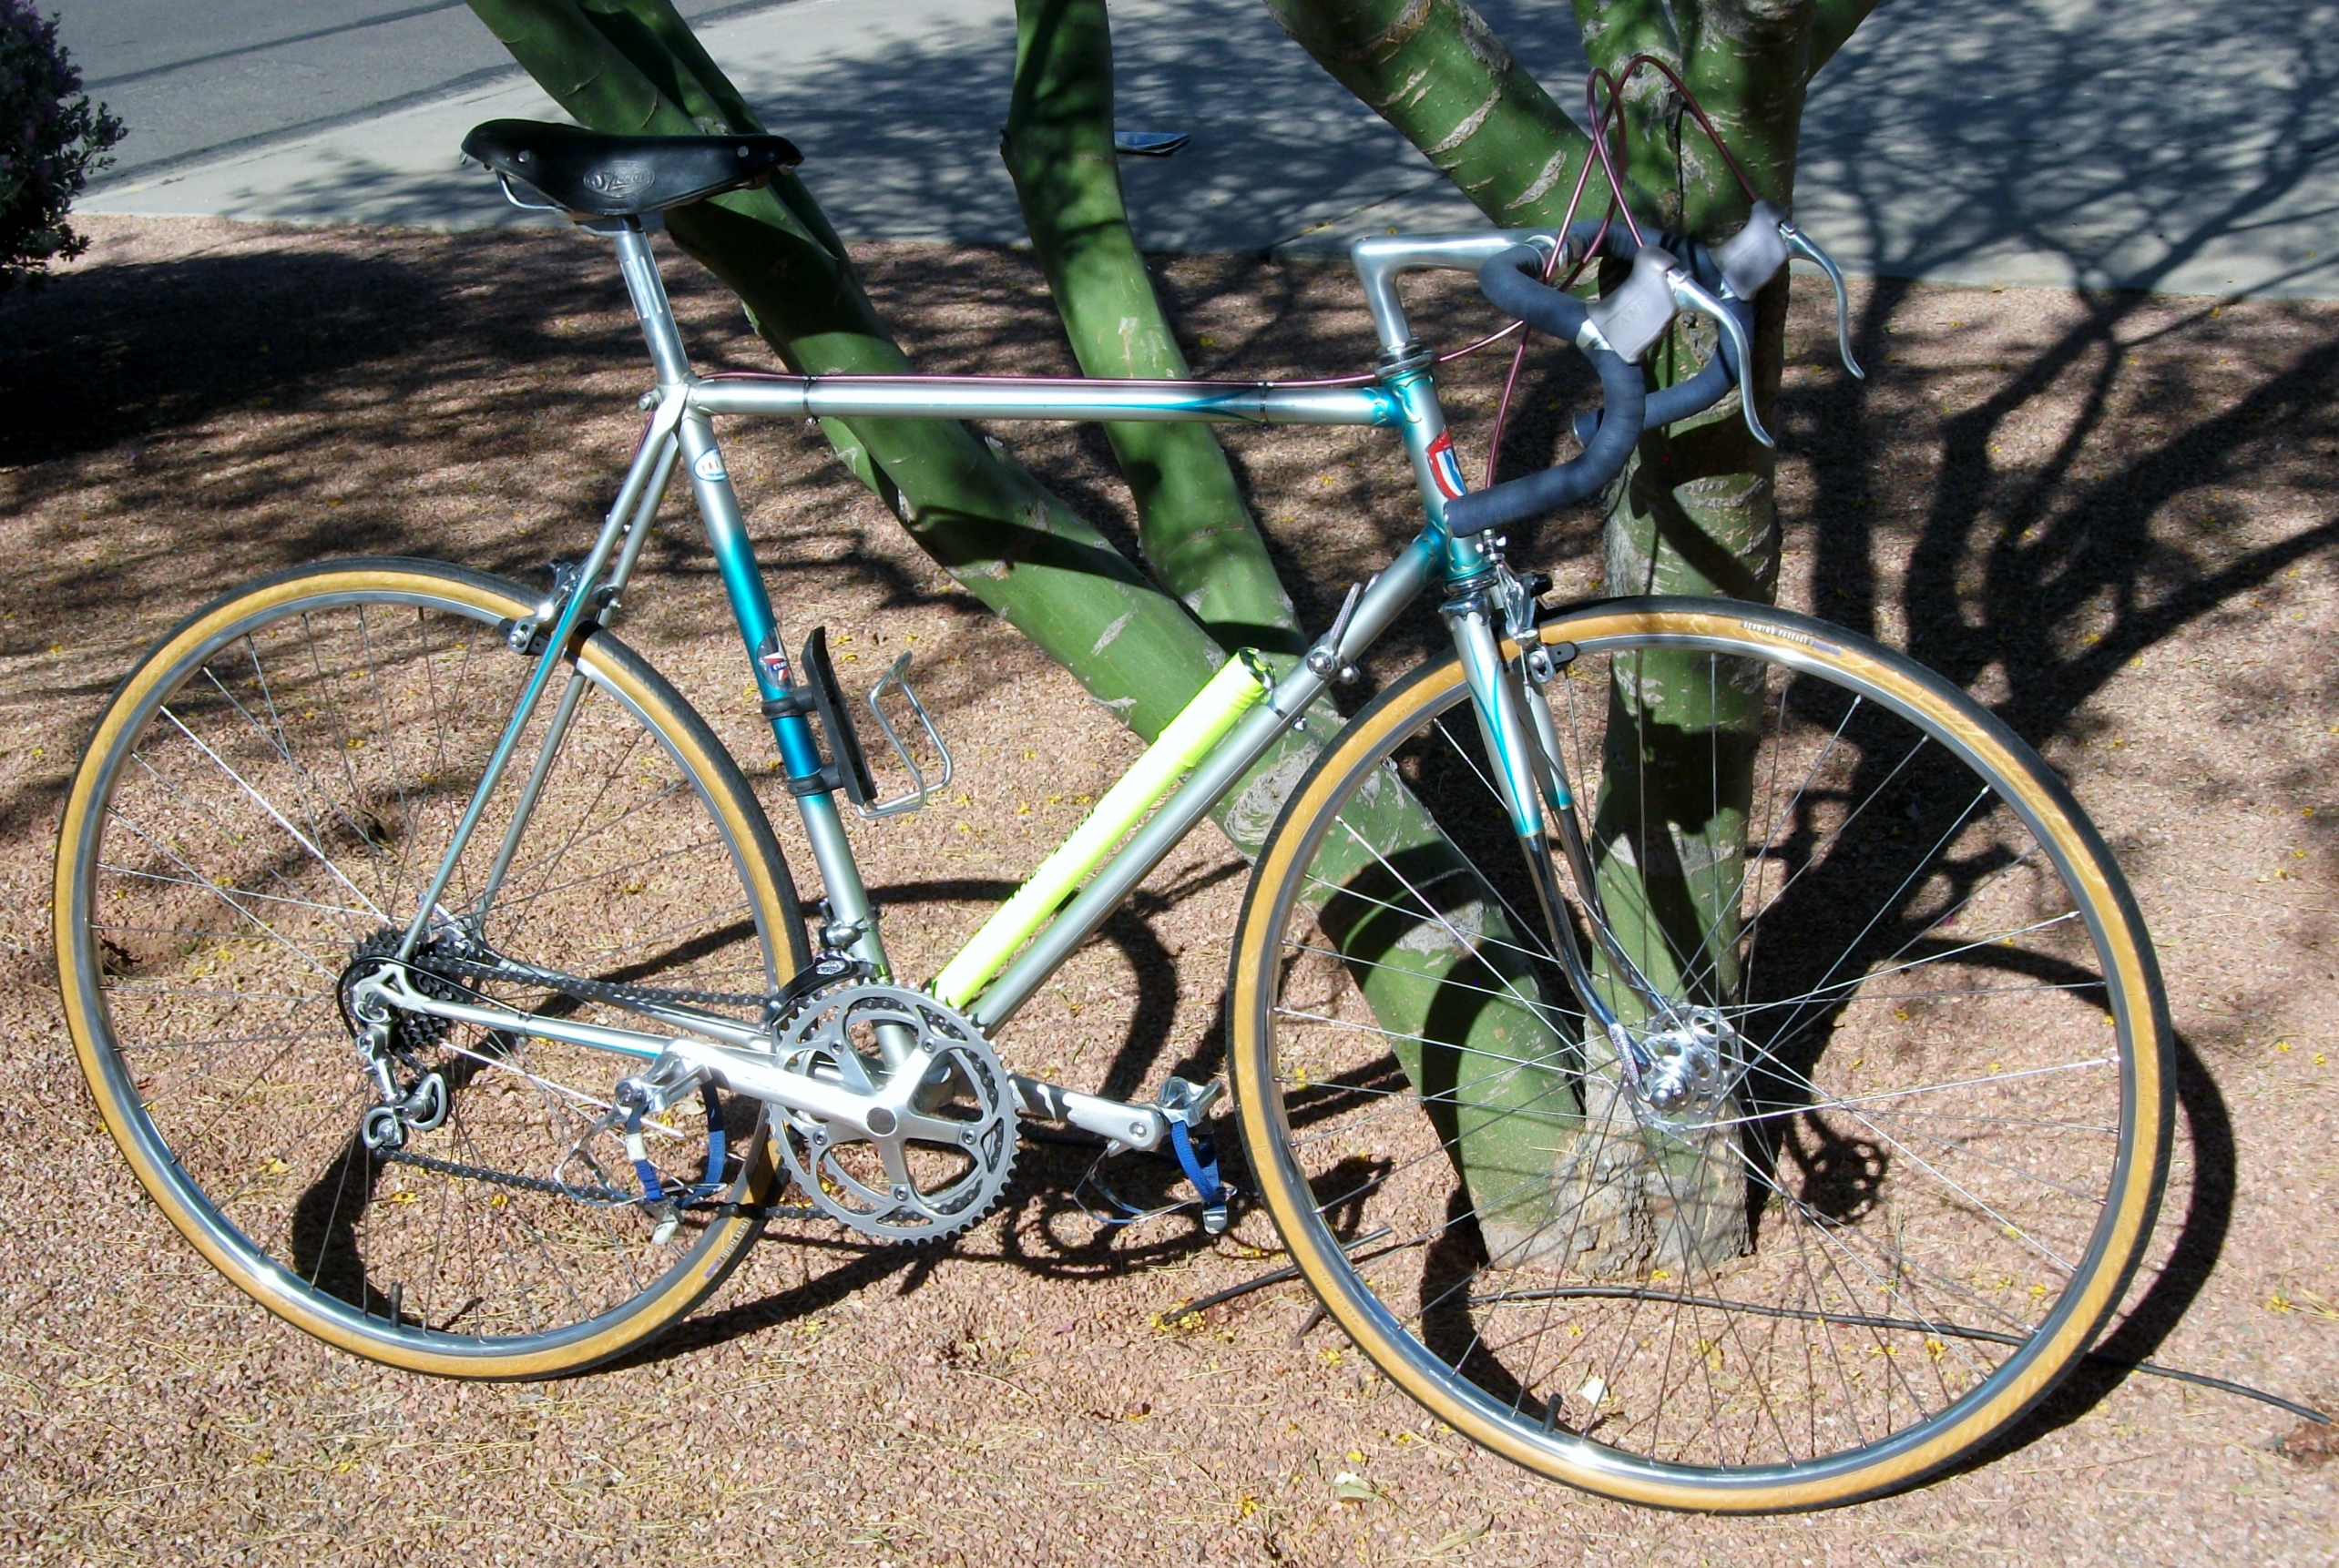
This next bike is the one I am most sentimentally attached to. Purchased as a fork and frame that was hanging in the bike shop for months with me looking at it but unable to afford it, I finally talked the owner down in price after we had a massive rainstorm and 100’s of bikes stored in the store’s basement were flooded under water. Because all the shop’s “kids” worked all weekend non-stop to assemble and dry out the bikes, he let me buy this Paris Sport frame at a price I could afford. I think I was 16 years old at the time. Each week, I would use part of my paycheck to buy more components, install them, and hang the evolving bike back up over the cash register. I still remember distinctly, the day I finished it and took it on its first ride. I have put thousands of miles on this bike, and have changed many of its parts over the years. I still have 90% of the original parts, like the Nervar Star crankset, the Triplex derailleurs and the sew up wheels. It needs a very thorough refurb, at which time it will also get Campy shift levers, Campy cable clamps, and the original crankset reinstalled. It has Campy hubs and a Huret Jubilee rear derailleur.
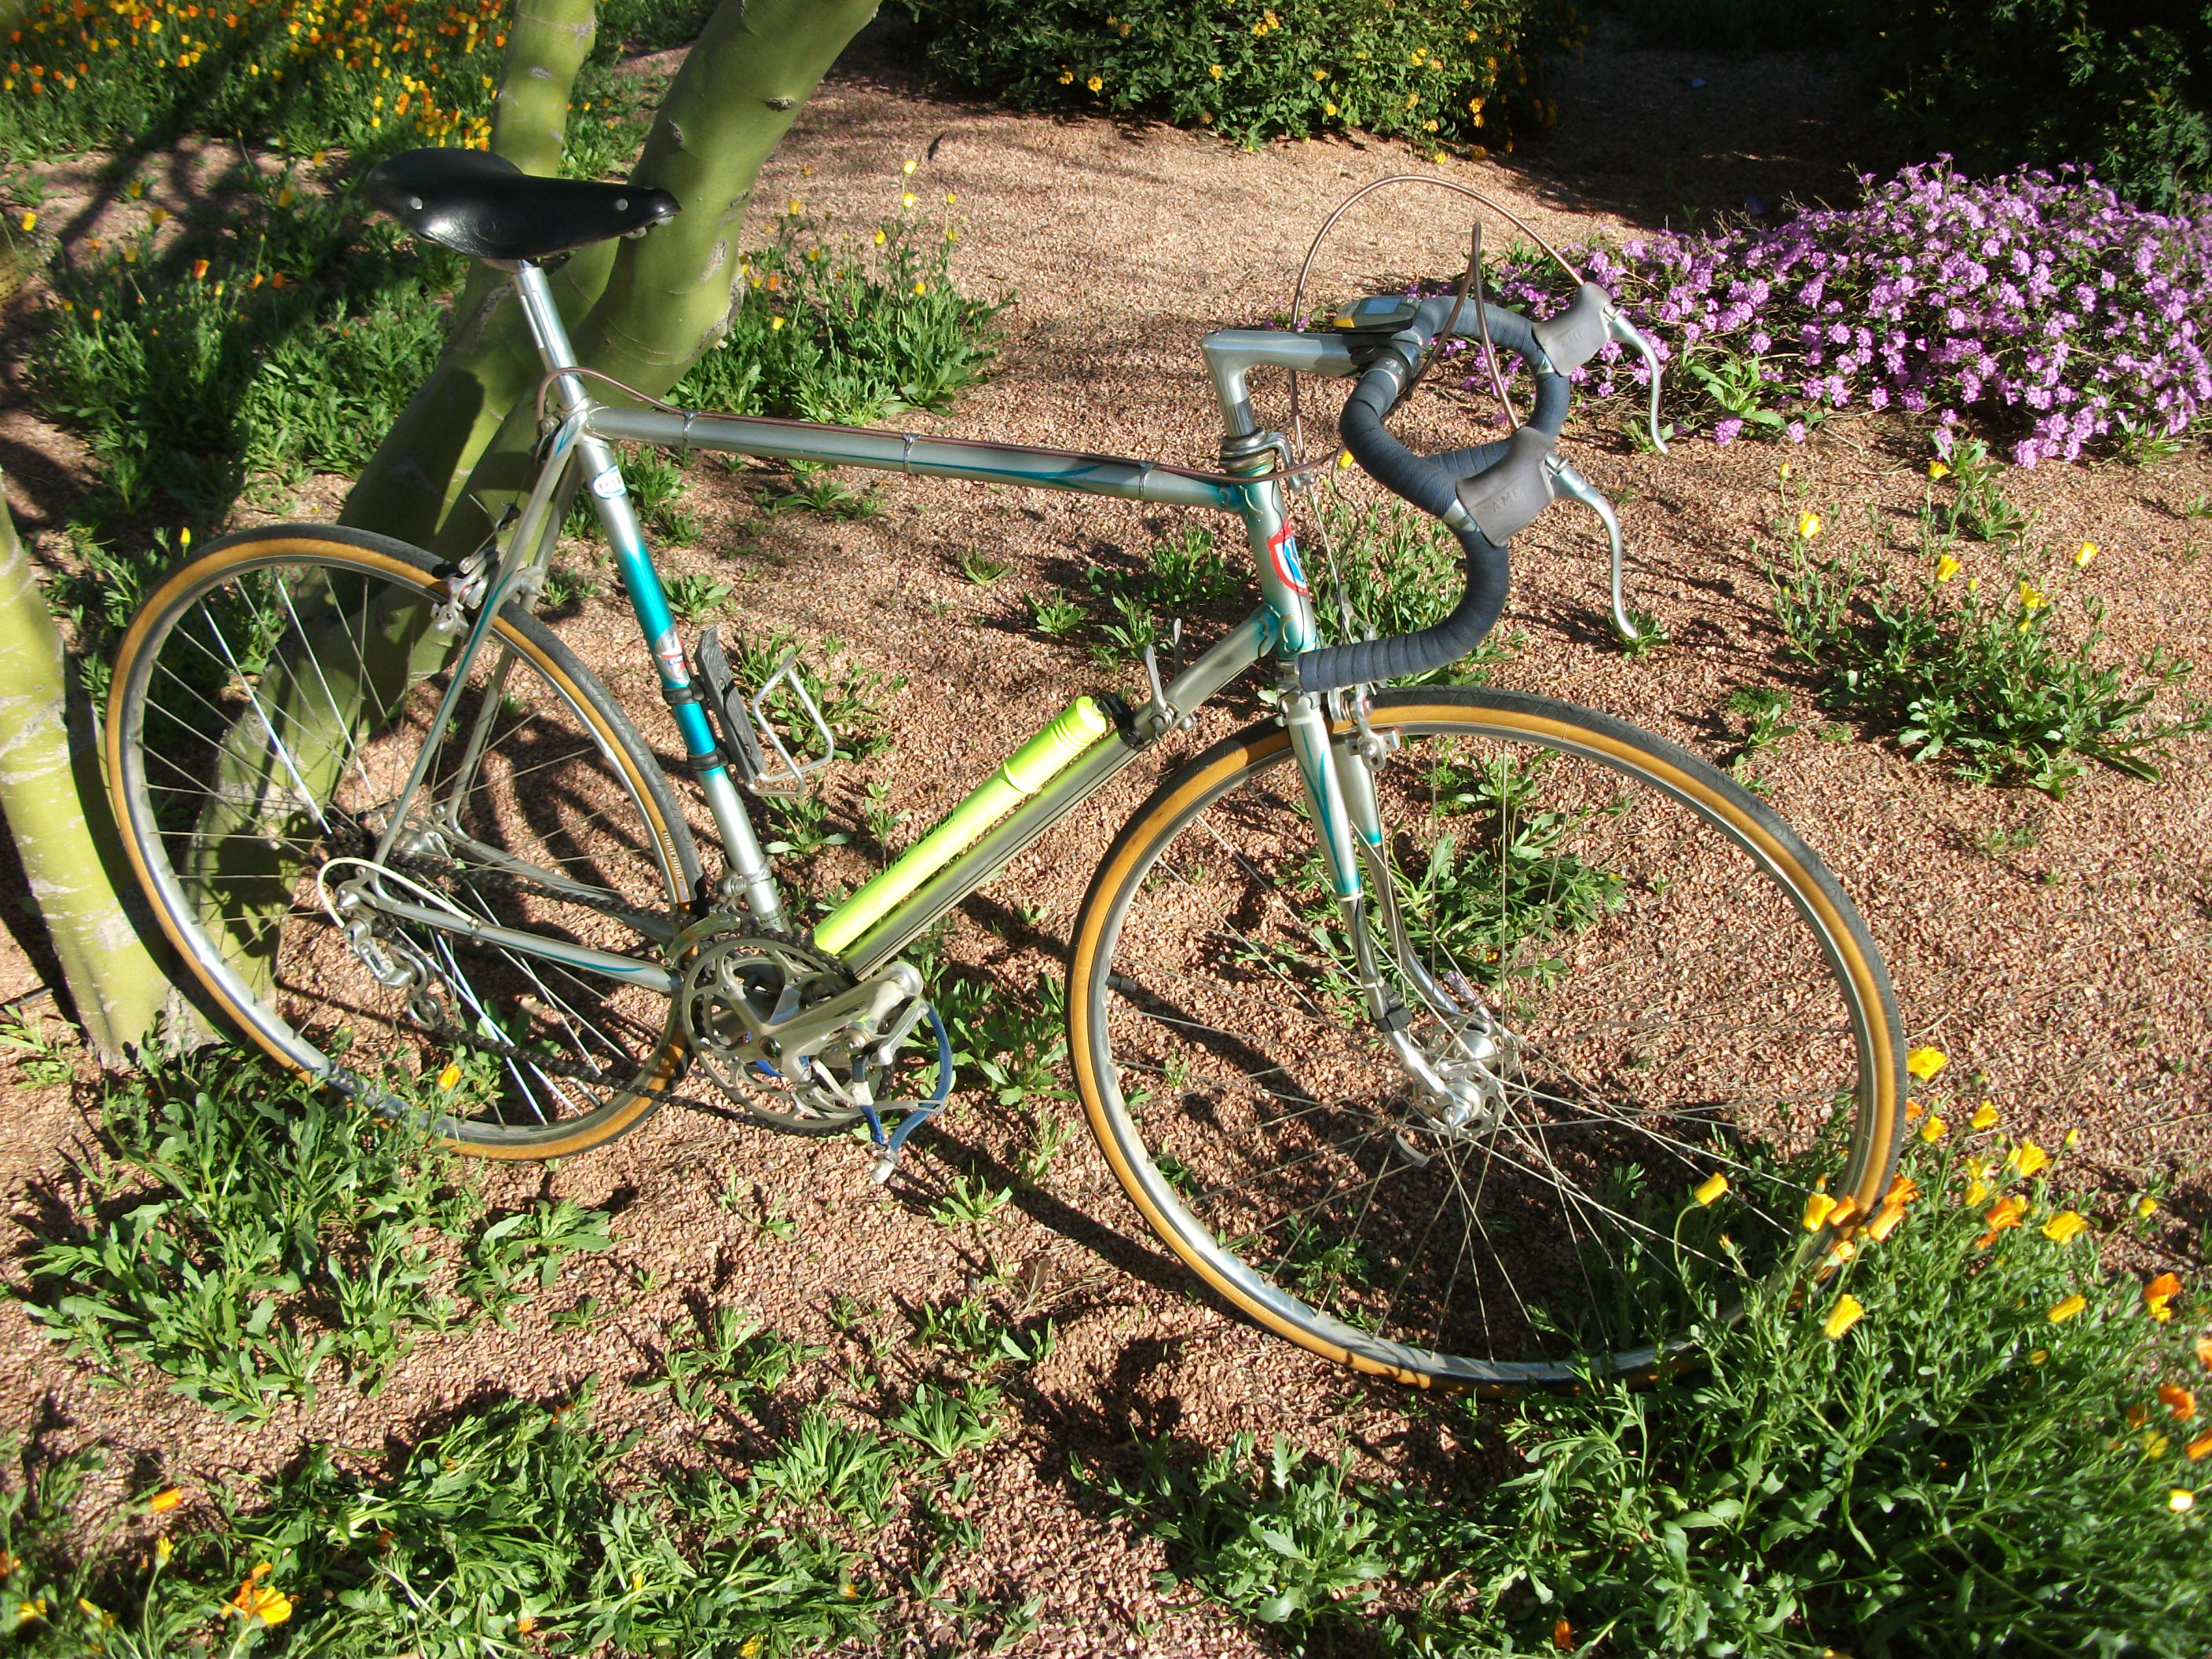
I write this entry in June of 2017, and the Paris Sport has undergone the aforementioned refurb. My goal was to keep its original character as much as possible, and concentrate on making the “mechanicals” work like new again, and clean off the years or accumulated storage and road mung. In the process, though I discovered some interesting problems that I didn’t anticipate. The biggest of these was at the top of the fork. Apparently, when I put it together 47 or so years ago, I was braver (cavalier?) than I am today. Back then, I set it up with Weinmann center-pull brakes. The necessary cable stop mounted to the front fork top left only a few threads for the steering head locknut, but it did hold fast all these years and through thousands of miles. None-the-less, after servicing the head bearings, I didn’t want to reinstall that important nut on so few threads, so I converted over to newly purchased side pull brakes which allowed me to remove the 3mm thick cable stop bracket and gain me a comfortable thread purchase on the head locknut. I used newly manufactured Dia-Compe side pulls that are made in the vintage style, and have the necessary long reach of 51mm front / 55mm rear that this frame requires for the Weinmann alloy rims.
Additionally, I replaced the shift levers with a set of NOS Campy levers with the beaded edges, and replaced the three top bar cable clips with NOS Campy clips also. Originally, I had two Huret clips and one Campy in the center. I very tediously refurbished the center Campagnolo clip and sent it to my brother for his new Gant racer for good luck. The picture below only shows 2 of the 3 clips, as I had lined them with clear tape, making the screws too short by 2mm, and I was still hunting for some slightly longer replacements. It turns out that these ancient Campy cable clips used a very odd screw; American machine screw #5 x 40 T.P.I. instead of an expected metric screw. The #5 machine screw is obsolete in today’s world and finding them locally was a challenge.
My plan to reinstall the original Nervar Star cranks was thwarted by the fact that they used the very odd and also rare “French” pedal thread of 14 X 1.25mm vs. the standard 9/16″ X 20 T.P.I. Once I reinstalled the cranks, I found that the only set of French threaded pedals I had were the original all-steel Lyotard ones that I replaced when I installed the Shimano 600 Tri-Color cranks and Campagnolo pedals 25 years or more ago. So, the Shimano cranks went back on after all. Lastly, the picture shows my fluorescent green Mt. Zefal pump installed in my new Campagnolo NOS pump umbrella clip. My brother said it looked like someone “wearing plaids with stripes” so I have since replaced it with a new black Zefal pump.
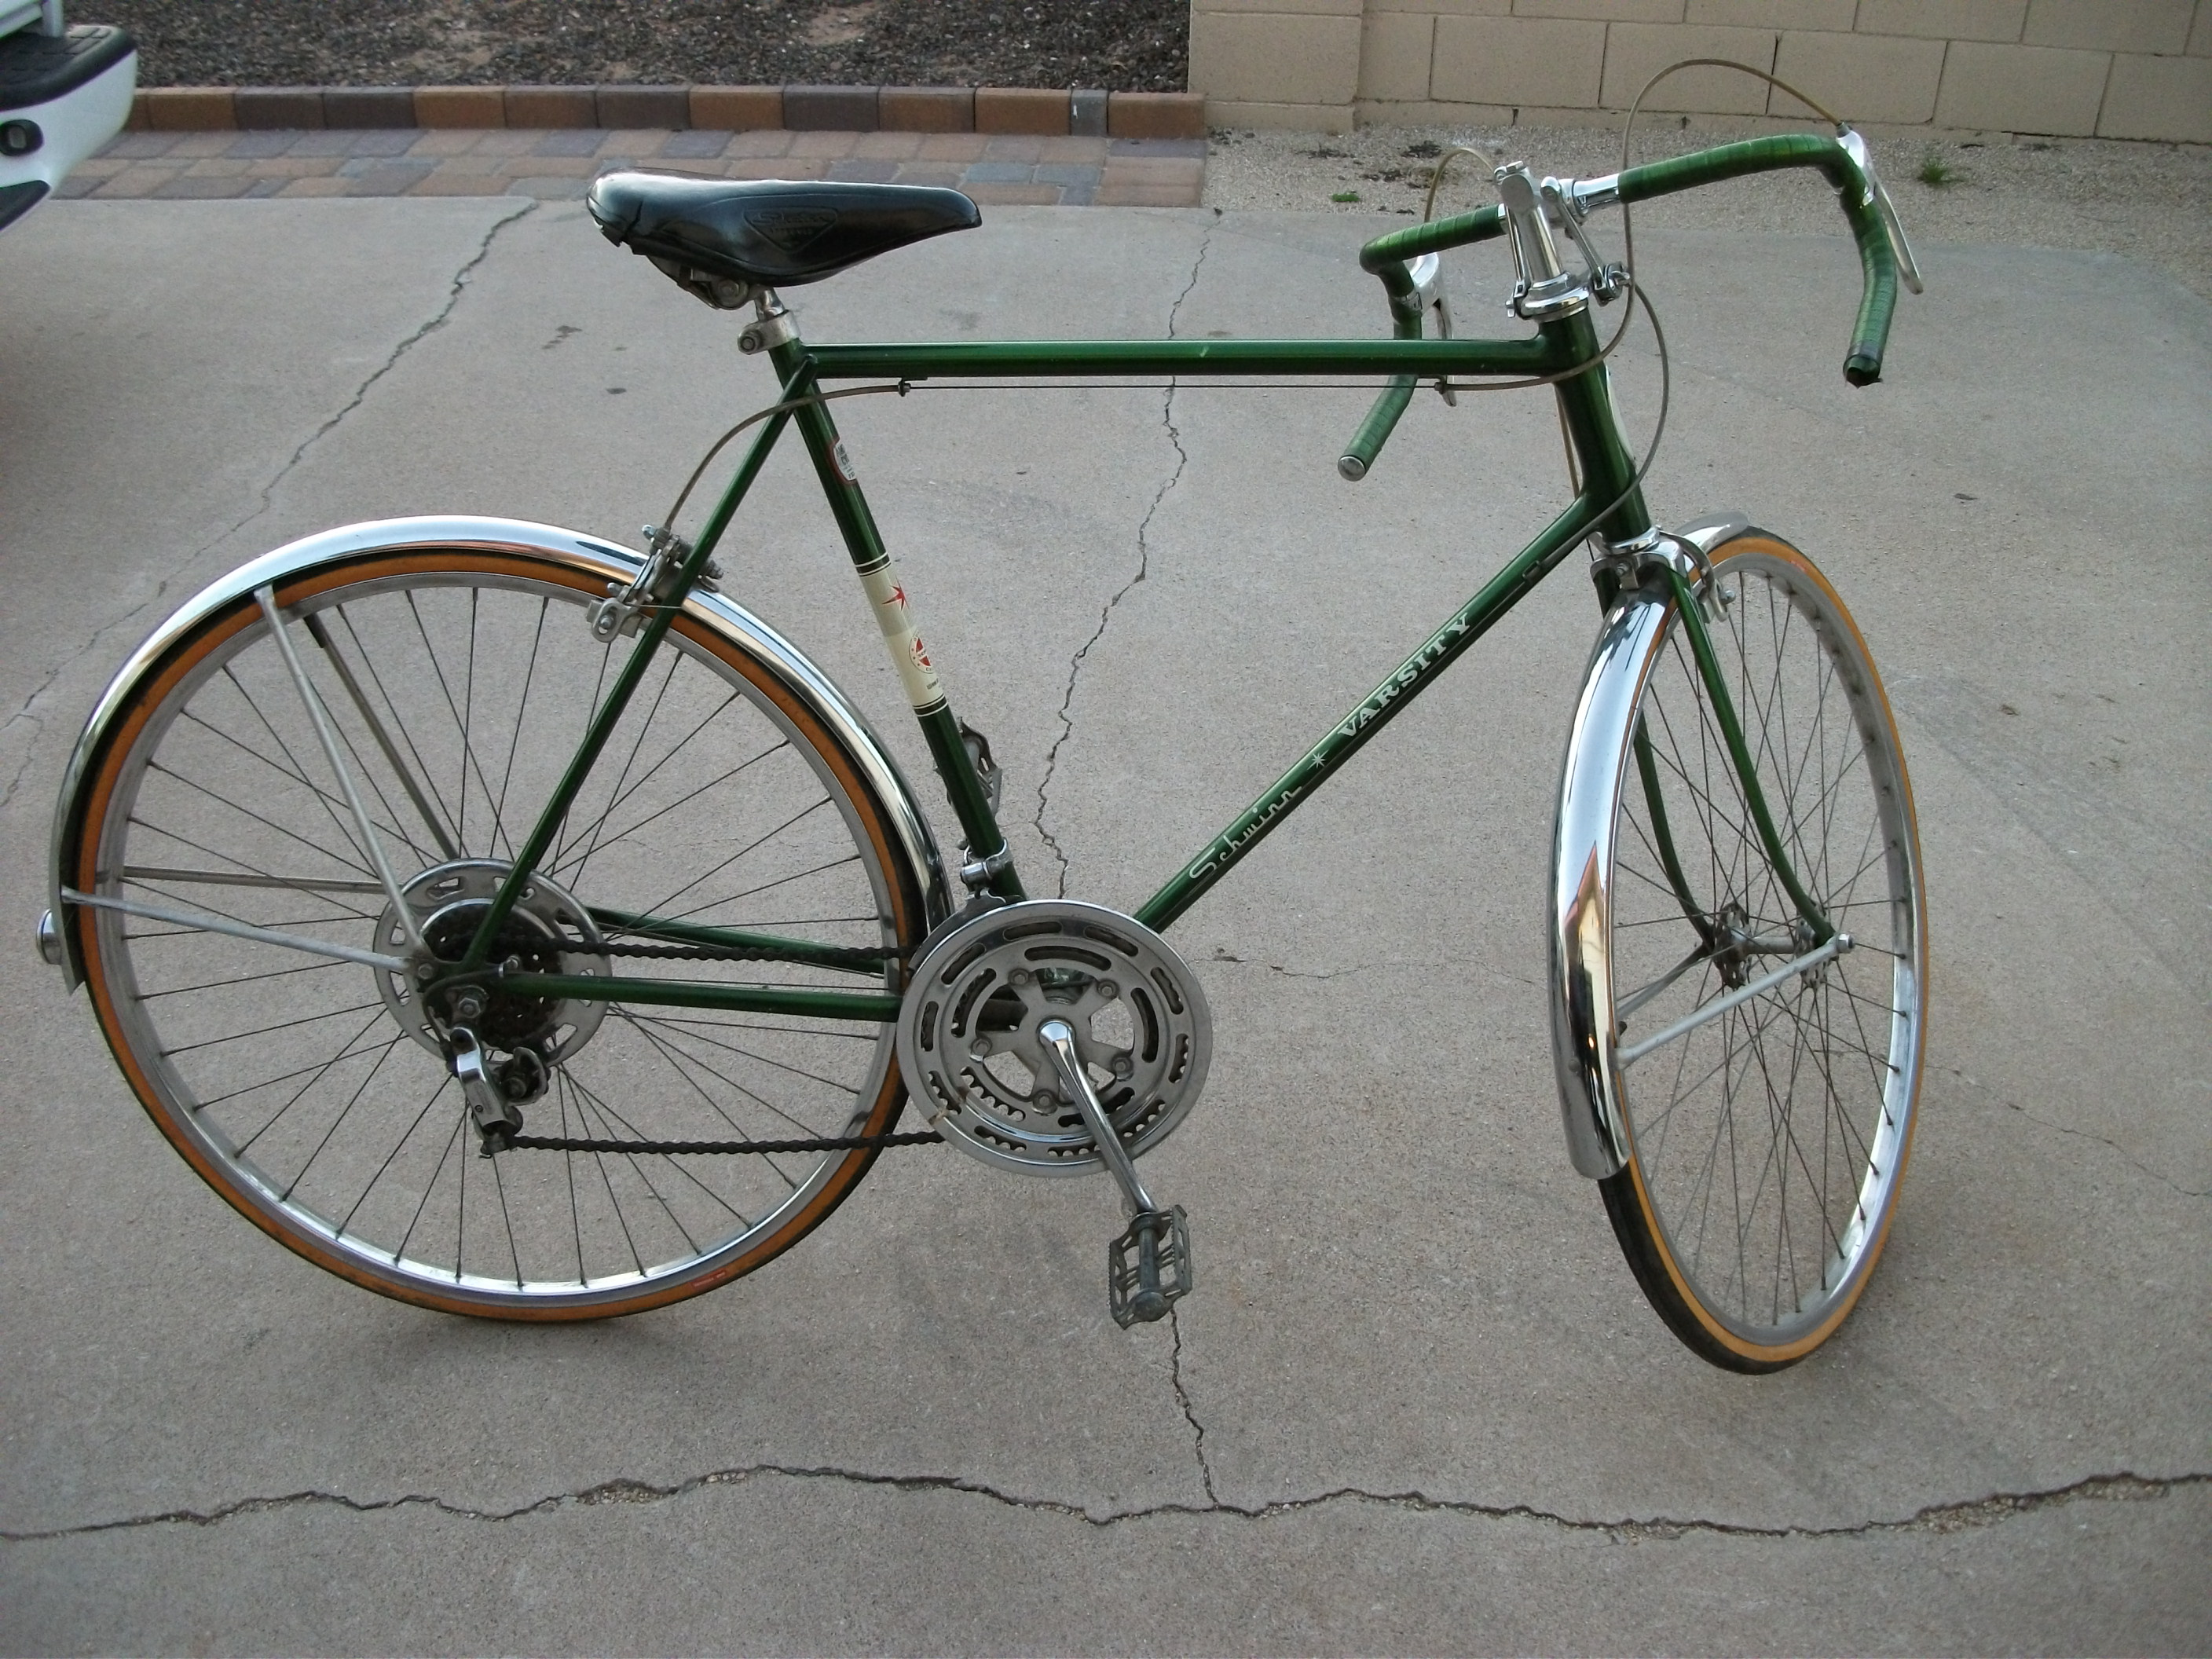
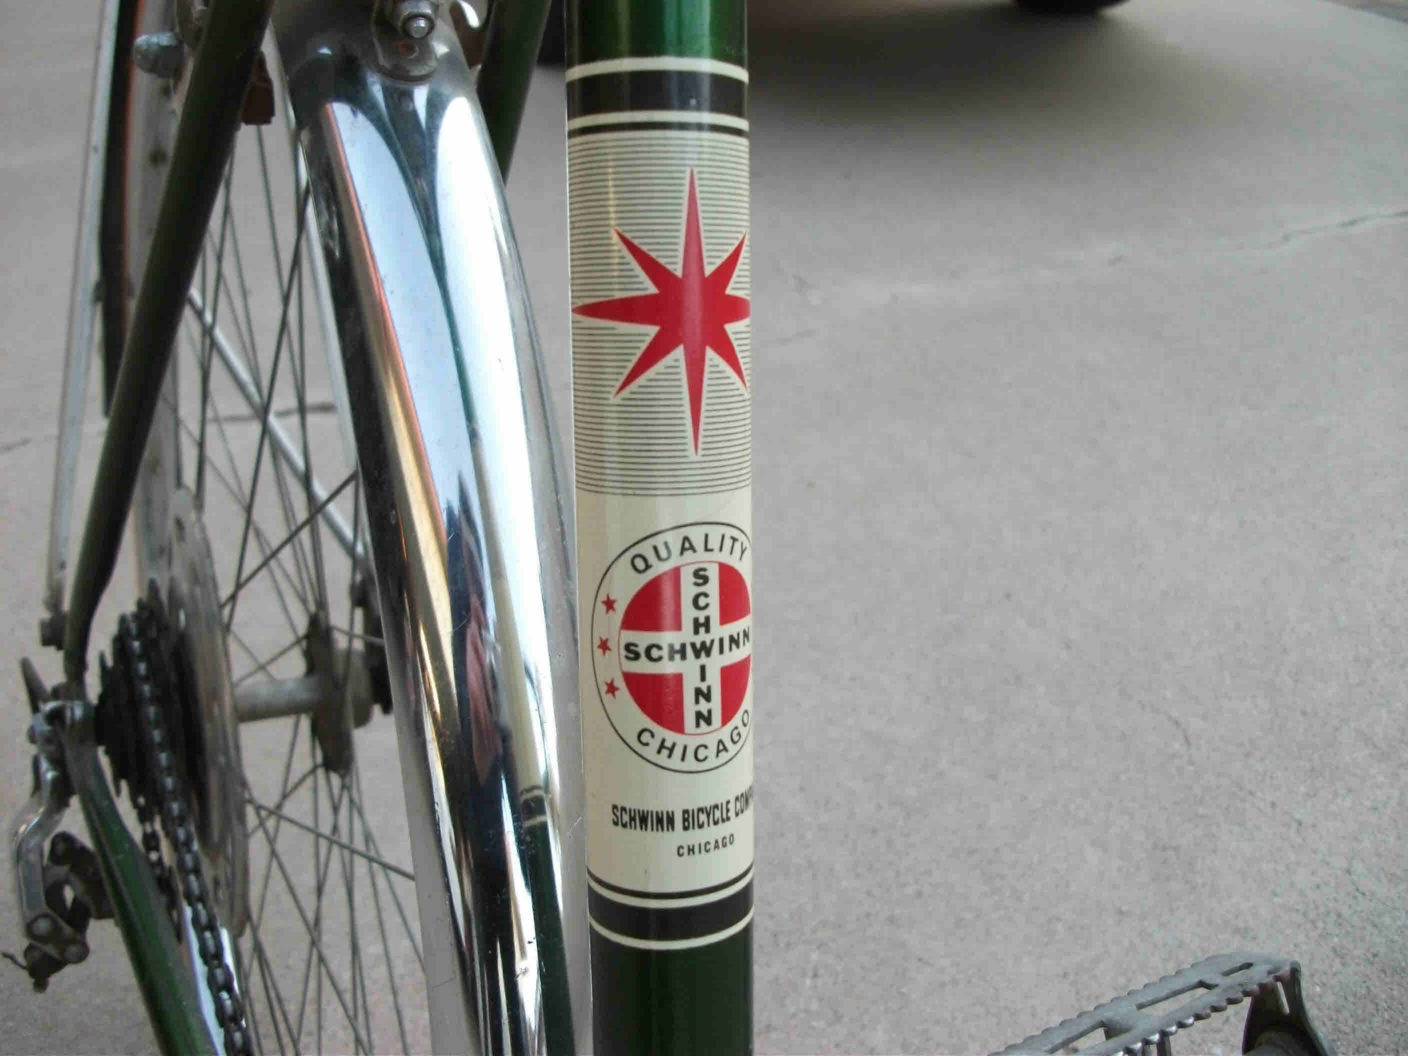
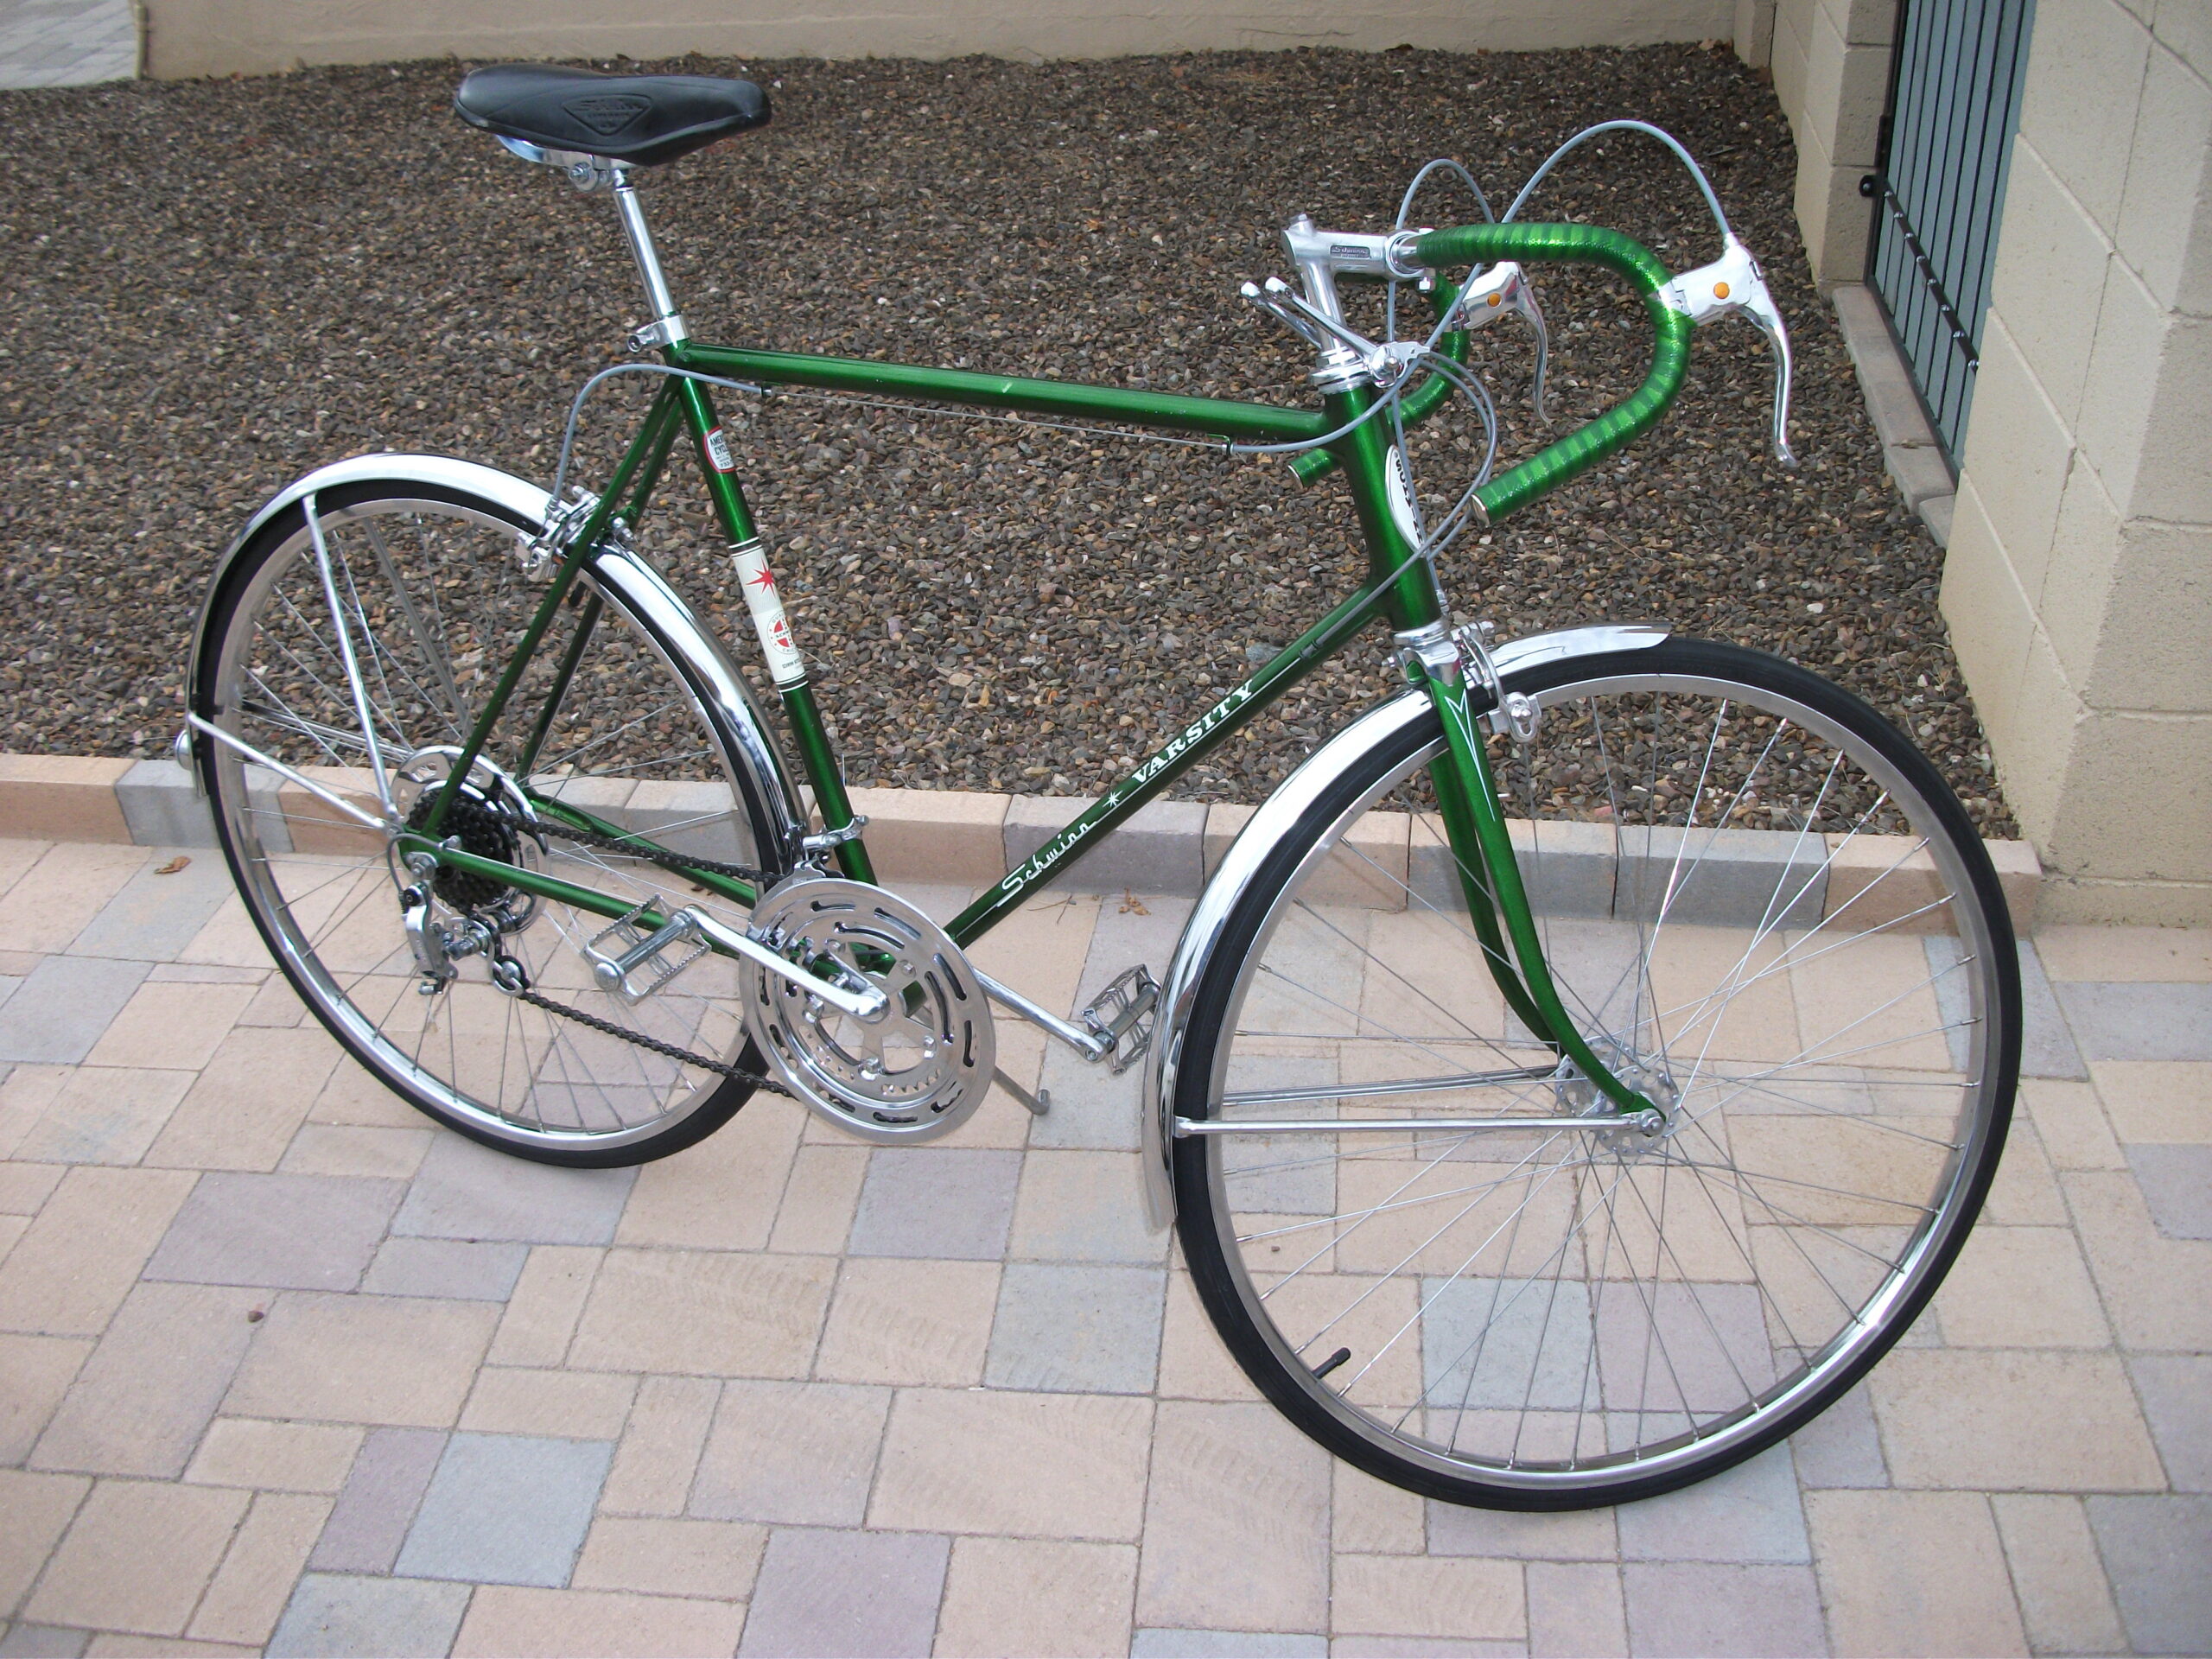
Here is another new member of my collection. It is a 1968 Schwinn Varsity that looks like it was stored in a vault for the last 49 years. This is the cleanest, most unmolested bike I have ever purchased, and I can’t wait to carefully turn back the clock and “restore” it. I know that term has different meanings to different people, and I usually prefer the term refurbish, but in this case, I will leave it as original as possible and just put it back to its showroom condition. I will restore it to original with a combination of Q-Tips and chrome polish! As is the case with many of these old Schwinn bikes, the spokes on this beautiful Varsity may just be too far gone to be safe. So, I’m planning on replacing them with new stainless steel versions of the same spokes.
Here it is the beginning of 2022, and I have news on this beautiful old Varsity.
My neighbor’s daughter, age 15, was assigned an independent study project that had to be completed in five months. She had to identify a worthwhile project, outline the process, plan the steps to completion, and then implement the plan. In February, she will have to present the entire project, all the documentation, and the final product publicly in a “science fair” type setting.
Amazingly, she chose to restore an old Schwinn bicycle. She came to me with the concept in September and asked if I would mentor her through the process. Since I had this July 1968 Varsity that I bought years ago and not started refurbing, we had a perfect candidate.
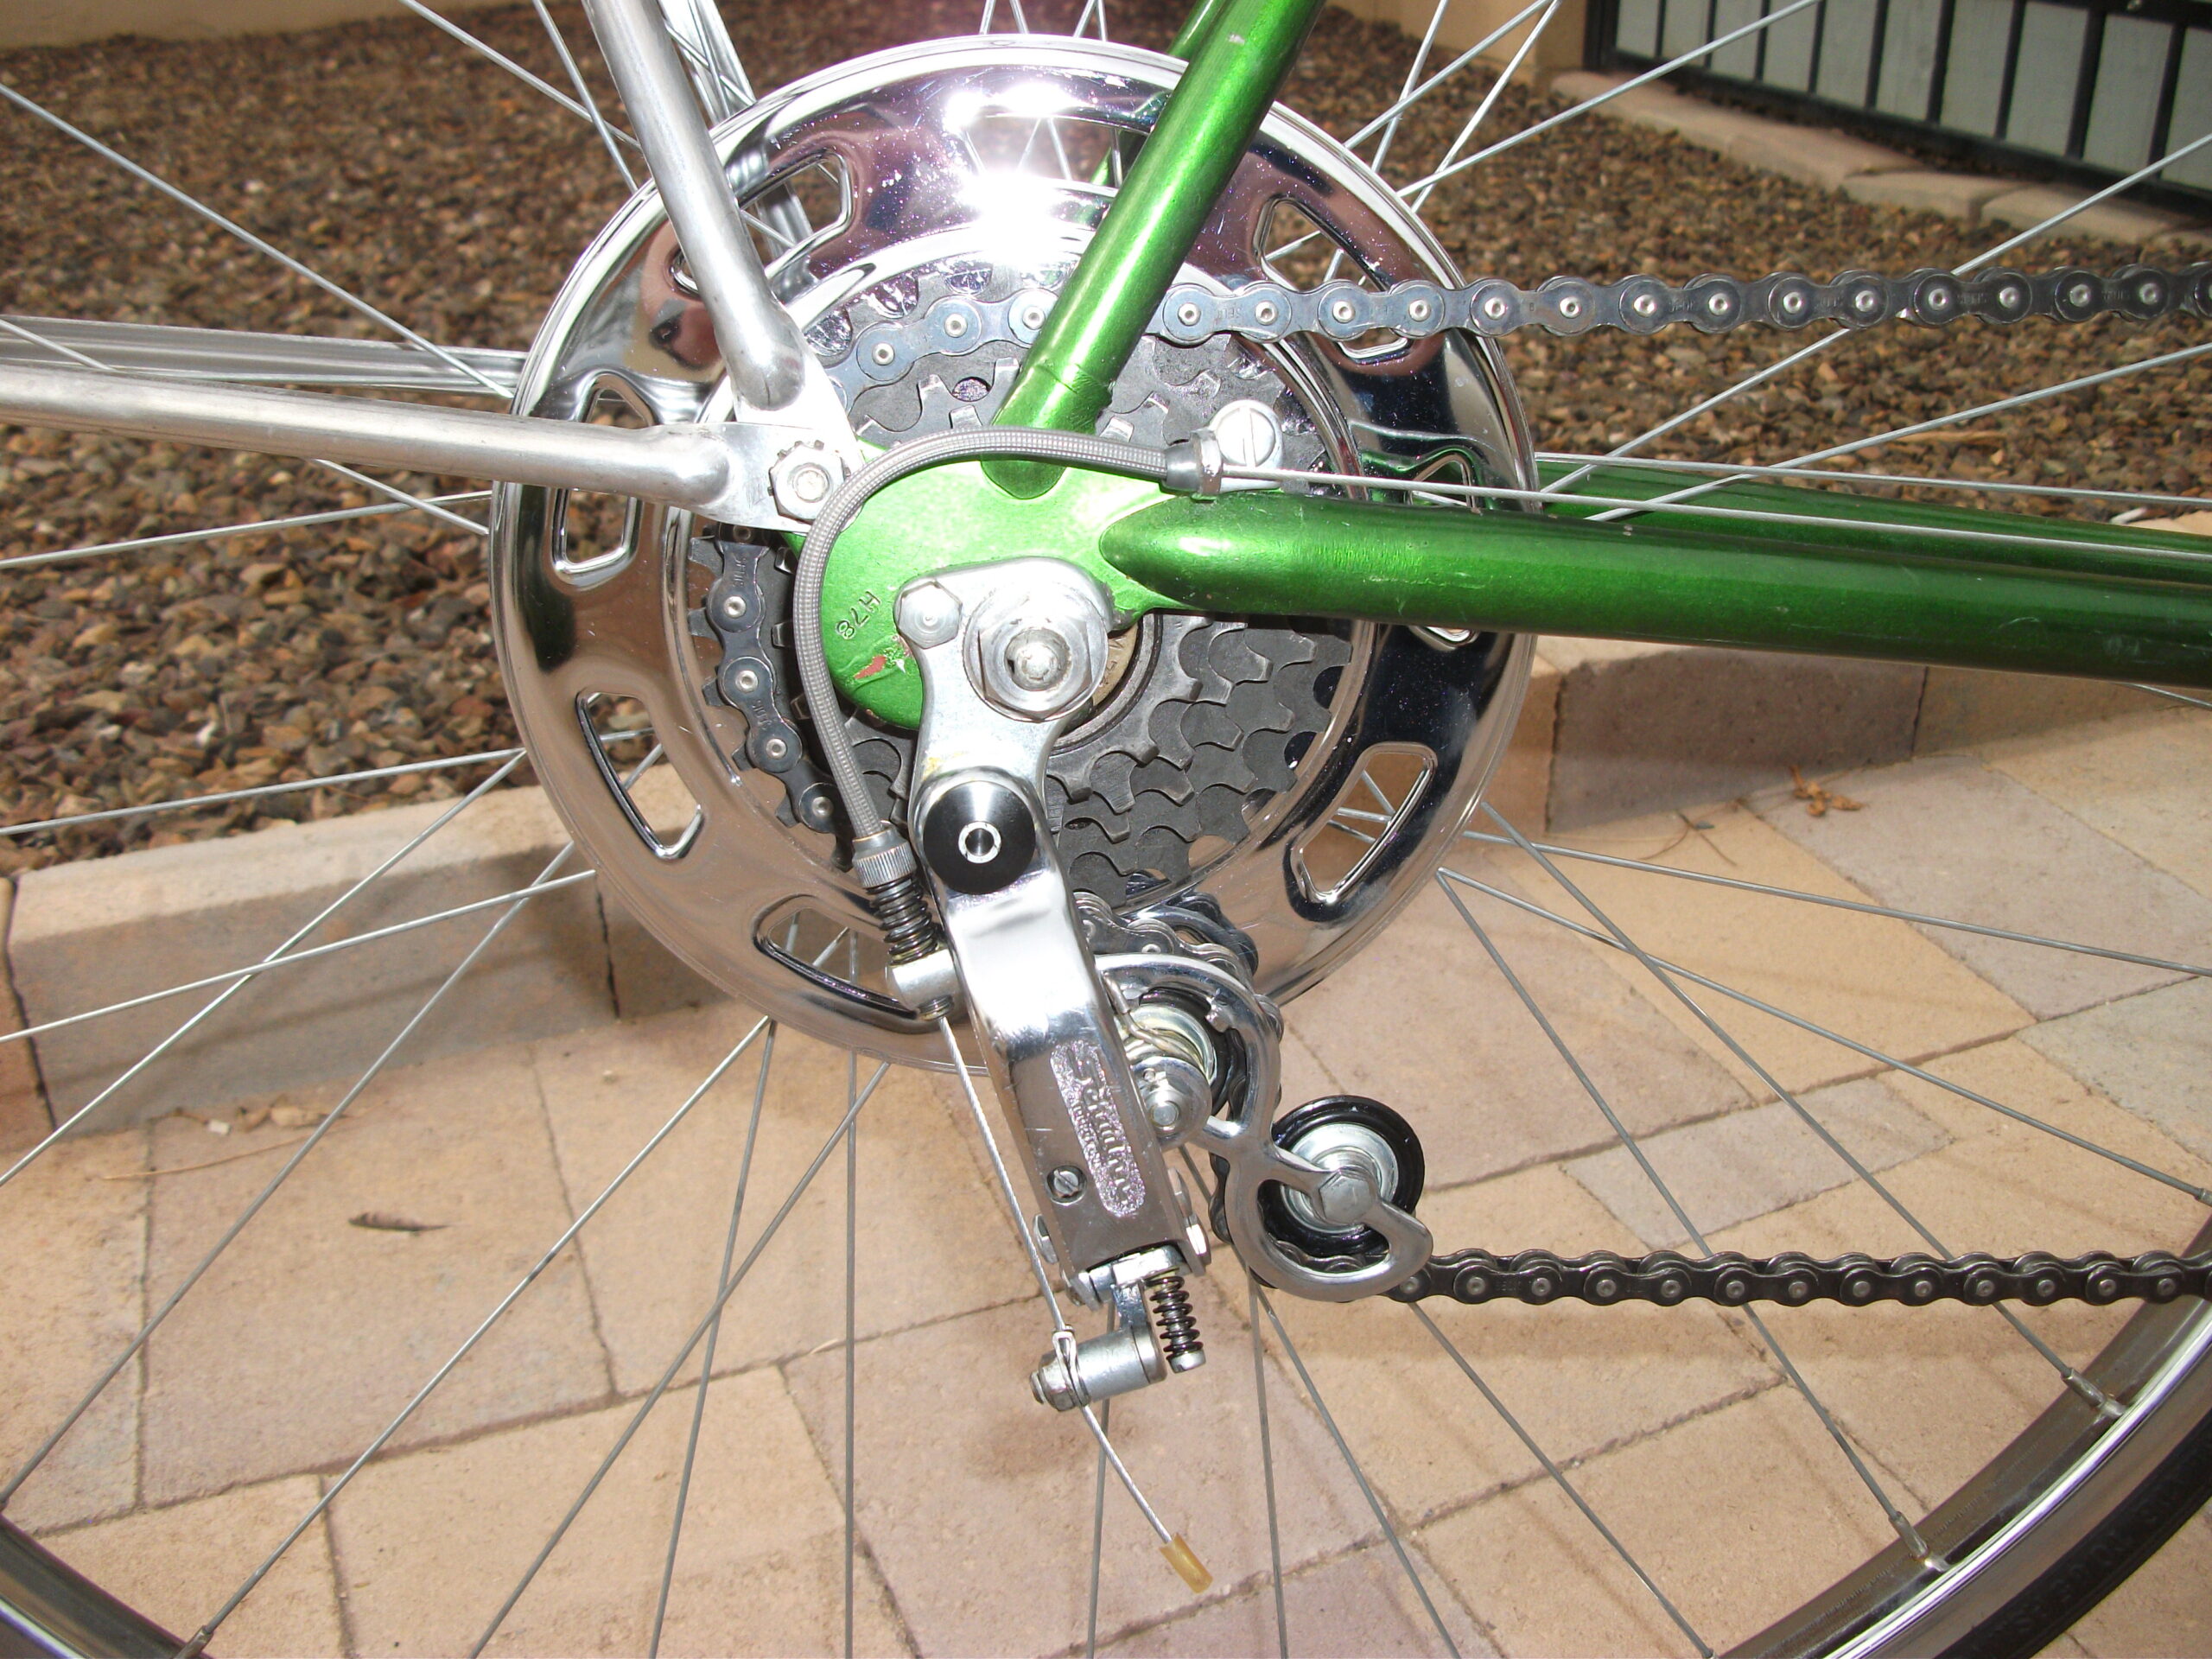
Working in my garage after school and on weekends, she carefully stripped the bike and then proceeded to systematically disassemble and refurbish each component in turn. Some intricate parts were helped tremendously by a half-hour session in the ultrasonic parts cleaner, but most of the pieces were laboriously cleaned, polished, and returned to service by hand. The wheels were especially challenging, as the spokes were quite weathered and the rear wheel had a few non-standard replacement spokes that had been replaced badly, with one even facing the wrong way on the hub flange.
Along the way we stumbled over a few other speed bumps like finding a radial crack almost all the way around the handlebar extension, a broken brake lever pivot, and a cheap aftermarket gear cluster, but in her determination to keep the bike as original as possible, she and I hunted down all the necessary replacement parts as either NOS or good used originals.
So, yesterday, we finished the bike and here it is in its 53+ year-old glory.
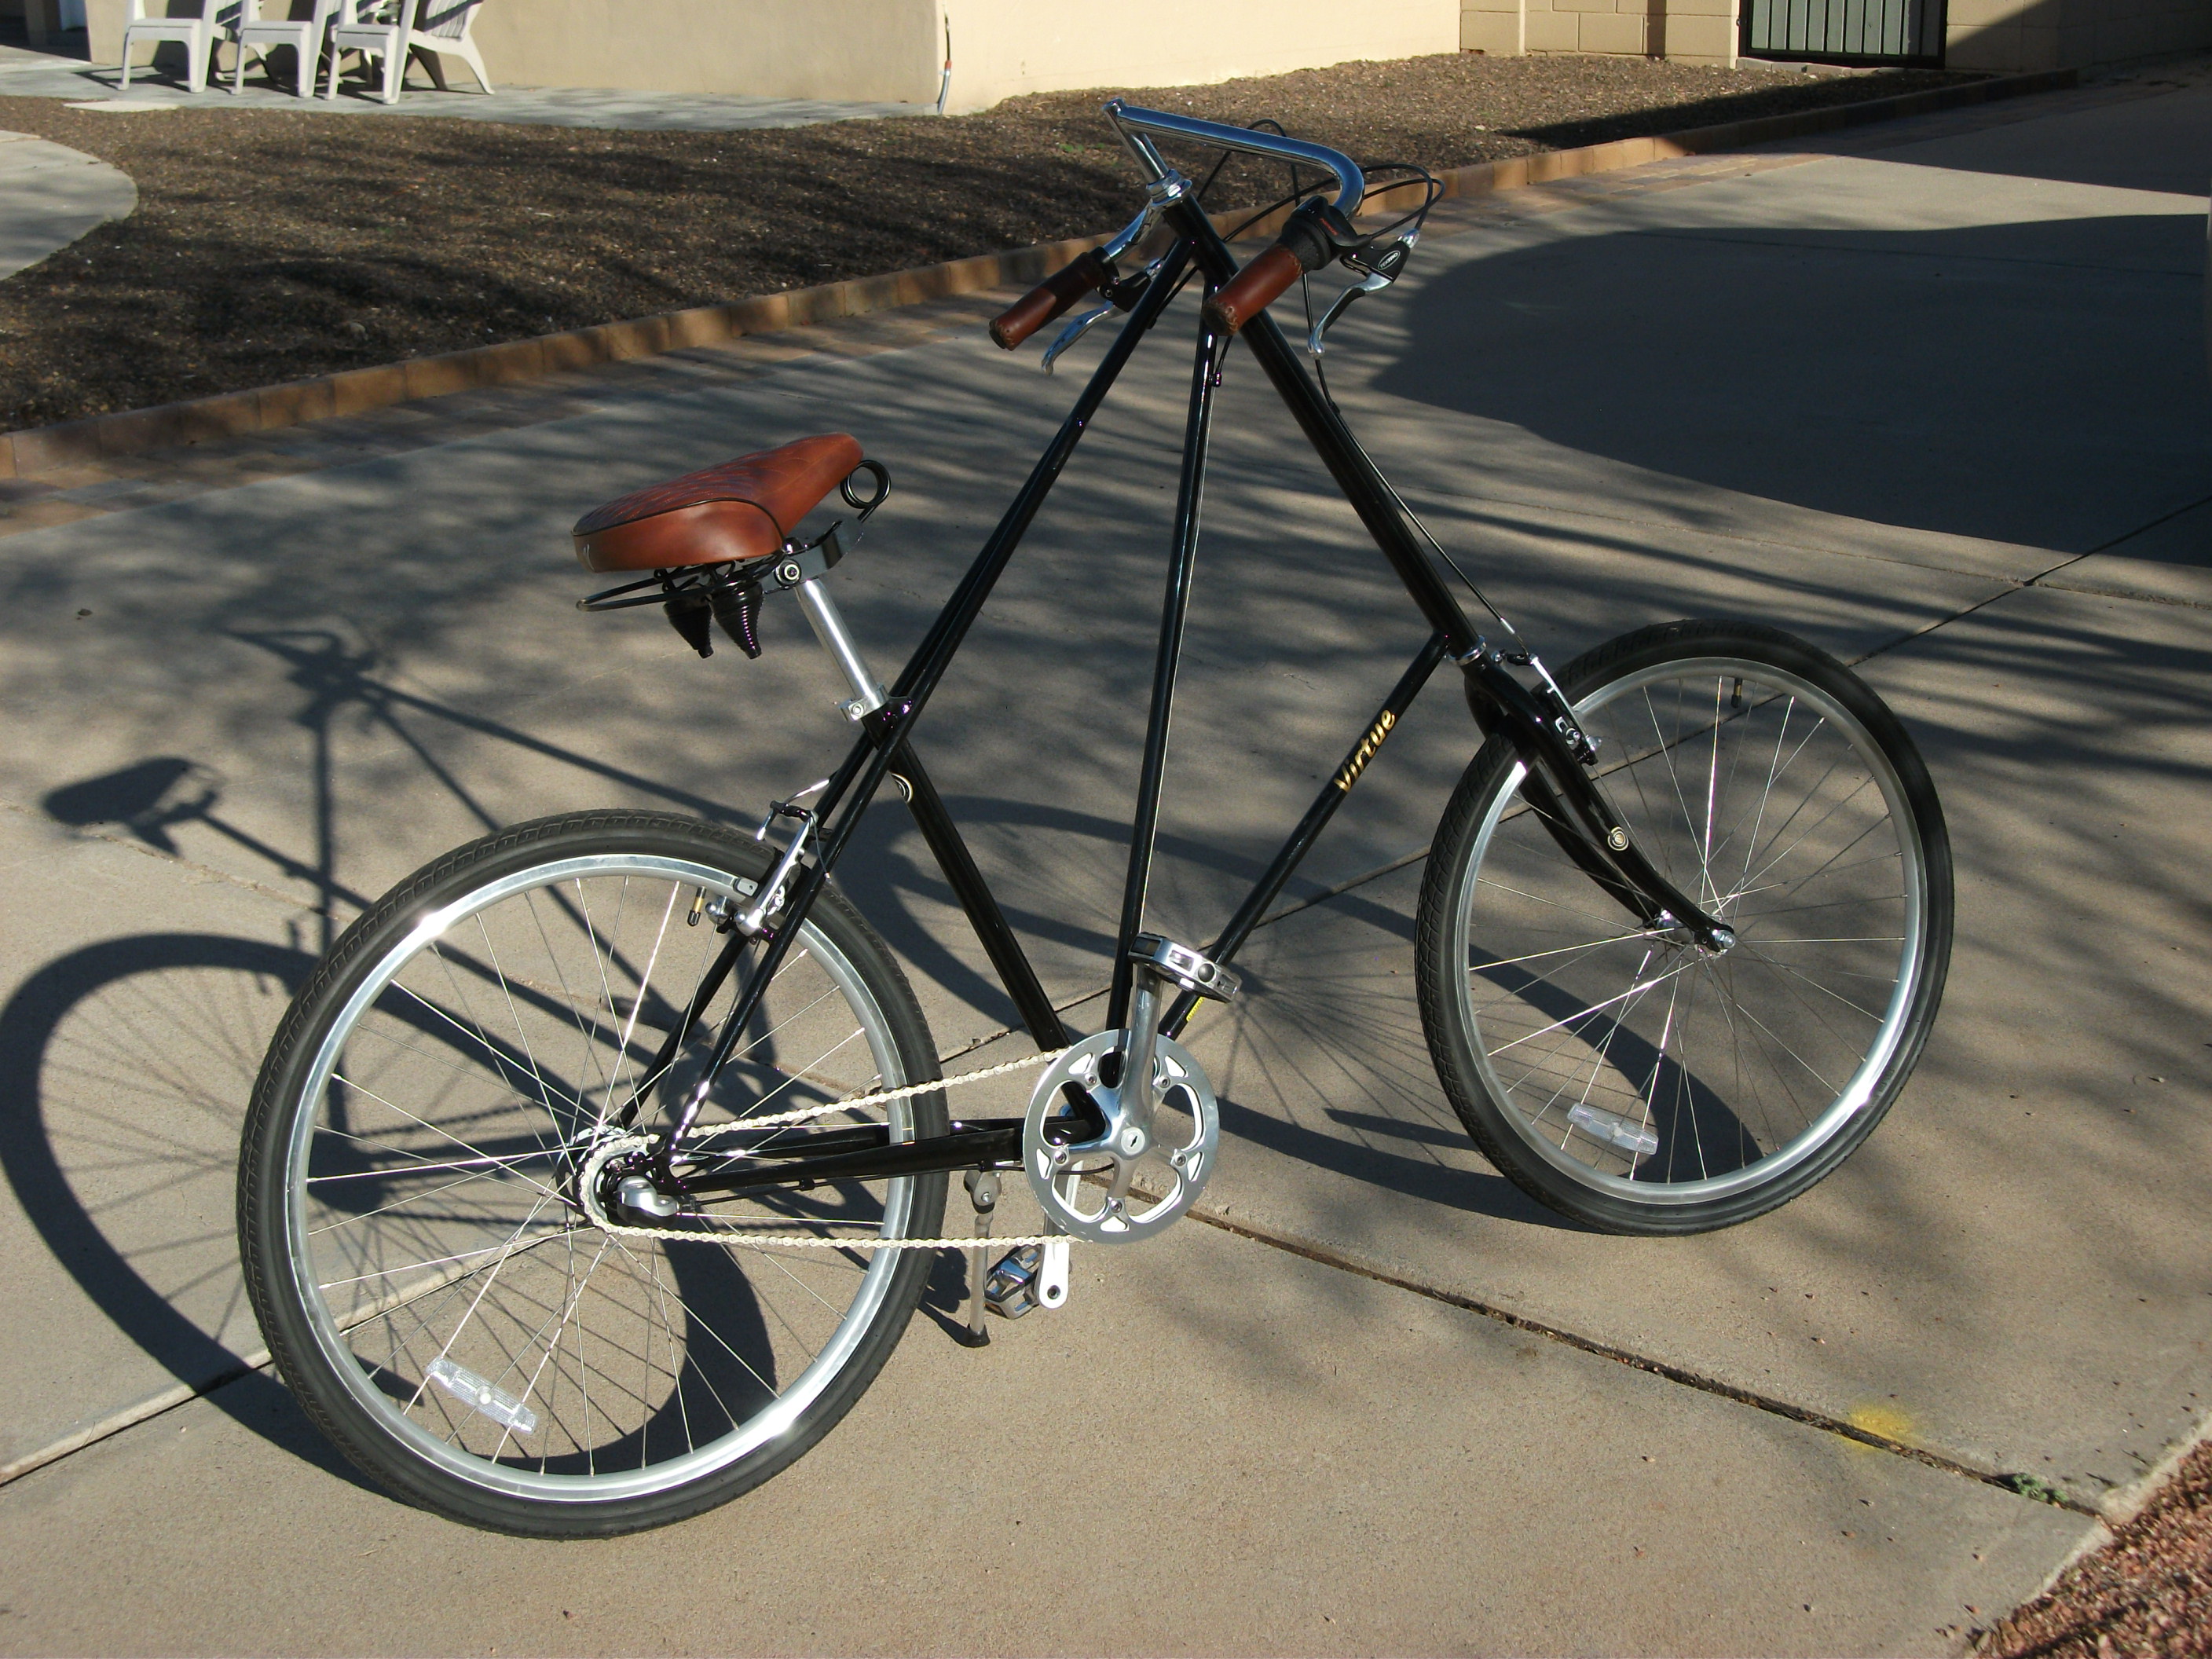
This next bike recently showed up for sale at a price that I couldn’t refuse. Similar to a long produced Pederson bicycle, this Virtue Ortho is actually a pretty standard simple 26″ mountain bike with a very unusual frame design. Touted as a bike to prevent or possibly alleviate back pain, one rides it in a nearly fully upright position, and with the elbows naturally bent. I find it relatively comfortable for a tour around the Park, but the upright position adds wind resistance, so higher speeds are more difficult to attain. It is nicely equipped with a Shimano internal hub 3 speed gear, and effective “V” brakes, and handles way better than the look of it would have you believe. Hand welded using Chrome Moly tubing and alloy rims, it is remarkably light. I consider it a “novelty” bike, but it is currently still manufactured and comes with a hefty price tag when new. This is the only “new” bike I have in my collection.
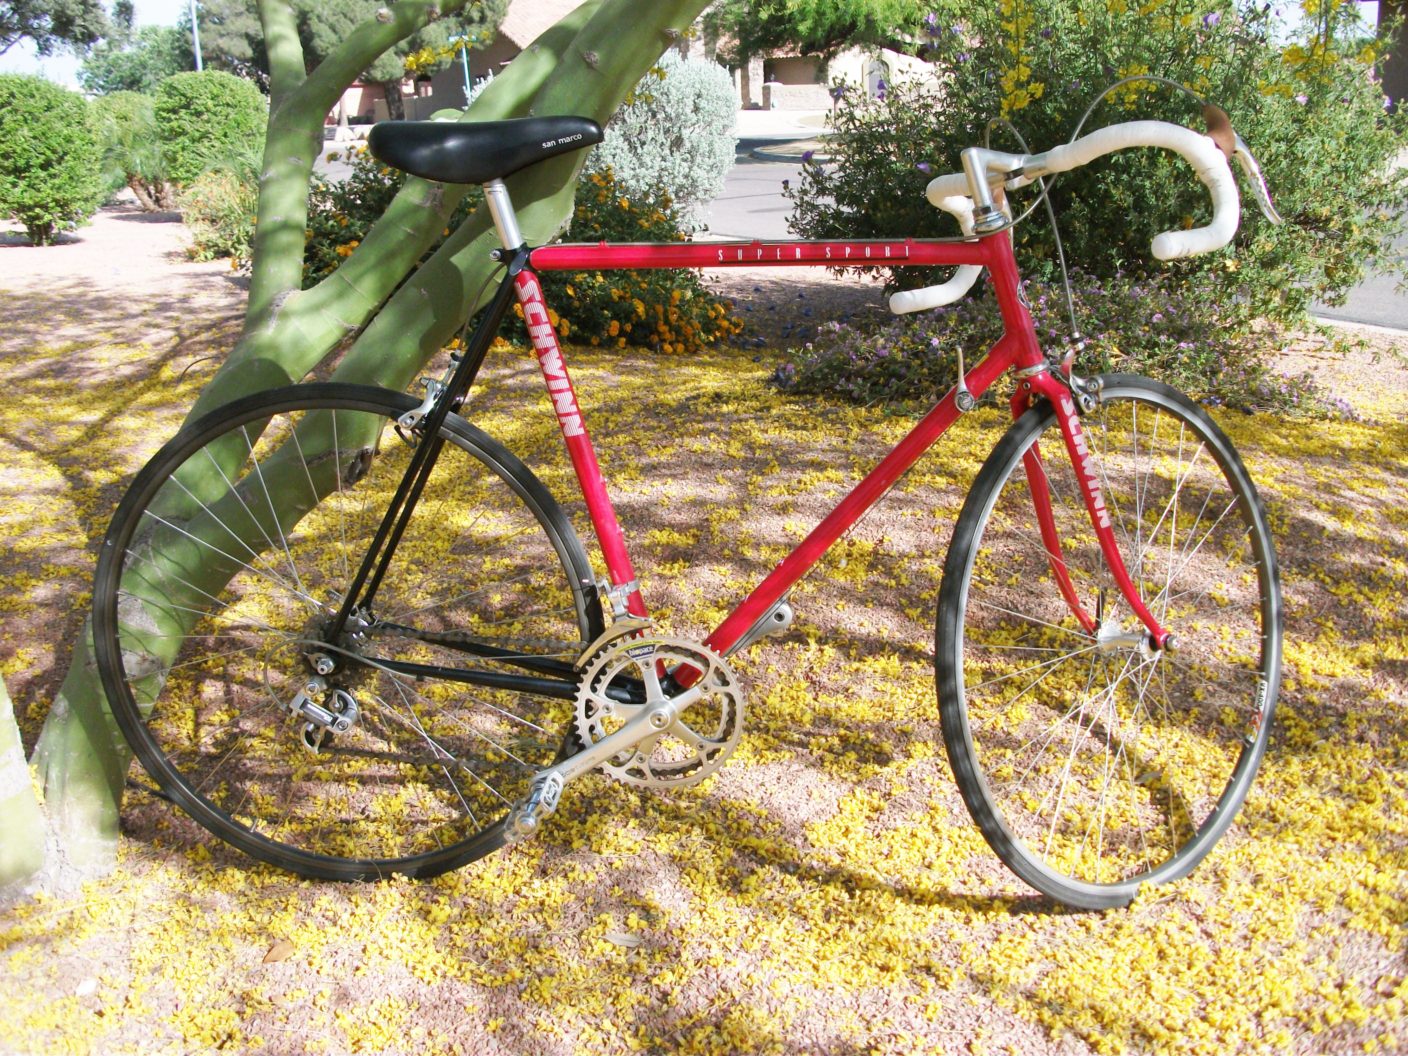
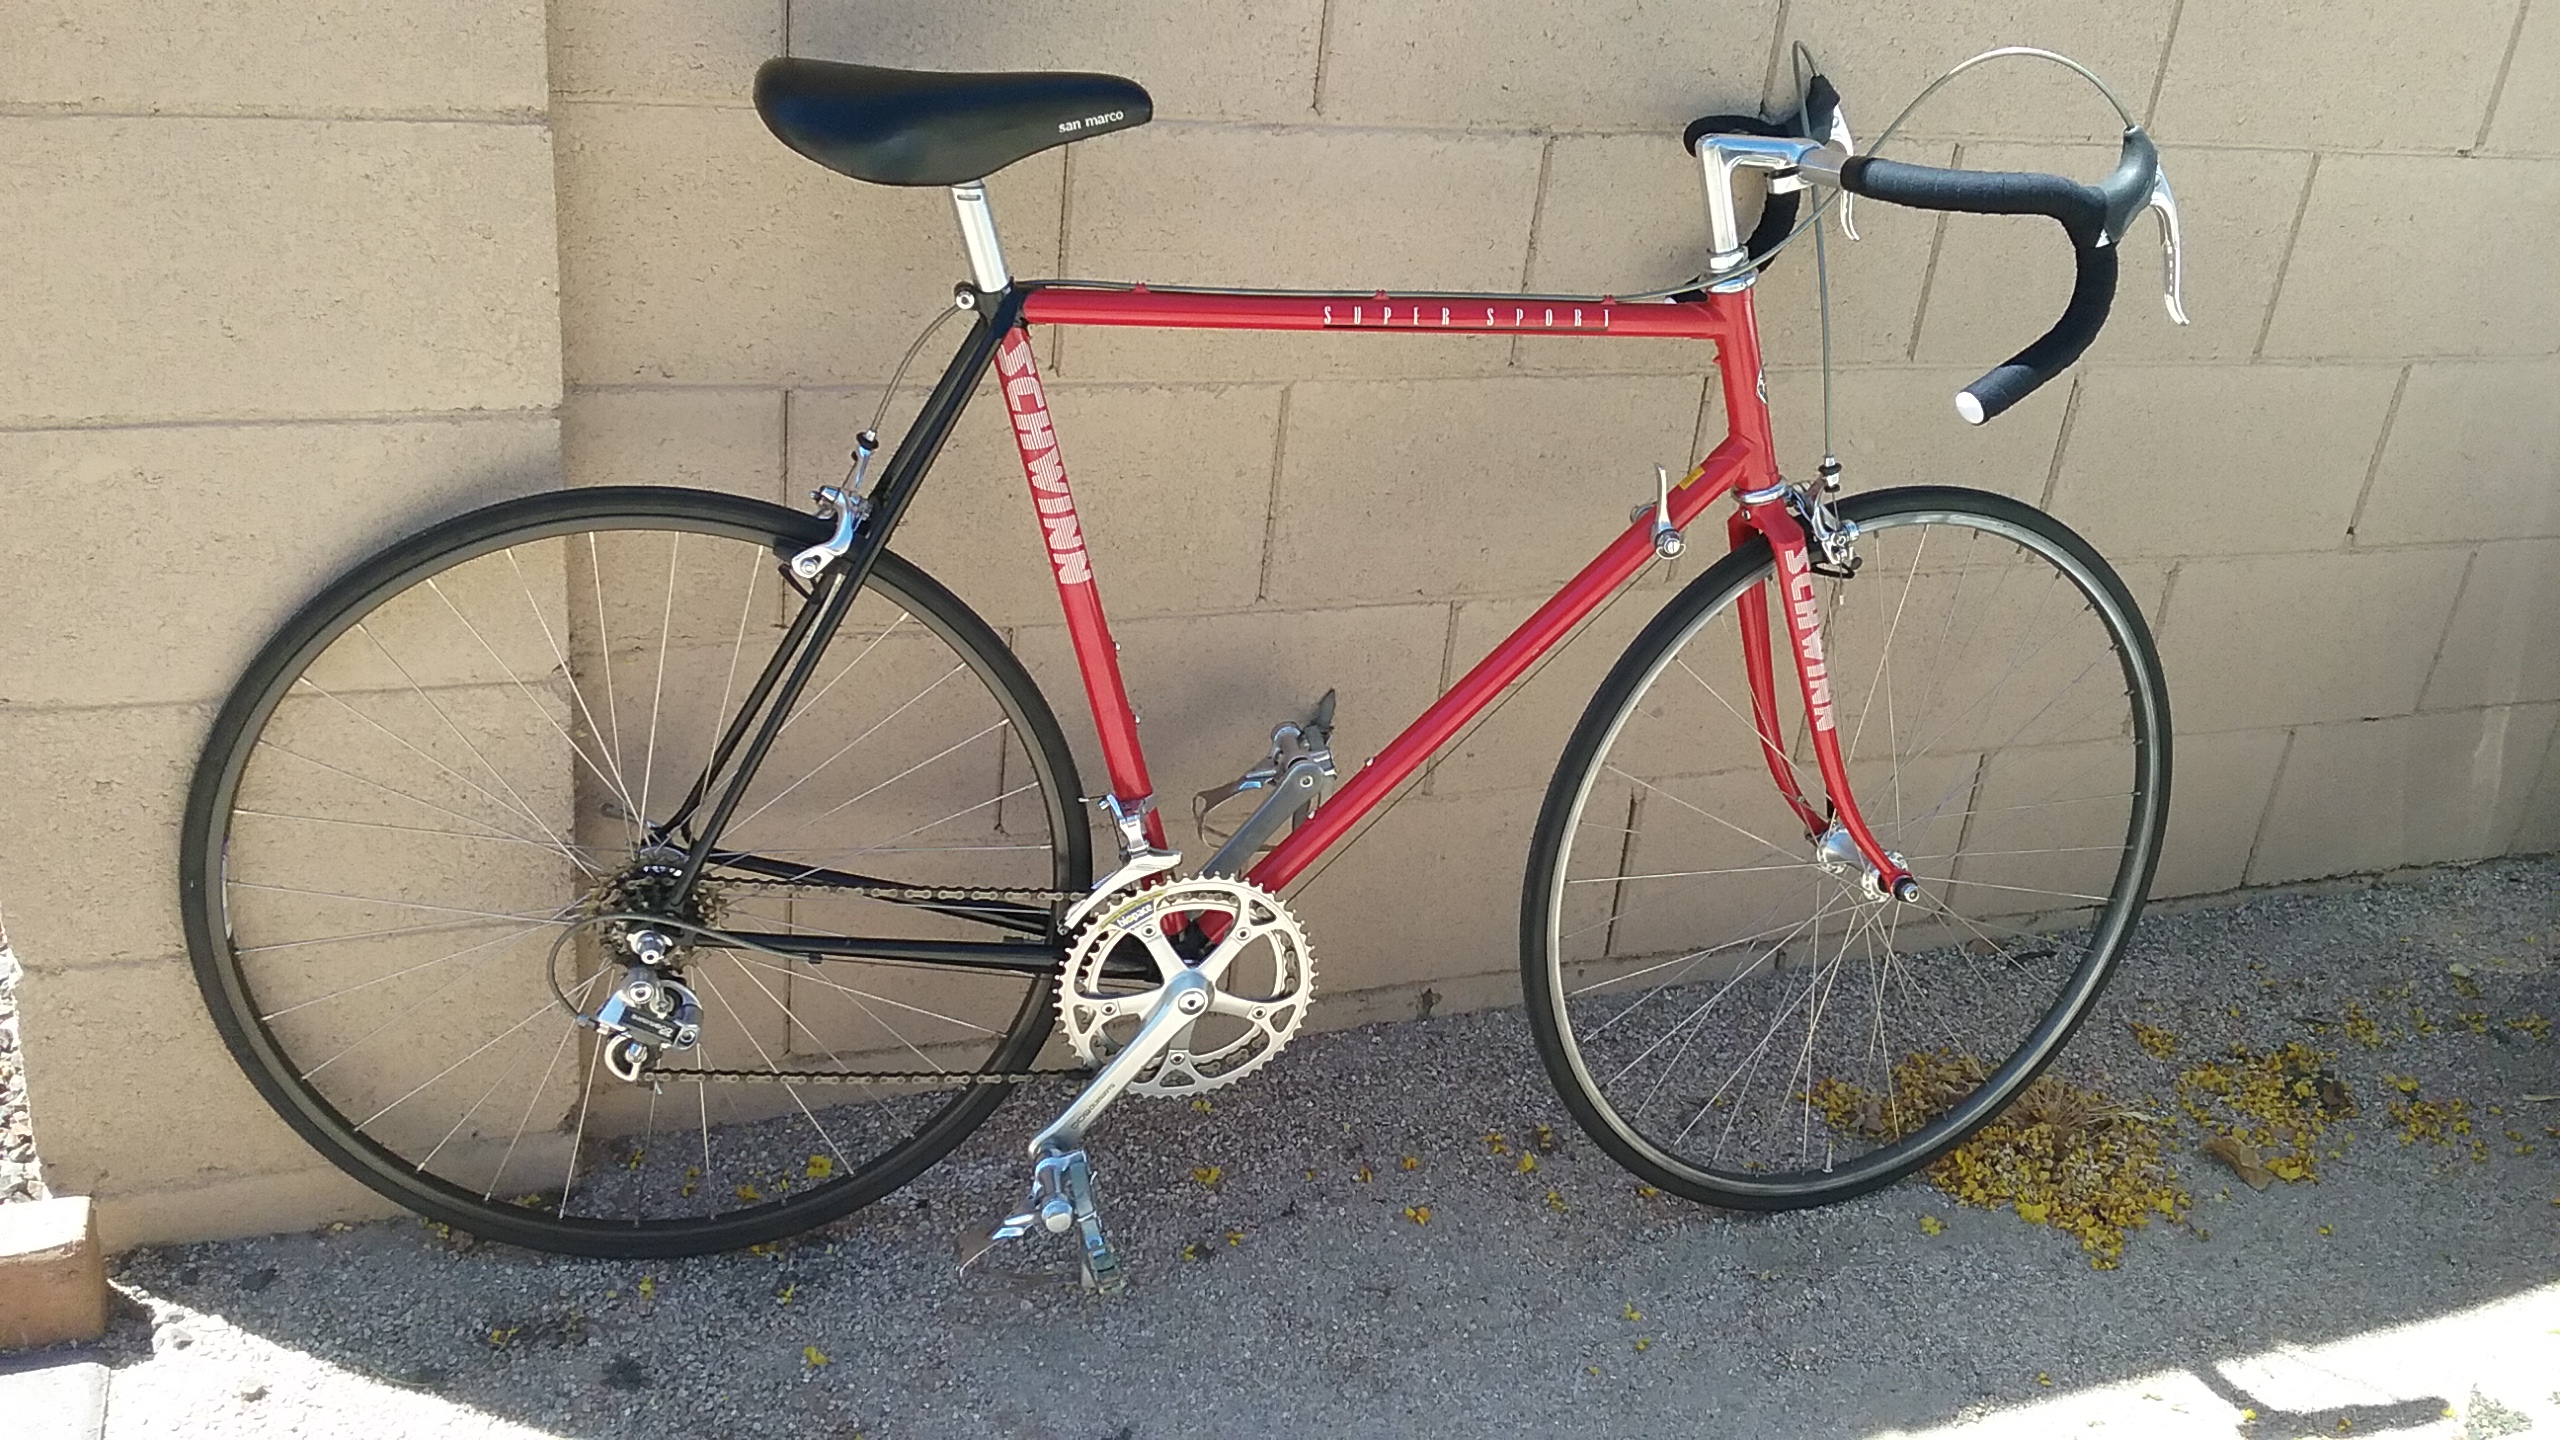
So, that darn Craigslist strikes again. This bike was listed for many weeks and apparently, no one was interested in it. The seller, who turned out to be a very nice older gentleman, dropped the price a few times, and then finally to a level that was, for me, enough to make me go and look at it. Some of the original parts had been changed over the 31 years since it was built, but as they say in the business, it has “really good bones.” All the major original Shimano 600EX parts were still there, except for the aero pedals, which had been replaced with LOOK clip-ins. The original leather San Marco seat and Sakae SR seatpost were there as well.
The cranks, derailleurs, brake levers and calipers all looked really original and clean and operated smoothly. The rear derailleur has the SIS (Shimano Index Shifting) option and after a little lubrication and adjustment indexes perfectly. It seems that the rear wheel has been replaced, but the one that is now on the bike is an extremely sturdy feeling unit with 32 hole 2mm spokes and only 2 cross, whereas the front wheel uses a more conventional 36 hole 1.8mm spoke in 3 cross lacing.
Probably the thing that most detracted from the bike is the fact that the original Custom Alloy SR Handlebar and Stem were replaced with inexpensive knock offs. I have found and ordered a close approximation of the originals, and the stem which is 20mm longer than the one that’s on the bike now, will help restore the geometry, although at 80mm, is still 5mm short of original.
I plan to wrap the bars in black tape to echo the rear stays, and use black brake hoods to match the tape. This is a “before” picture, although I had already cleaned the frame and components of most of the dust and dried lubricant, and replaced the LOOK pedals with some generic ones so I could give it a thorough test ride. It’s FAST!
As soon as the “new” replacement parts are installed and I get it on the road, an “after” picture will follow.
So, as promised, the Super Sport parts arrived and are now installed. This is the finished bike with the correct handlebars, handlebar extension, and the Shimano 600EX pedals with toe clips and straps. The pedals arrived in very good condition, but as a precaution, I dissembled and inspected them and cleaned and re-lubricated the bearings. The handlebar had a series of small scratches at the edge of the engraved area, and being alloy, I figured a quick trip to the buffing wheel could mitigate the severity of the scratches and give a nice shine on the bars to boot. That’s when the fight started! Sure, I was able to buff out the scratches, but it made the surrounding area much “darker” and almost mirror finish. It became apparent immediately, that the center section of these bars is actually anodized, although the color is ostensibly “aluminum,” it’s much more gray and “satiny” than actual bare aluminum metal.
Well, now I had to make them appear uniform again, so I started what became a multi-step process of wet sanding with progressively finer grits, polishing with rubbing compound, then polishing compound and finally a coat of wax. The whole job of removing the anodizing and polishing out the resultant fine scratches took more than two hours.
Finally, I assembled the extension and bars to the bike, and after installing the new Dia-Comp brake hoods and brake levers, wrapped the bars with Velo Orange Double Thickness Cotton Bar Tape in black. The Dia-Comp hoods don’t fit exactly, and I had to trim them a bit so they wouldn’t interfere with the movement of the brake levers.
As soon as it was all finished, I took it for a quick spin, and realized right away that I will need to practice my toe-clip technique, as I almost did the unthinkable slow rollover when I had to come to a quick stop for traffic. It rides smooth and fast and with the considerable amount of tuning and tweaking I did on the gear train, it shifts very positively and reliably. I have been keeping the shift lever set to a place about halfway between friction and SIS, which gives me some shifting feedback to help positioning the lever, but not so much as to disallow some fine tuning.
There was a time when the brand “Diamondback” was two words. Back then, the bikes were engineered in the USA, and built in Taiwan using US made tubing. Such a bike is the groundbreaking Diamond Back Avail, which was one of the first “Crossover” bikes, as it used 700c wheels, but fitted with 38 or 45 mm wide tires. Recently, a pair of these 25 year-old bikes became available to me, and although I am really more of a Schwinn enthusiast, when I saw them I knew I could bring this Diamond back!
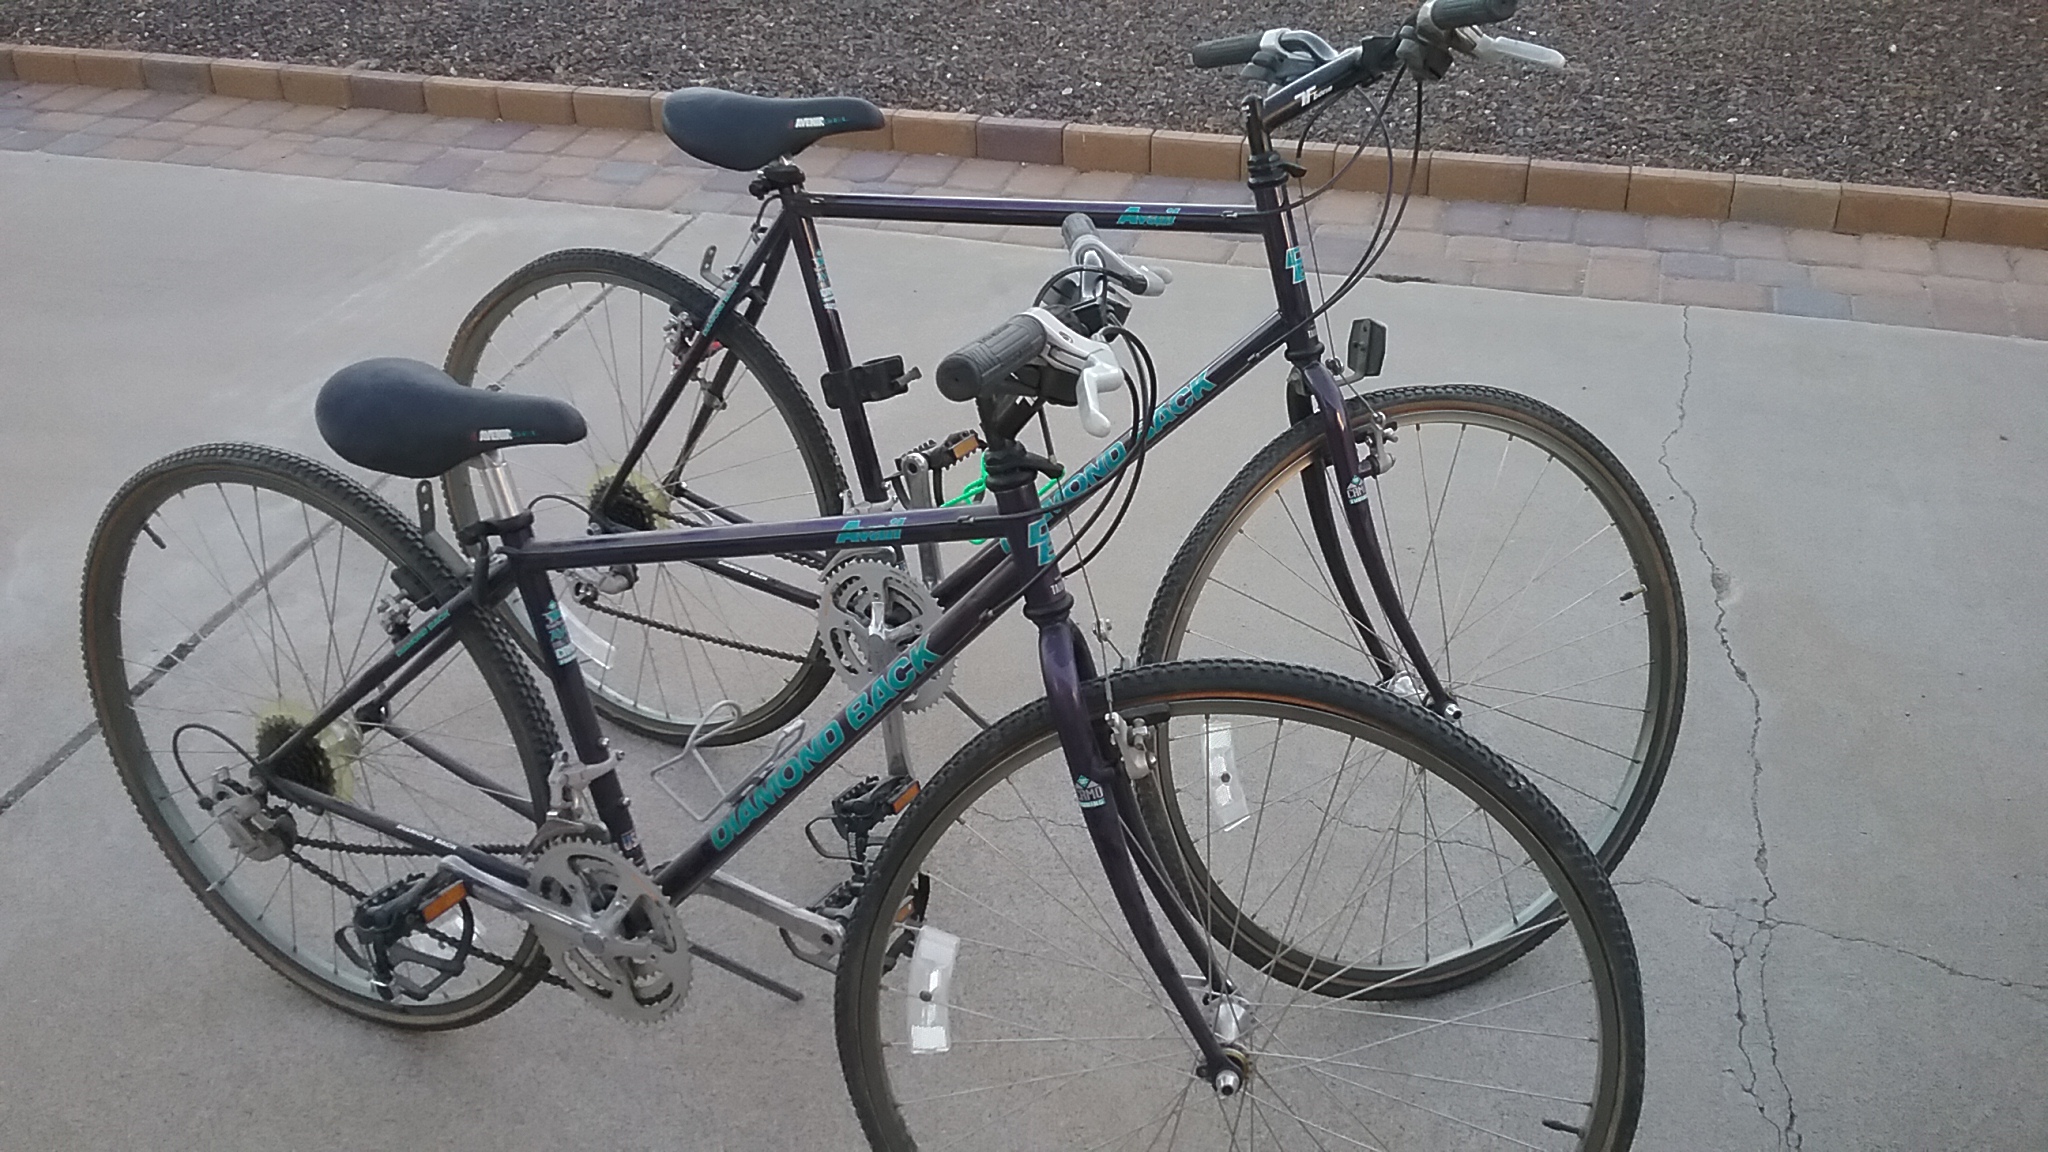
Take note of the innovative chain path on the smaller frame bike! As I began the disassembly, I realized that neither of these bikes had been ridden more than a few miles. The bottom bracket axles showed absolutely no evidence of bearings riding on the black anodized surfaces, and the triple chainwheels showed only the slightest contact marks from the chains, and only on the center sprockets. The inner and outer sprockets were completely untouched!
Equipped with a very respectable Shimano Exage 500CX groupset, Avenir Gel seats, Araya rims, and double-butted chrome-moly tubing throughout, these bikes promised to be exceptional rides when refurbished. I jumped into them enthusiastically.
As always, every part was disassembled, cleaned, inspected, polished, lubricated, and replaced as needed. Once stripped down, the frames were polished and waxed, and all the bearings were re-lubricated and adjusted. I was amply rewarded with two beautiful, like-new classic bicycles.
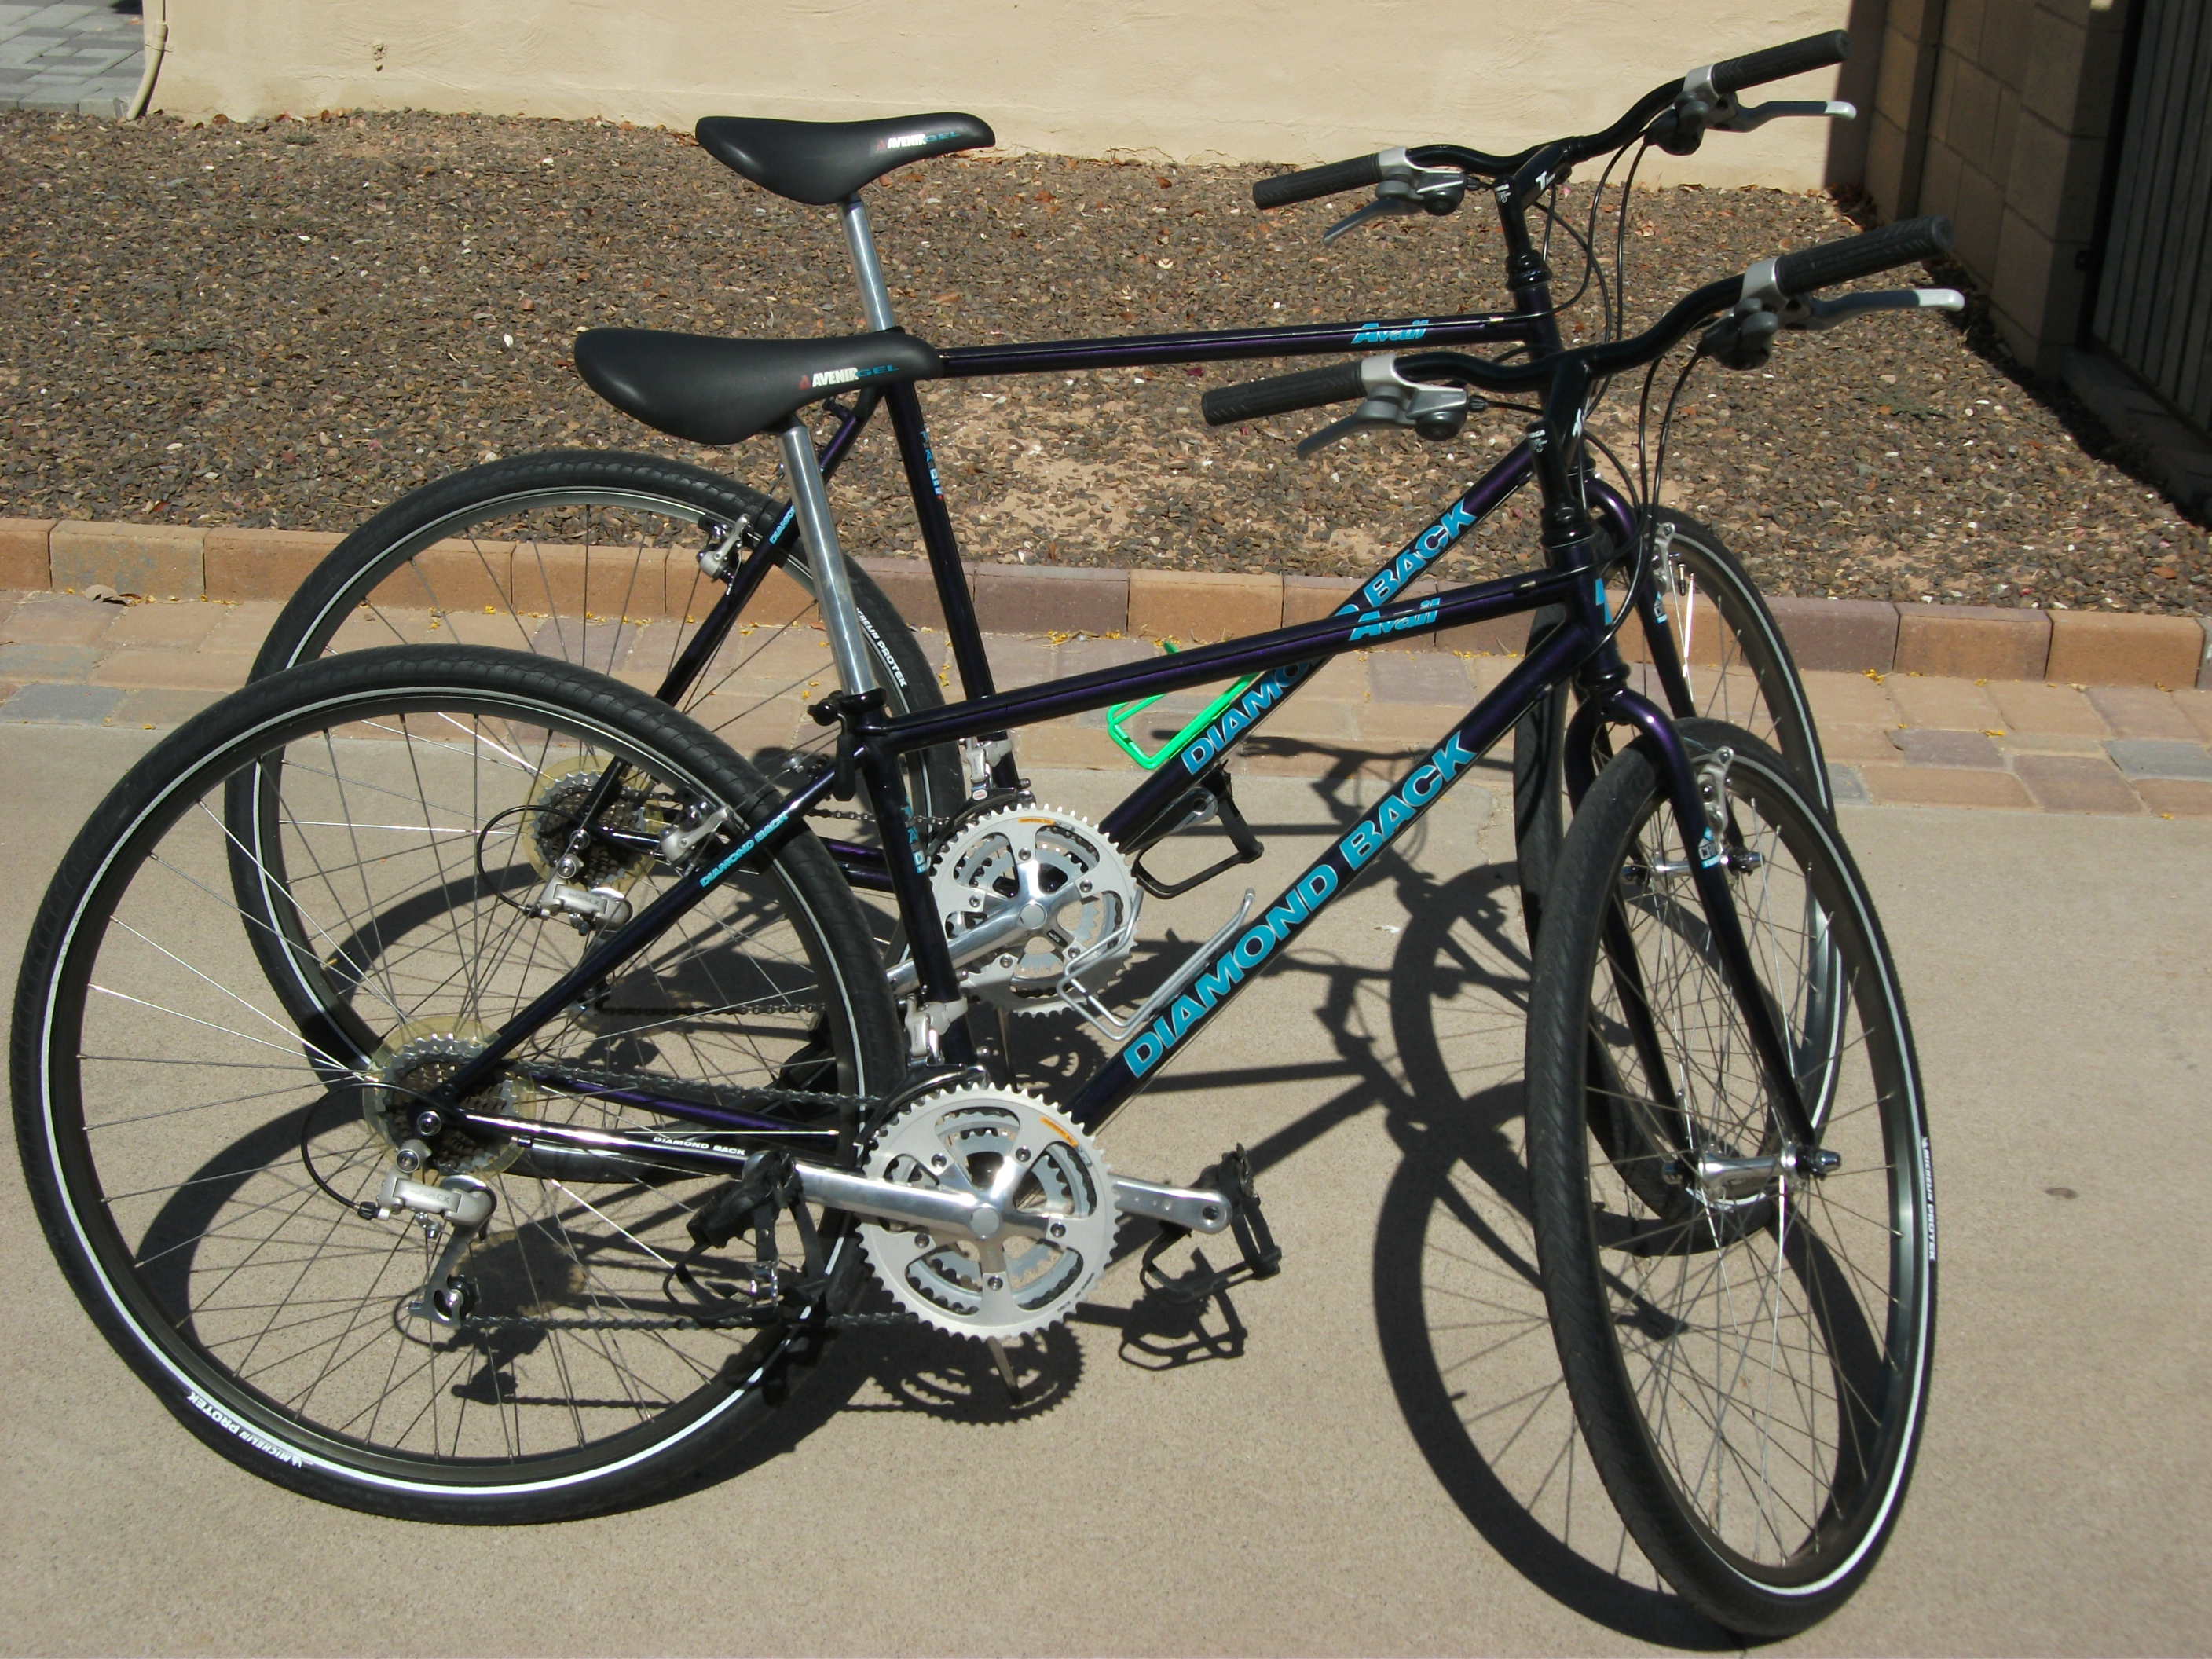
The larger frame bike had a right side crank arm that was really stuck, and so the puller threads failed trying to remove it. So the one on the bike is a used replacement, polished to match the left arm, but other than that, these are all original. I was pleased to find some Michelin tires this size and also genuine Shimano brake blocks. The initial test ride proved that these were really excellent bikes originally, as they roll almost as easily as a road bike, but with 21 speed flexibility and slightly wider tires, exude rugged versatility. They are solid and quiet, light enough to go fast, and a joy to ride. Hyperglide shifting makes gear changes sure and positive, and the new brakes on those practically virgin rims stop beautifully.
The most difficult part of the refurb was that age had solidly cemented the delicate shift lever mechanisms into immovable lumps, as the original grease turned to dried bubble gum. Equipped with a large variety of ratchet pawls, return springs, cams, and levers, these shifters are a jigsaw puzzle of parts that tend to want to fly apart once you loosen the single left hand thread locknut. Thank God I had two bikes to compare, otherwise, the puzzle might still be unsolved. Tiny “E” shaped circlips holding delicately sprung ratchet pawls firmly glued in place by time, presented a particular challenge. When enough force is applied to break them free, they tend to take flight in unpredictable directions, and once out of sight, would be irrecoverable. This necessitates working with hands, tools, and parts draped under a shop towel, to catch errant missiles, but obscures ones sightlines. It’s OK, though, since I can’t see that well anyway, and my fingers see better than my eyes.
It’s a great joy to realize that these bikes were saved just days from being thrown in the trash, as their previous owner had dragged them house to house for 25 years and put them on Craigslist as a last ditch attempt to get a few bucks before hauling them off to the dump. What’s remarkable, is that the NONE of the components showed even the least bit of wear or even wearing in. Sprocket teeth, bearing races, and brake pads were all untouched and unmarked. Additionally, it’s also apparent that this model of Diamond Back is quite “rare.” Information is hard to find, and mention of the “Avail” on the bicycle forums and on the net in general is scarce. An almost identically spec’d model was sold in 1992 and appears in the Diamond Back catalog as an “Override,” but not in the colors shown here.
Now, for something really cool! In 1992, Diamond Back produced a virtually identical bike to these but in a 26″ fat tire, rigid frame mountain bike. Identical in color, decals and lettering, and almost identically equipped, the Diamond Back “Ascent ex,” was pictured in the 1992 catalog, although in Neon Green Splash, with Deep Purple listed as an available option. Recently, I found and purchased just such a bike, and I will refurbish it and post the pictures here when I am finished. It too is somewhat “rare” as it is a large (tall) frame. The catalog lists it as a 20″ frame, but in Diamond Back’s “Performance Sizing” it is effectively at least a 21″. It fits me beautifully!
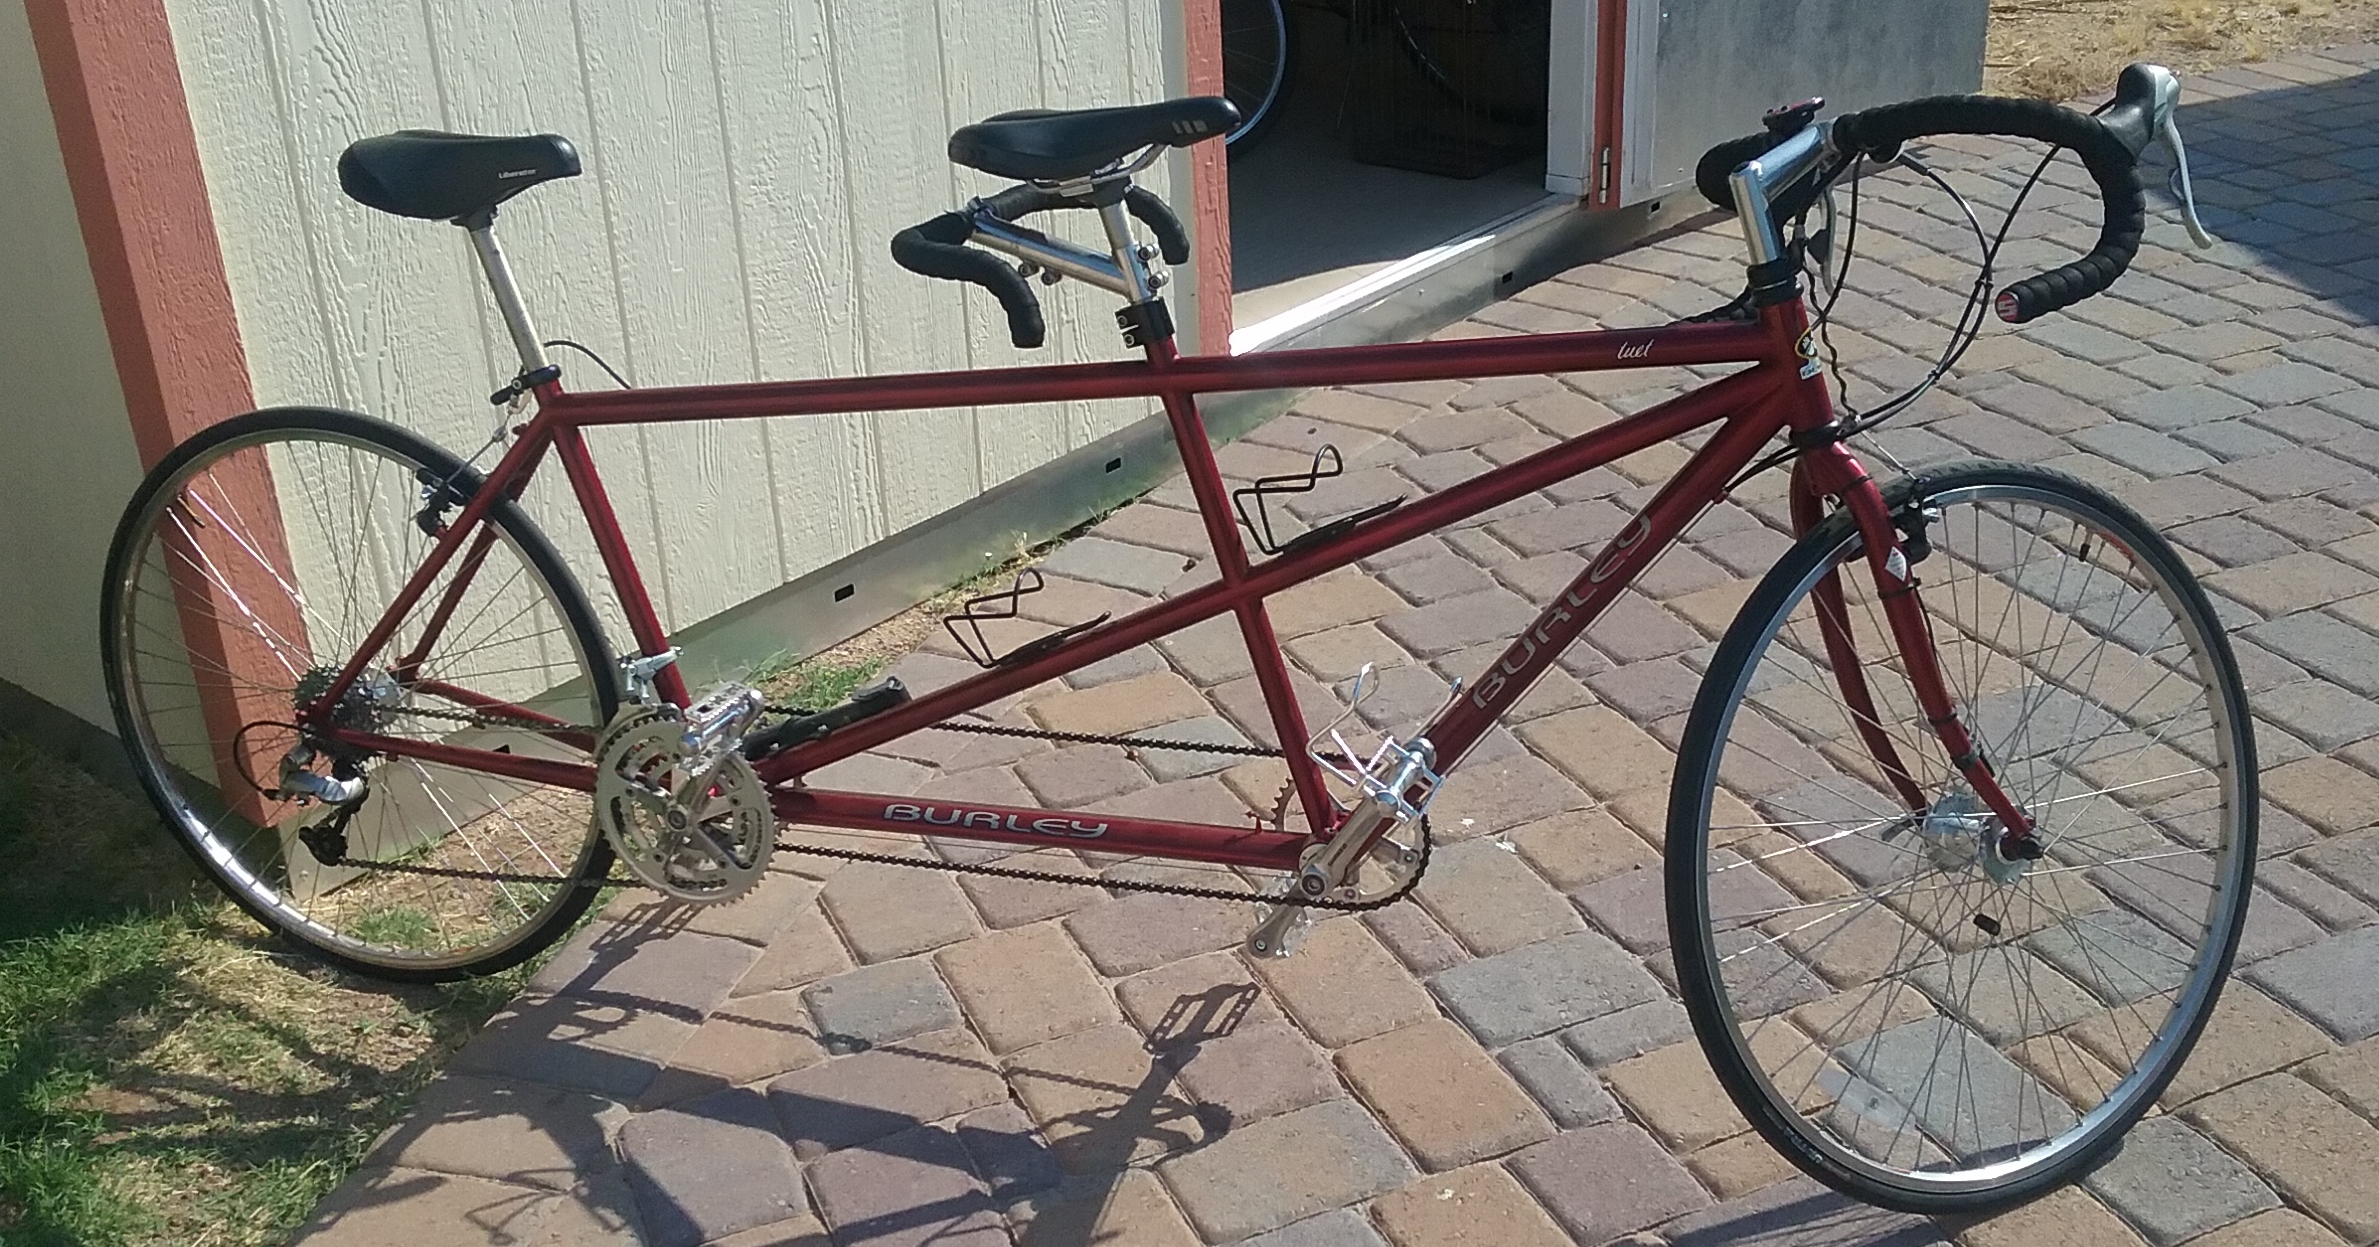
So, with the completion of the Schwinn Twinn Tandem we discovered that it is a little cramped in the rear “stoker” cockpit. Hence, when this spectacular condition 1998 Burley Duet Tandem showed up for sale locally, we HAD to go take a look at it! Of course, since the frame fits us perfectly, it’s the newest addition to the stable. This tandem sold new for a remarkable $2250 in 1998 money!
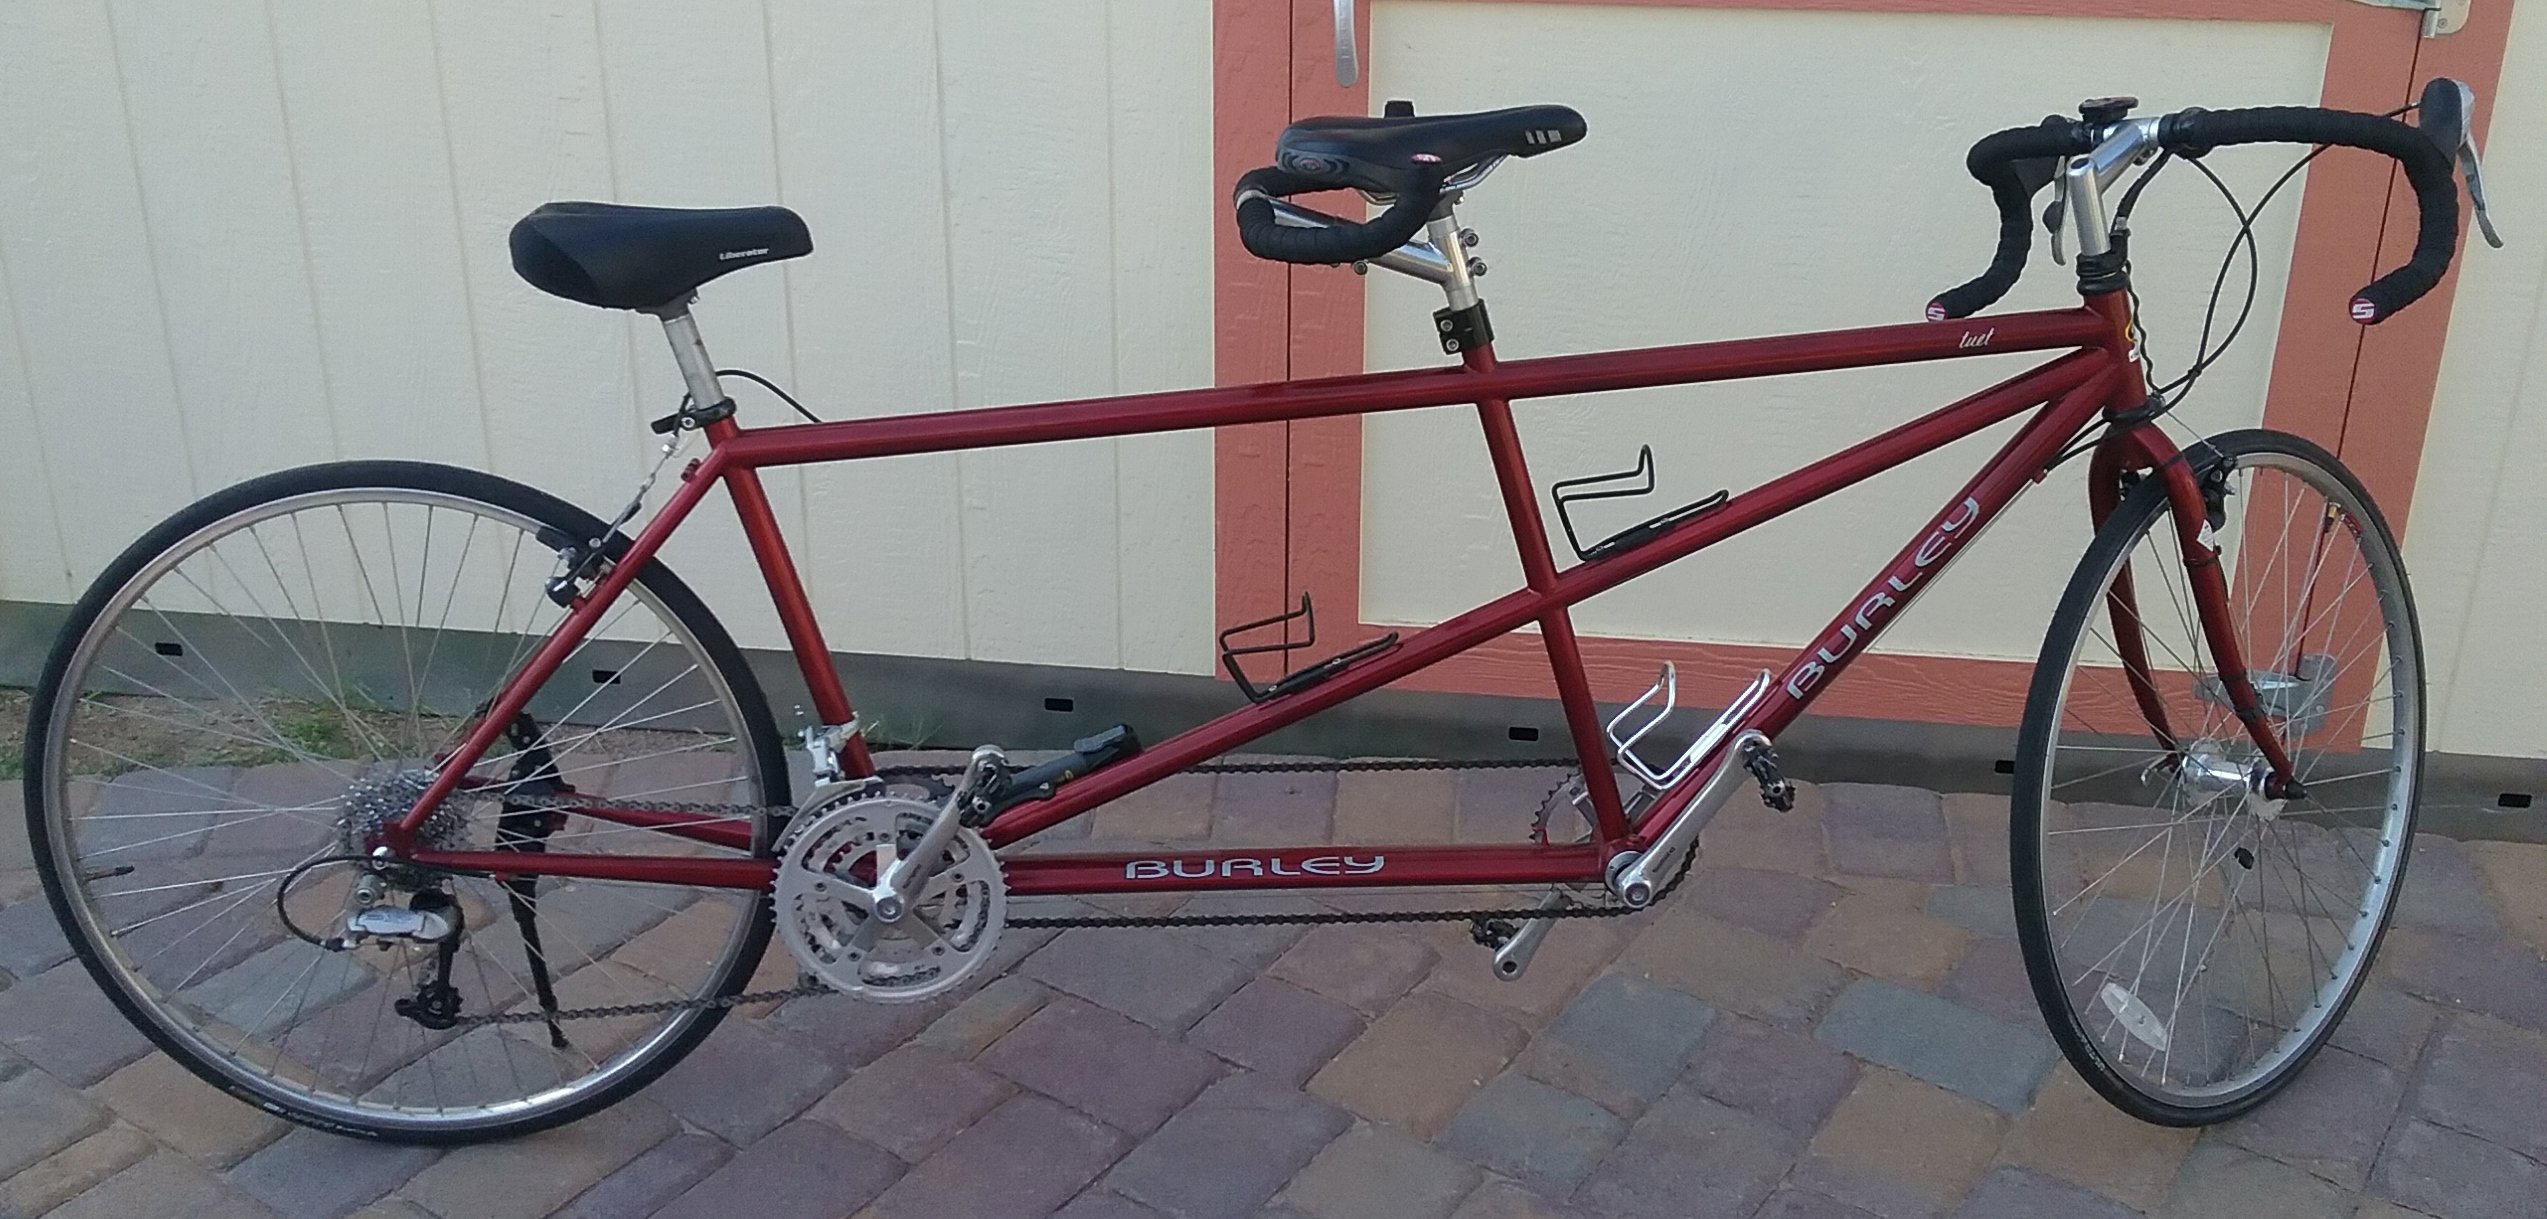
I have just given it a quick look over on the repair stand, and adjusted the cables, and then I screwed a pair of spare pedals to the front cranks and test rode it alone. within a hundred yards, it was buzzing along at 22 mph. This is going to be one fun ride with two up! I will do a more thorough maintenance before we ride together, and I have two pairs of road bike pedals on the way so we can practice without being locked in for now. It had integrated Shimano shifters in the brake handles, and clicks through the gears like butter. As I sort out the best bar positions, seat heights, and dump that kludgy kickstand, I’ll update this post with results.
And here is the promised first update; The new pedals arrived and were installed and the shakedown cruise was initiated and completed with reasonable success. Then, seat heights were perfected and 22.5 mph was easily attainable, even by two amateur riders. But, as fate would have it, we rode a front flat at around 17mph and I nearly lost control. But, with no damage to the rim or us, we walked it home and it awaits new 32mm wide Kevlar reinforced Michelin tires before we ride again. It’s really fun and fast to ride.
Update – 8/17/17 – Oh woe is me! The Michelin tires arrived and were quickly mounted and ridden; all of 3.5 miles, before we were sidelined with another flat. Careful inspection showed that the rim strap had fractured, and the tube pinched in one of the spoke holes. A long walk home resulted in some trepidation from my stoker. New Schwalbe rims straps were ordered, and mounted and another test ride begun. Alas, another flat and another walk, and my stoker proclaiming that she just doesn’t trust “that tandem” anymore!
Inspection showed that I had ordered a rim strap that was just 2mm too narrow. It shifted sidewards, and another pinch flat in a spoke hole ensued. Wider Schwalbe rims straps took about 10 days to arrive, and were speedily mounted. Since my stoker didn’t trust the bike now, the neighbor girl substituted, and off we rode. All of 4 miles until another front flat! Another walk, another pinch, and a mountain of frustration. Even the wider rim strap had shifted all the way up into the bead seat area and exposed a spoke hole. Psssss….. flat!
Finally, in desperation, I ordered some Velox sticky cotton rim tape. Tentatively, the neighbor girl and I have ridden about 7 miles without mishap. But, it will be a while before I get “the wife” back up on this “cursed” ride. She likes it though, I know she’ll come around. By-the-way, the newer slightly wider Michelin Protek tires have been really awesome. They have flatted, been ridden on the rim as we came to a stop 4 different times, and never popped off the rim or shown sidewall damage in all those flats. They also haven’t rolled off the rim on our many walks home. I am using them on 4 different bikes now.
Ever since I built the Lemon Yellow Schwinn Twinn Deluxe Tandem and began riding it around the neighborhood, the next door neighbor’s 11 year old daughter has become a vintage Schwinn enthusiast. She bugs me for a ride on it every chance she gets, and I am more than happy to oblige, as I think it’s a really fun bike to go cruising on. In the meantime, she has become a pretty capable stoker.
Recently, her dad suggested that if I found a nice Schwinn for her, he’d foot the bill to refurb it and she could have a cool vintage ride as opposed to the fat tire Wally-World single speed she rides now. Last week, I found a May 1974 ladies 10-speed Suburban and when I went to look at it, saw that it was a very clean bike, except for the many years of storage mung that it was covered with. When I got it home, I suggested that maybe instead of having me do the whole refurb, she could work with me on it, adding to its value for her as she’d have a personal investment, and maybe getting her interested in the process.
So, when we showed her that dusty, greasy bike with 2 flat tires and rusty cables, her face lit up. When I suggested that she and I could work together to make it “new,” she couldn’t wait to get started, and we agreed on starting the teardown the next morning at 6 am. Meanwhile, I ordered tires, tubes, rim straps, brake pads, and a rear reflector.
She was already waiting for me when I raised the shop door at ten-to-six the next morning and we worked for a few hours to strip it to the frame and get the greasy bits soaking in the solvent tank. For the whole next week, she showed up promptly before 7am every day as we undertook the refurb process, piece by piece, system by system. There wasn’t a job I assigned her that she wasn’t eager to try, and even the less glamorous jobs like scrubbing the chain with an old toothbrush or polishing the corrosion from the spokes, she completed without complaint, even though she wasn’t having a ton of fun right then.
She learned to adjust bearing cones, buff alloy parts, lubricate bearings, mount tires, true wheels, and adjust brake cables and derailleurs and everything else, because other than a few hours here and there when I worked on it alone, she was there eagerly helping with every step. She reloaded all the tiny bearing balls into the derailleur idlers, scrubbed a hundred parts in solvent (with safety glasses and nitrile gloves on, of course) and polished fenders and frame. She helped me tap out a few fender dents, buff brake handles, and scrub the hand grips in soapy water.
In the process, I found a few anomalies. First, it was obvious to me that the bike had very few miles on it, and that the rear derailleur had never been moved out of the lowest sprocket, based on tooth wear. Similarly, the large front chainwheel had never seen the chain. Although the rims were virtually perfectly straight and smooth, all of the spokes were at least 1 to 2 turns loose. Both front and rear axle nuts were much less tight that I would have ever ridden a bike with; just a 1/4 turn past finger tight. The pedals were also not on tight, barely snug, and they were not Suburban “bow” pedals, rather more like Speedster or Racer pedals, although “Schwinn Approved.”
The front fork is forged, not tubular, but a perfect paint match and with correct decals and a chrome cap. The brakes are Swiss Weinmanns’ stamped Schwinn, and the derailleurs are made in France Huret Schwinn Approved, and yet the shift handles are the later ones with the bigger cable drums, making it nearly impossible to move them, as the “ratio” is all wrong. The hubs are correct wide flange alloy, but the rear is stamped Schwinn, “Japan” and the front looks the same but just says Schwinn Approved. The brake pads (blocks) and the rear cable casing had been replaced with non-factory parts, as had the tires and tubes.
So, it’s all done, and she absolutely LOVES it! She was over here at 6 this morning so we could go for a ride and she could learn to shift on the road, as opposed to on the repair stand. I had replaced the shifters with the correct Twin-Stik small barrel ones, and we were off and running. Her “new bike” smiles just wouldn’t quit!
The sticker shows that it was purchased locally all those years ago, and complete absence of any rust bears out its Arizona heritage. In any case, the world has another happy vintage Schwinn owner, and another bike was saved from oblivion to be enjoyed for years to come. Oh, yes, there is a non-Schwinn seat quick release. After watching me work on my “race” bike and seeing the pretty Campagnolo parts, she had to have at least one Campy part on her new bike, for “luck” she said. I was happy to oblige.
Well, I guess I started a trend. Once that new Suburban was ensconced in the garage next door, it encouraged both of my neighbors to do a little more riding. Since the bike has a quick release seat clamp, both neighbor Mom and neighbor Dad really liked how smooth and easy it was, and most of all, how much easier it is on the knees than their old big-box bikes that are, frankly, just too small.
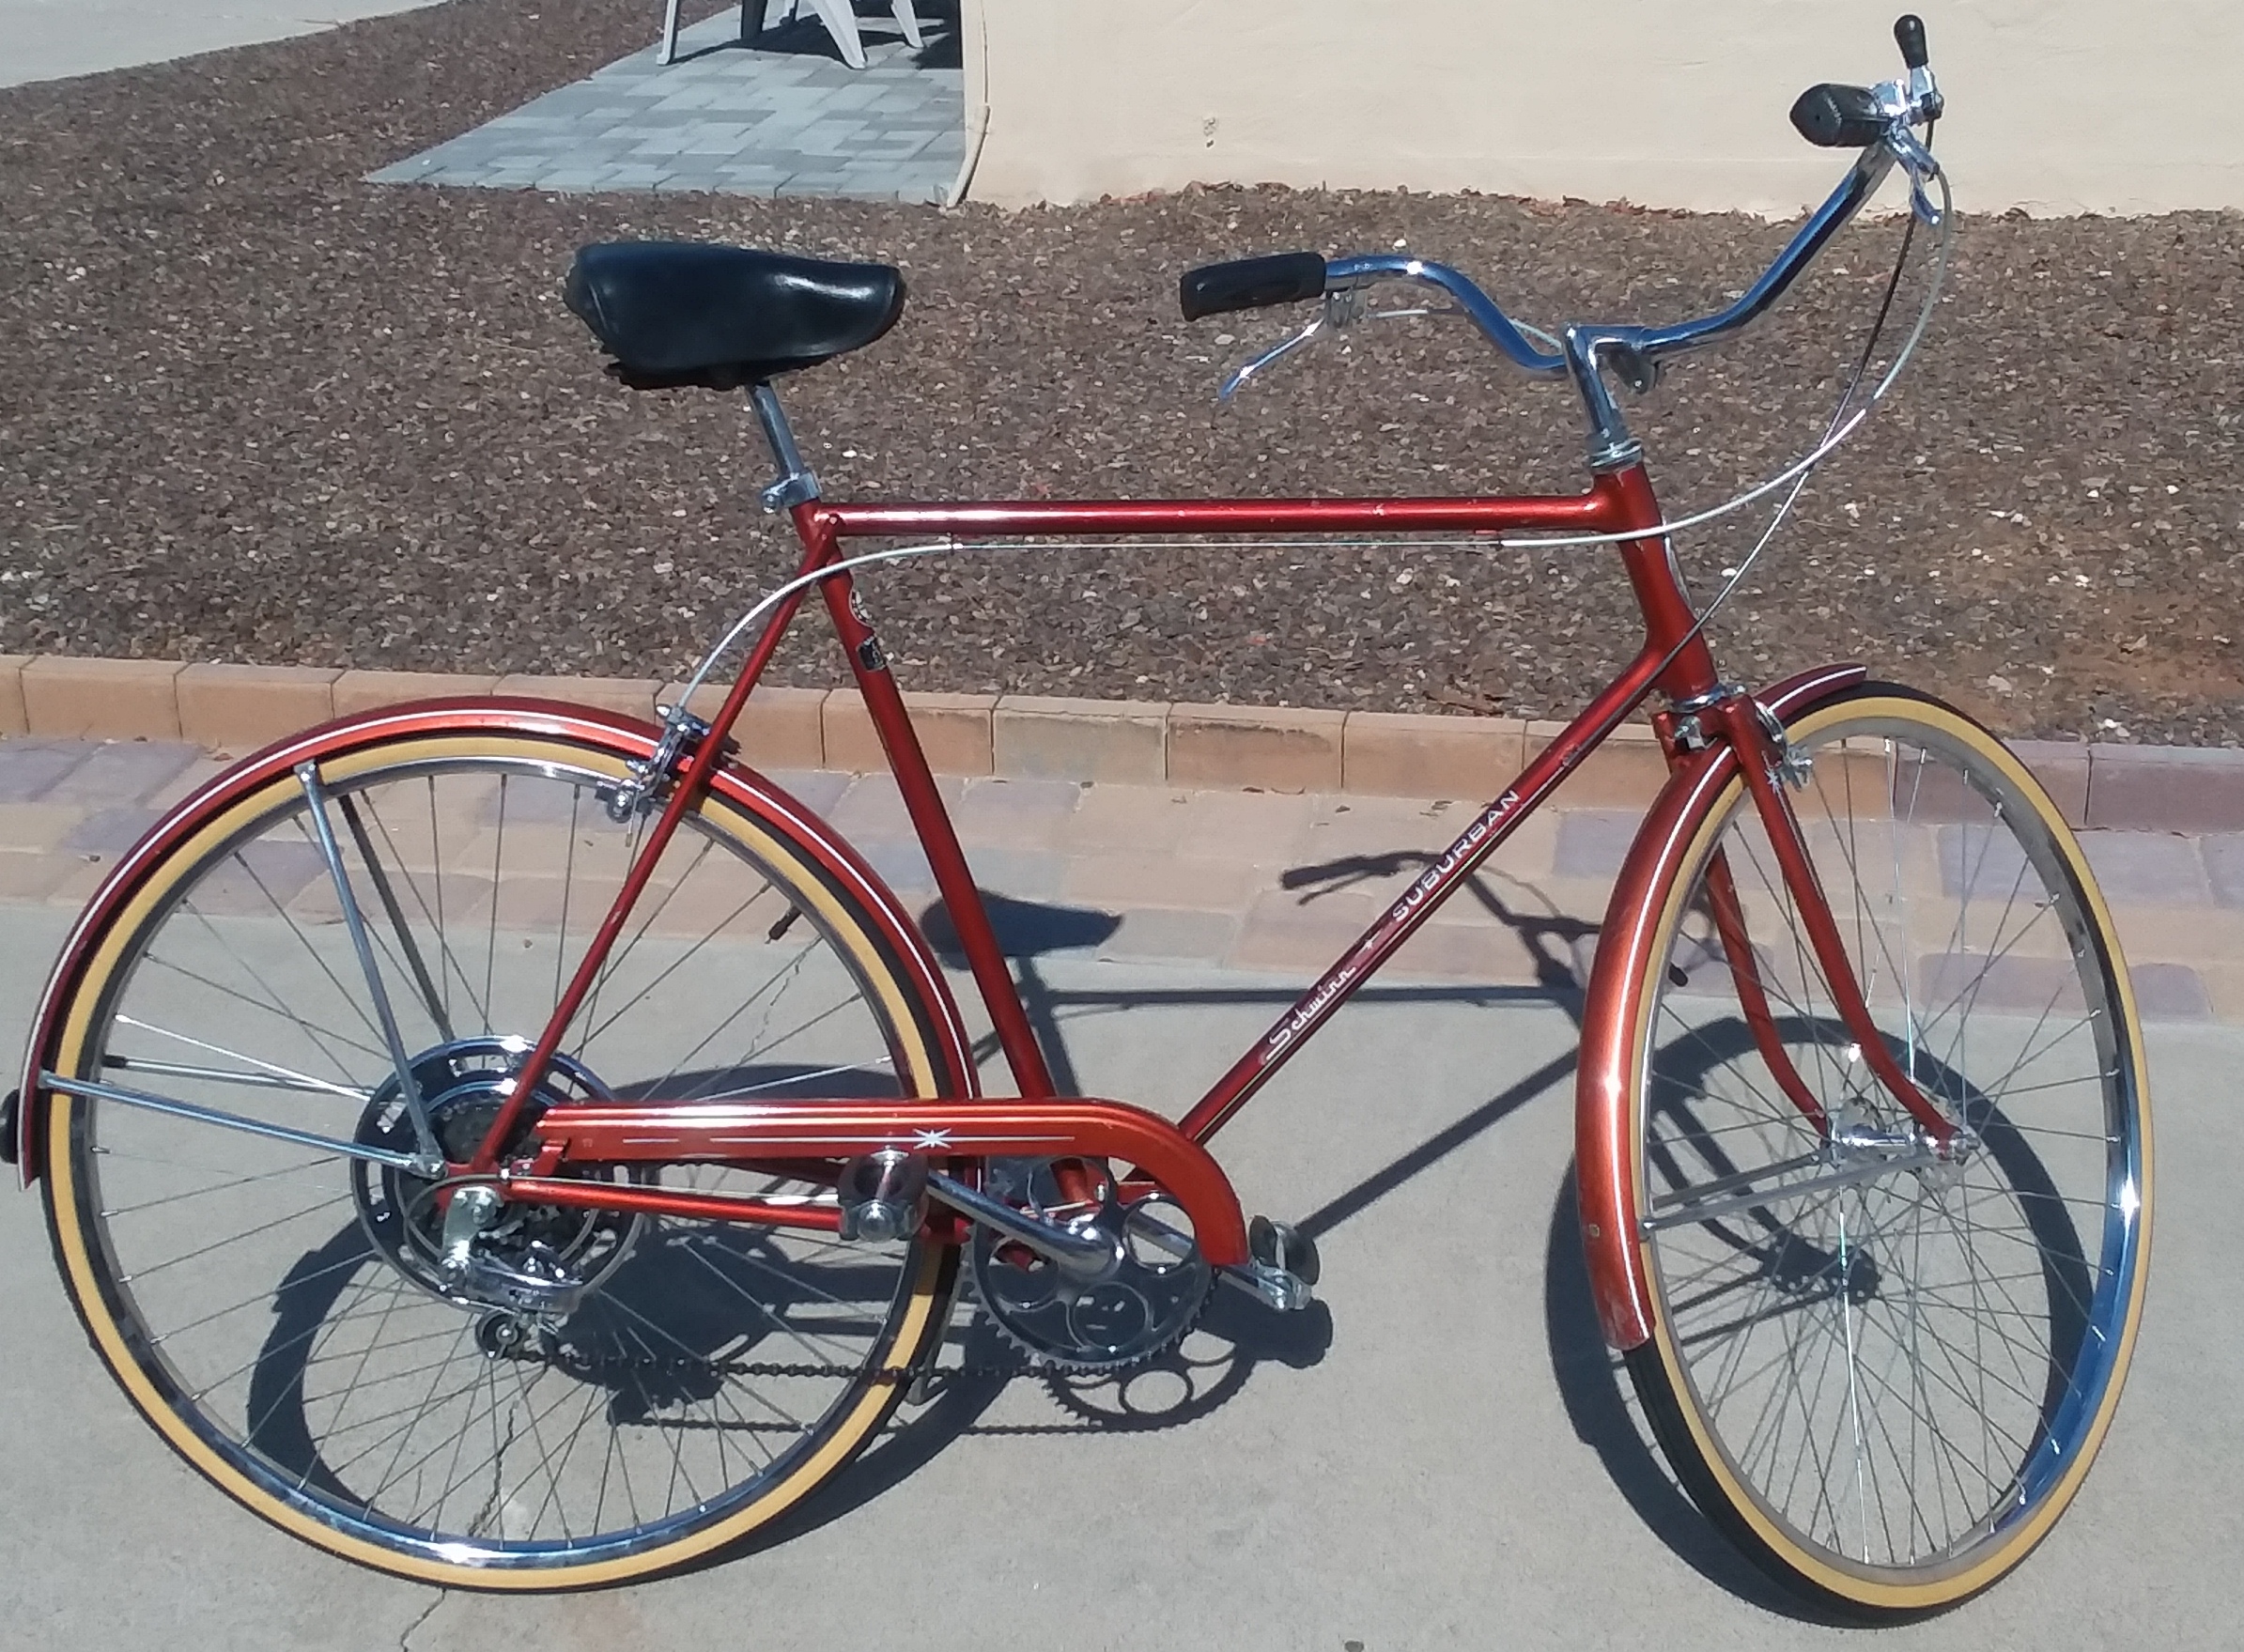
So, I started looking for a suitable Schwinn for the Dad, anticipating that I would refurb it and give it to him as a gift. Well, after some searching, I found a nice 1974 5 speed Suburban with the proper frame size, matching the one above in color. Since my garage faces their house, I couldn’t work on it in secret, so neighbor Dad asked what I was doing with it, and I told him it was to become his. Immediately, he volunteered to come over and help with the refurb until we got it done. We worked every day for a few hours for about two weeks, and here is the result.
The thumb shifter is the original stock unit, and its internals are remarkably complex. Fitted with a new cable and casing, it effortlessly shifts the GT100 derailleur.
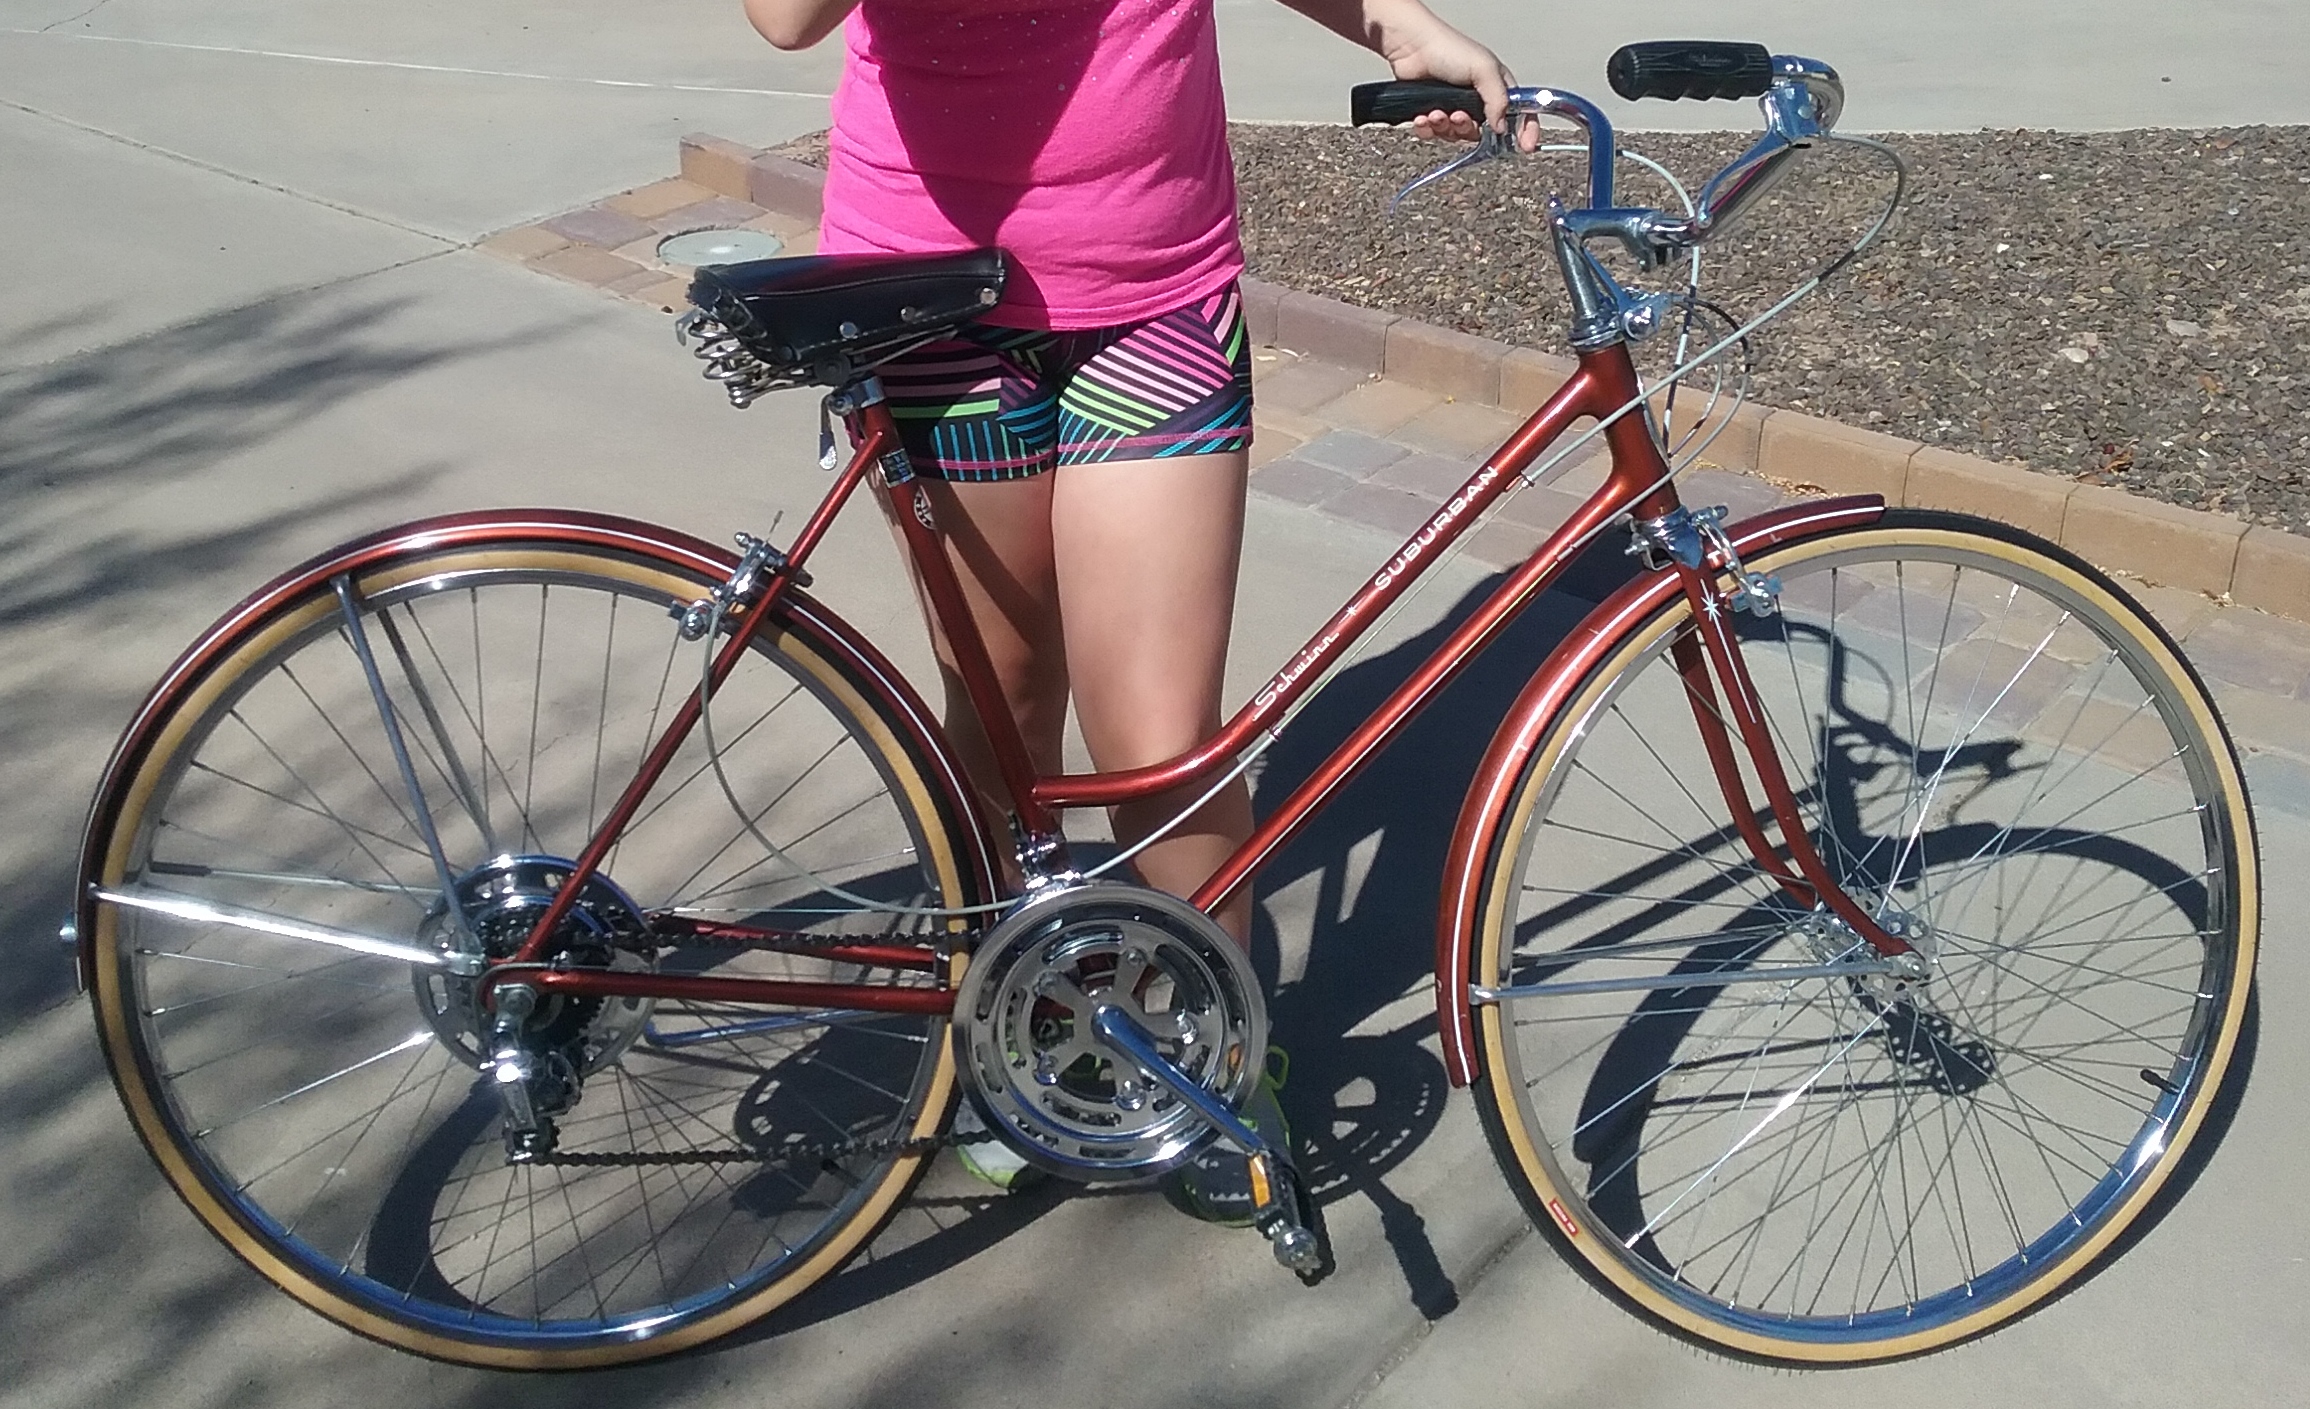
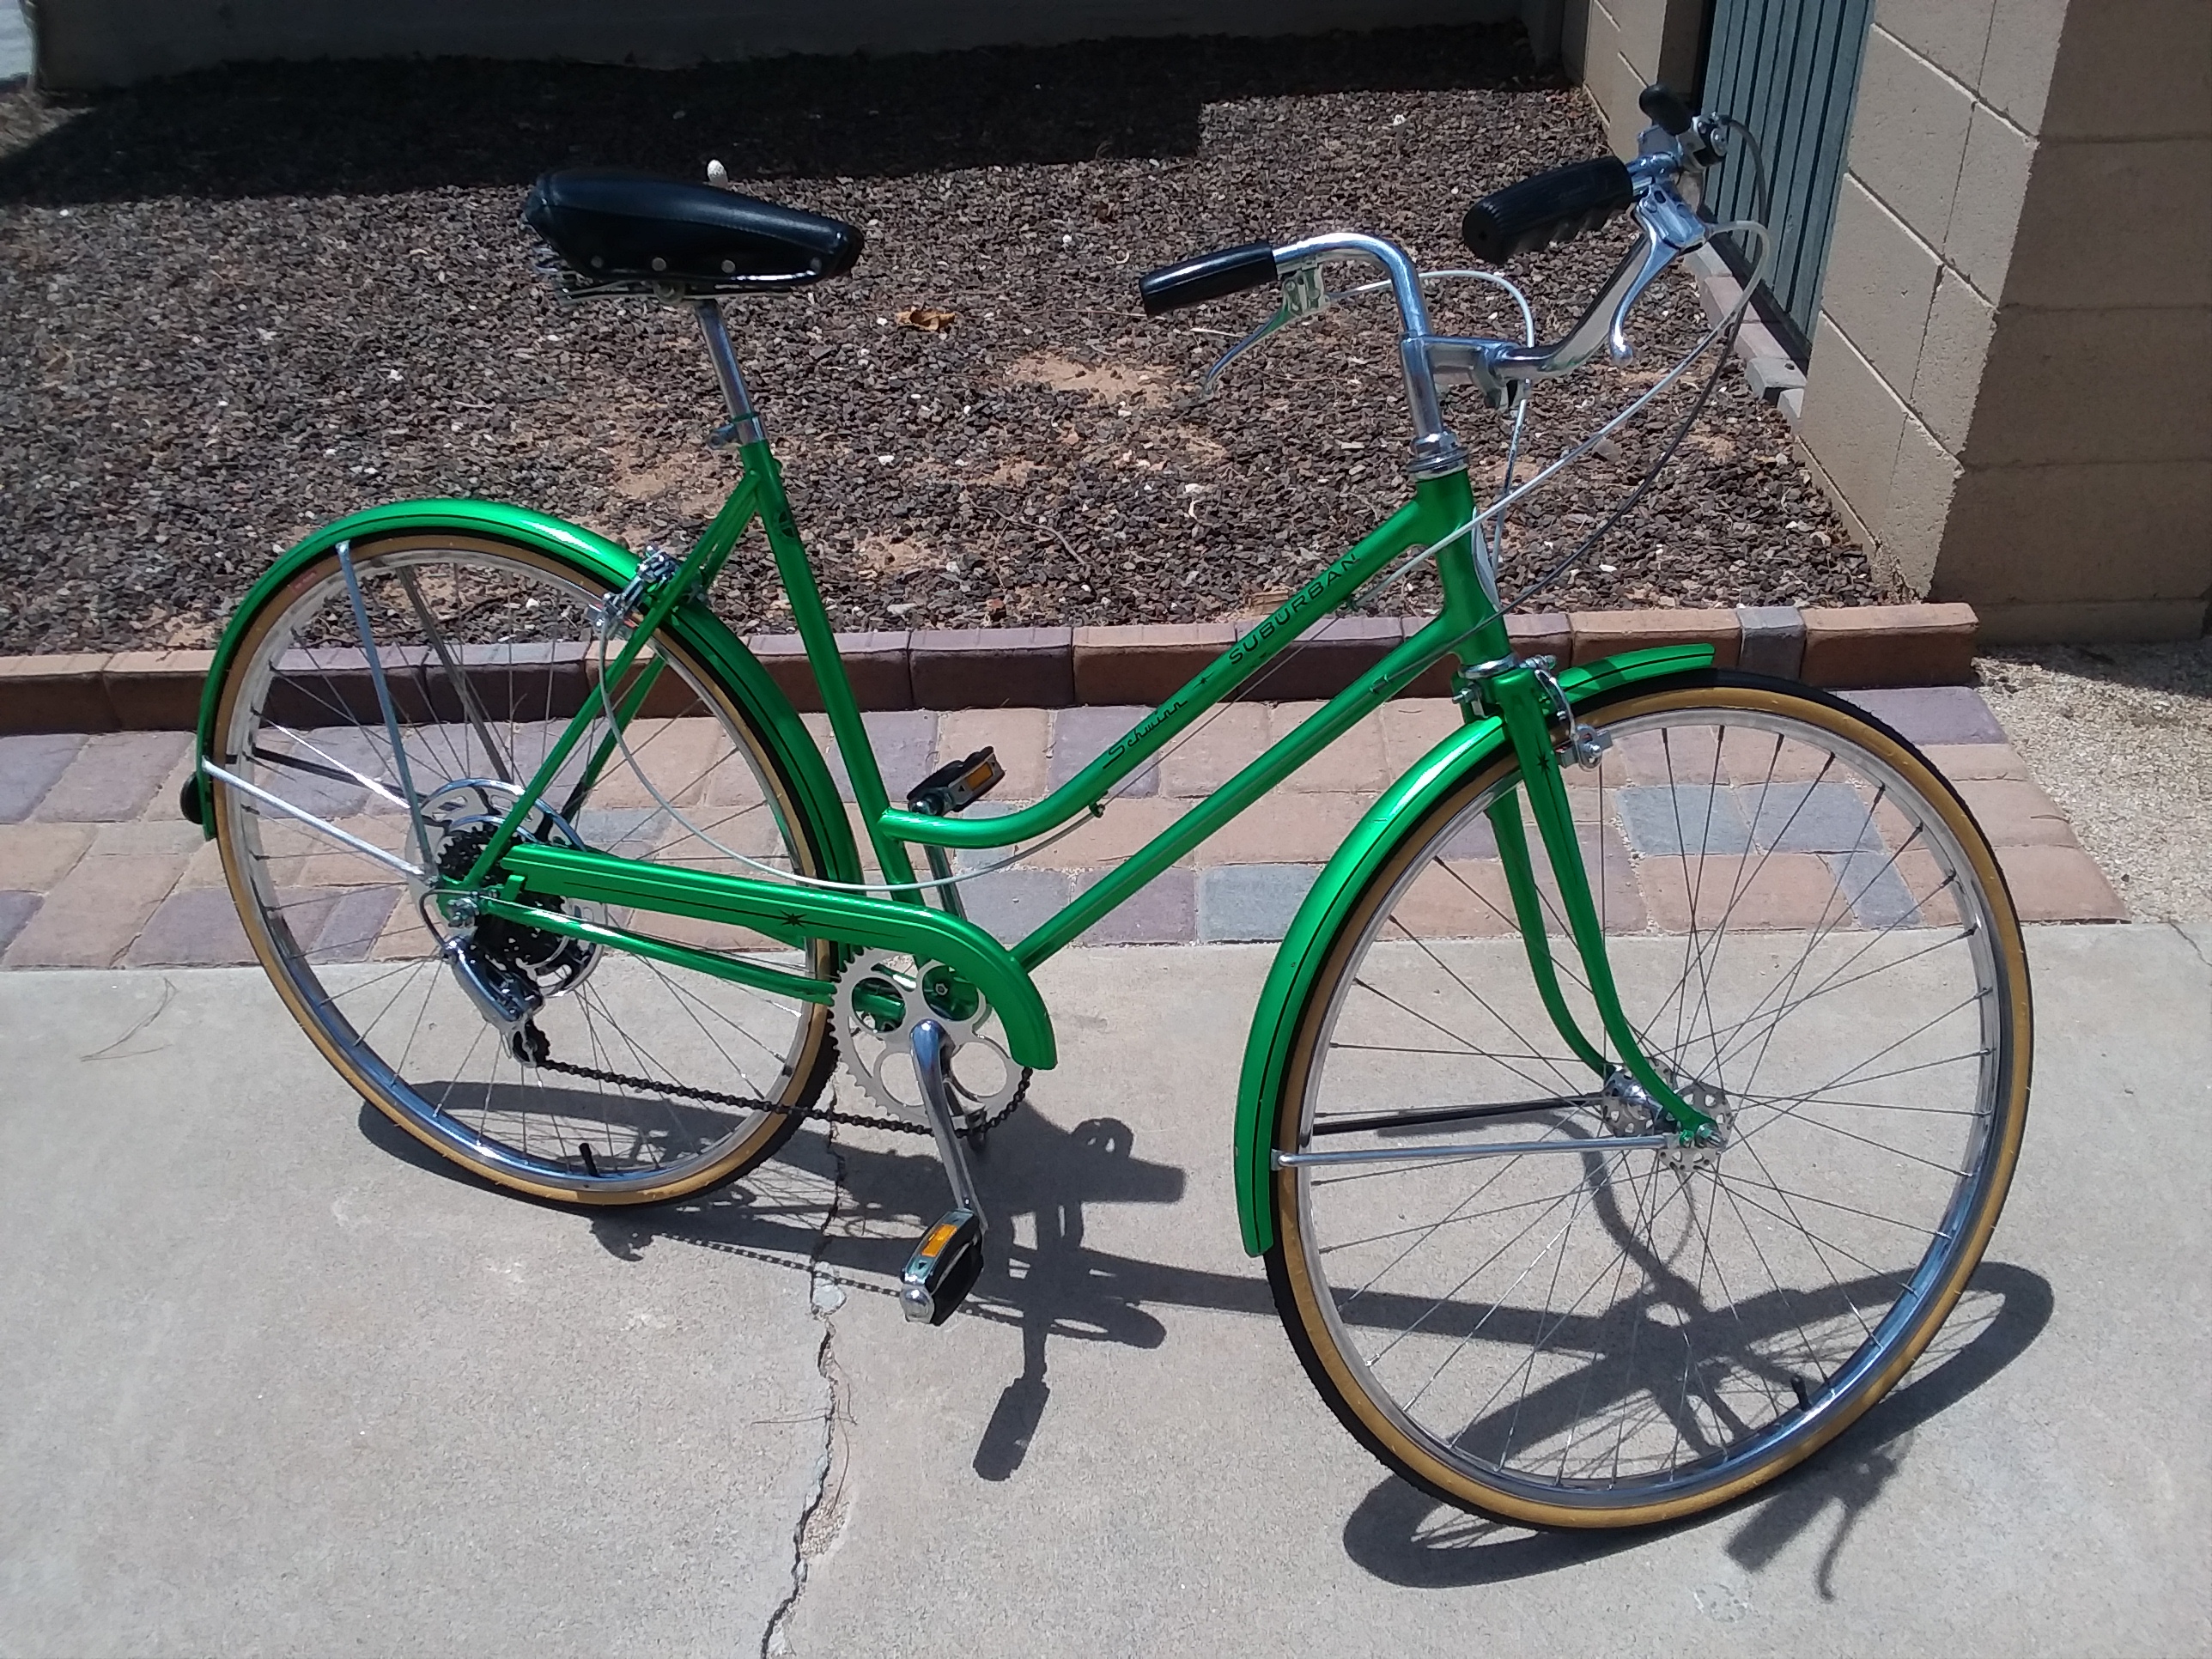
Of course, then we HAD to find another ladies frame for neighbor Mom, and it was neighbor Dad that found a really nice 5 speed in Tucson. We drove down and back one afternoon, and brought back this beauty that he and I refurbed in an intense week. It’s an especially rare color, lime green, which just happens to be her favorite bike color. Named “The Pickle”, it now gets ridden 7-10 miles every day.
It is a few months later 1974 model, so it also has the thumb shifter. This one was inoperable when I got it, and required complete disassembly and cleaning before it would ratchet and hold properly. But, like on the bike above, it shifts the GT120 smoothly and reliably.
Thanks for looking at my memory-land collection of of bikes.